I thought I’d put out my basic embroidery information. I’m not going to try to make an online stitch dictionary (at least no more than happens naturally from my own explorations), but I have thought a lot about embroidery for beginners through teaching it.
Fabric and thread to start: I like to start people with calico fabric (quilting cotton) and two strands of embroidery floss. That is a good combination weight-wise and those materials present no special challenges. Try other fabrics (coarsely woven, fuzzy or fluffy) and other threads (the full six strands of floss, perle cotton, ribbon) after becoming comfortable with the motions of embroidery. That shouldn’t be long, though, and then there are some rules of thumb for matching. Six strands of floss or something heavier like perle cotton is good on a very coarse fabric or to achieve a dimensional effect. On a puffy fabric such as fleece you’d likely want at least four strands of floss to keep the stitches from disappearing. For a smooth-surfaced fabric such as cotton or felt, two or three strands is good (for detail work a single strand might be employed).
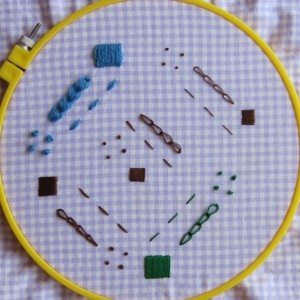
Above: A sampling of materials. The fabric is cotton calico. The brown thread is Coats and Clark 6-stranded embroidery floss (6, 4, and 2 strands shown, left to right), the green at bottom is DMC perle cotton size 5, and the blue at top is Columbia-Minerva 100% wool “Persian-type” needlepoint and crewel yarn.
| Tip 1: It is very difficult to separate a single strand of floss from more than one other strand without tangling to the point of knots. I find it easiest to separate two strands at a time, and if I want an odd number of strands, to separate a pair into singles and put the appropriate number together. | Tip 2: While stitching, your floss will want to twist, which can lead to tangles. One way to lessen this is to separate all your strands, run your fingers all the way down each to smooth them, and then put them back together. Wetting the strands when you smooth them helps as well. |
Needles: Embroidery needles tend to be fine and sharp, but unless you are working on unforgiving fabric (delicate silk, say), use whatever needle is comfortable to work with, has a large enough eye for the thread, and is sharp enough to pierce the fabric. Wetting and twisting the end of the thread between your fingers will help in threading.
Knots or Not Knots: Knotting is typically not done in embroidery; instead, you leave a few inches loose at the back and weave them under your stitches later (or to start, if it is not your first length of thread). The same is done to secure the opposite end. Sometimes you have to knot, however, such as if you are stitching around the edge of a piece of fabric. In that case two or three overhand knots to start and a half hitch to end are easiest.


Above left: Overhand knot. Above right: Half hitch.
| Tip 3: Let your needle dangle from the fabric after every dozen stitches or so. Its weight will help unwind the floss before tangles can happen. For more help, slide the needle down the thread until it is against the fabric, and use your fingers or a pin to separate and re-smooth the strands. | Tip 4: In a situation where knots are appropriate and you have two layers of fabric, provided the thread does not show through a single layer you can hide its end easily. After making your final knot, stitch through one layer only and bring the needle out a short distance away. Pull so the fabric is slightly compressed and snip close to the fabric. The end will disappear between the layers, and the tail should be long enough to stay put inside. |
Comfortable Stitching. To keep your hands and forearms from getting sore, stretch and rub them frequently. Make sure you are not gripping the work too tightly, and change your hand position regularly. If it is difficult to get the needle through the fabric, use a thimble to push and a bit of rubber to pull (you may buy one for the purpose, or cut a 1.5-2″ square of a rubber jar opener). As a right-handed stitcher, I find it is most comfortable to stitch with the needle pointing somewhere between left and forward, and to tighten the thread up or to the right. Experiment for the best solution for you – for me it is frequently not the direction given in stitch instructions.
