Baby shower gifts

I went to a baby shower this weekend for a dear friend and tried to give her something cute and something practical, but also cute.

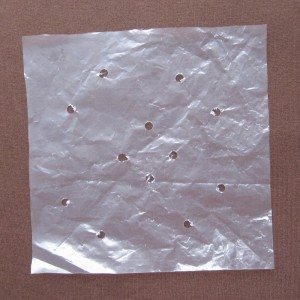
The first was a crinkle square. I don’t actually have a photo. I ruined the one that I made for the occasion, and had to draw on a backup. I do have an innovation to share, though: crinkle squares shouldn’t be a suffocation hazard to begin with, considering their small size and the fabric layer preventing a seal from forming, but for an additional point of reassurance you can hole-punch the plastic.

hole punched plastic for a crinkle square

I tried something new for the rest of the gift: burp cloths made by backing cloth diapers with flannel. The diapers are quite absorbent and the flannel clings to your clothes, preventing the burp cloth from slithering down off your shoulder mid-spit-up. This was not my idea originally but apparently I did not bookmark the site I found it on (which was also not the origin of the idea, so I don’t feel too guilty). I got a package of 10 diapers by Gerber and washed them all twice (the first time their edges were quite crumply and I thought that might indicate they were mid-shrink – sure enough a second wash smoothed them out a bit). They seemed rather thin so I doubled them up.

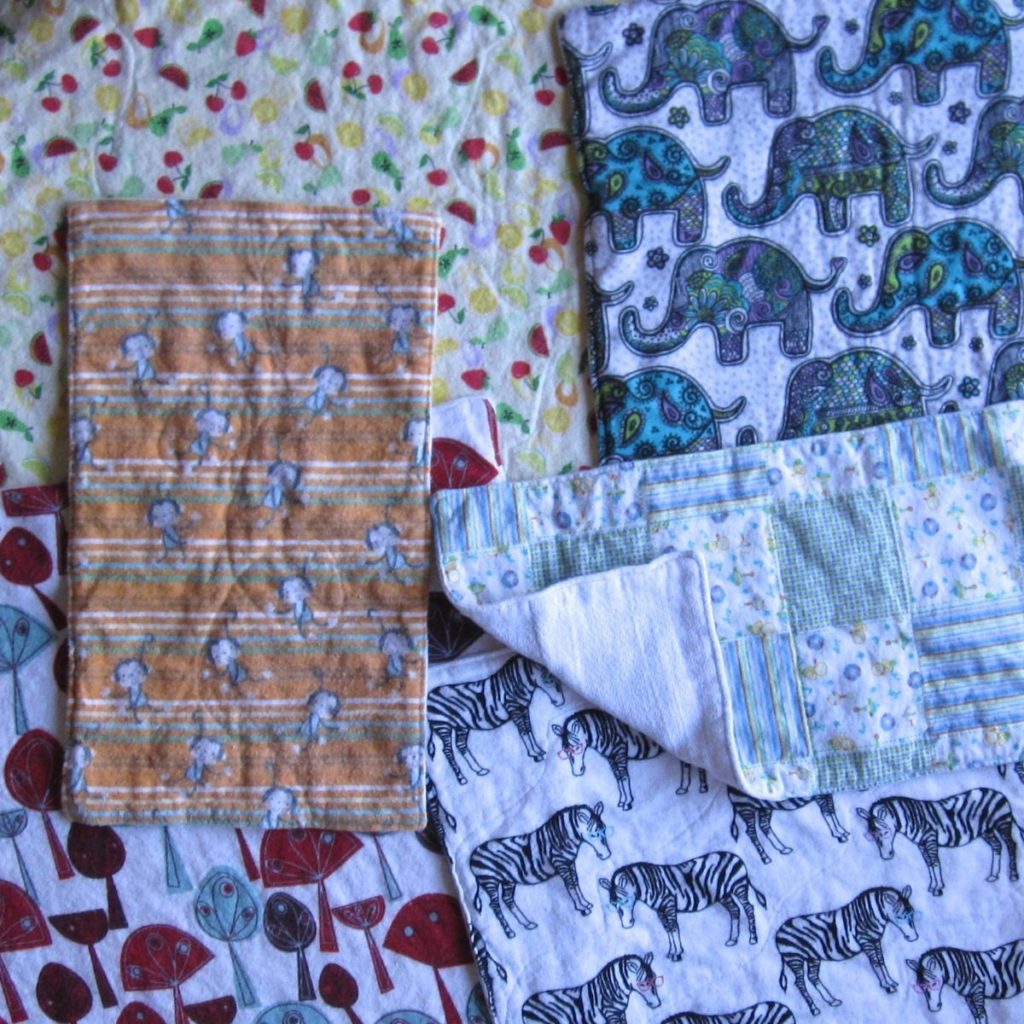
The first three burp cloths were large: fabric cut 16″x18″, sewn face down to a pair of diapers at 3/8″ (i.e., presser foot at the edge of the fabric but needle ticked over to the left) with an opening for turning, then diapers trimmed around the edge and the whole thing turned right-side-out. After a good press I topstitched around the edge and did a little quilting to keep the diapers from sagging on the flannel. For the mushroomy one and the elephants I outlined parts of the design, and for the fruit I made some jagged lines. I had a lot of trouble with catching strands of the diaper cloth and shoving them down into the bobbin housing instead of piercing them, even with a brand new fine needle. Fortunately nothing was ruined.

cloth diaper and flannel burp cloths

After I made those three I put one on my shoulder and found it was rather large for its use (though the parents to be are both taller than I am and might not find them quite as overlarge), so with the remaining four diapers I made smaller cloths. Two of them had shrunk enough in the wash that they didn’t have a 16″x18″ flat region anyway, so theirs would have had to be reduced. I ended up making two with fabric that was 9.5″x16″ (out of the two diapers that hadn’t shrunk as much) and one with 15″x15″ fabric (out of the smaller pair). Their quilting was simple: for the checkerboard one, a sort of zigzag the long way, outlining the boxes, for the zebras wavy diagonal lines, and for the monkeys a single continuous stitch line from top to bottom that looped around the monkeys nearest its path.

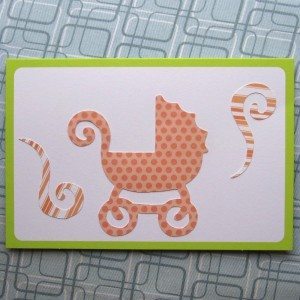
I tried one other new thing as well: making my own card. I have a Cricut die-cutting machine that mostly sits on a shelf, and it was time to start really using it. The card took an unreasonable length of time given its simplicity (three die cuts on a purchased blank card with a colored border), but most of it was set-up. I’m pretty happy with how it came out.
baby shower card

Calculating your own basket pattern

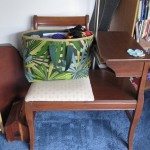
side view of the fabric basket I know I said my fabric basket didn’t come out perfectly. The basic construction is still sound (follow that second link to see the directions), so I thought you might want to know how to use it for a custom size basket.

Here are the measurements you need:
H = height of basket
L = length of long side of basket opening
S = length of short side of basket opening
A = seam allowance for side and base seams
T = top opening turn-down allowance

In the basket I just made, these numbers were 12, 16, 8, 1/2, and 0, all in inches.

There will be vertical seams down the center of each short side. If you want to make a cube, H, L, and S will all be the same number. A and T will often also be the same number; for me, A is almost always 1/2″. If you want to have a lined basket where the outer fabric folds over the inner fabric and then under itself to give a clean edge, you’ll need two different values of T: 0 for the lining pieces and at least 1″ for the outer pieces (that would give a half-inch band around the inside top, with a half-inch turn-under of the raw edge); if I were doing this I would probably want a T of 2″ so a half-inch first fold would leave a 1.5 inch second fold, which is to say an inch and a half wide band of outer fabric around the top of the inside. At least for a large basket I would want a wide band like that.

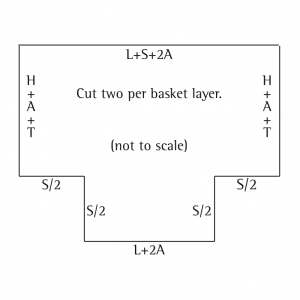
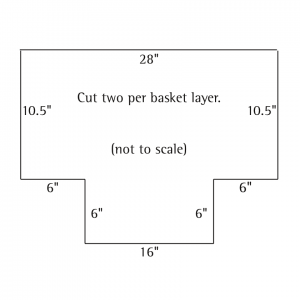
As before, the rectangles below are not to scale. The cut-outs are larger than they would typically be, for ease of placing readable measurements on them.

Diagram: top: L + S + 2A; side: H + A + T; cut-out edges: S/2; base: L + 2A

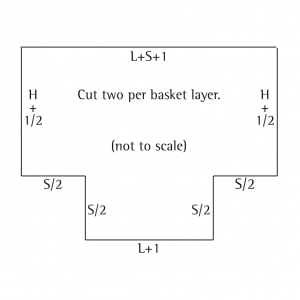
Example: no turn-down at top because basket will be bound around top, seam allowance elsewhere is 1/2″.

Diagram: top: L + S + 1; side: H + 1/2; cut-out edges: S/2; base: L + 1

If this were a file box, L = 15″, S = 12″, H = 10″, we’d have the following.

Diagram: top: 28

It would be easy to modify this so there is a 1″ band of outside fabric at the top of the lining, with a 1/2″ turn-under at the bottom of the band. The lining would be cut by measurements of Example 1. The outer fabric would be cut almost the same, but the upper part of the side would be H + 2. For the file box, that makes it 12″.

I hope these are useful diagrams. Let me know if you make something with them!

Sewing the basket: what went right and wrong

I was all set to create a tutorial (in two parts, even) for the fabric basket I showed you last time, but when it had a few issues I decided that would be overselling it. Let me tell you basically what I did, and where it went well and poorly.

Body of Basket:

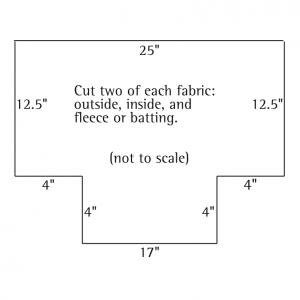
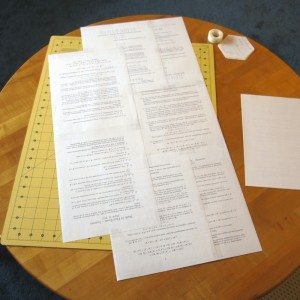
I made a paper pattern for the main basket pieces (diagram below) and cut two of it from each of three fabrics: outer basket fabric (patterned outdoor home dec fabric), basket lining fabric (solid cotton duck), and thin fleece. Later I discovered the pattern was five inches too wide – there was a 17″ measurement, and I thought good, that’s twice as wide as a sheet of paper. Well, you can probably guess what I did, and if not there’s a photo below.

fabric basket pattern diagram fabric basket erroneous paper pattern

The pattern was good but I have to figure out how to make linings fit well inside thick bags. The bottom interior is a bit scrunched to fit, even though I sewed the outer layer with 1/8″ smaller seam allowance than the inner layer. I also ended up trimming about 1/4″ off the top of the lining when I nested the layers and sewed them together. If I were doing it again I would also pony up for fusible batting and attach it to the outer layer (probably stopping 1/2″ in from the non-top edges) to eliminate the possibility that some of my issues are due to the loose fleece lining being in the wrong place.

Continue reading Sewing the basket: what went right and wrong