Mop covers

Long ago I made crochet covers for my Swiffer sweeper, but I never got much use out of them. They were not as thorough at sweeping as I would have liked, and the normal Swiffer sheets are terrific at their job. That sweeper finally kicked the bucket and I got a Swiffer Wet Jet, unaware that it would not be able to hold the sweeper sheets. Well, for sweeping I’ve gone back to a broom and dustpan.

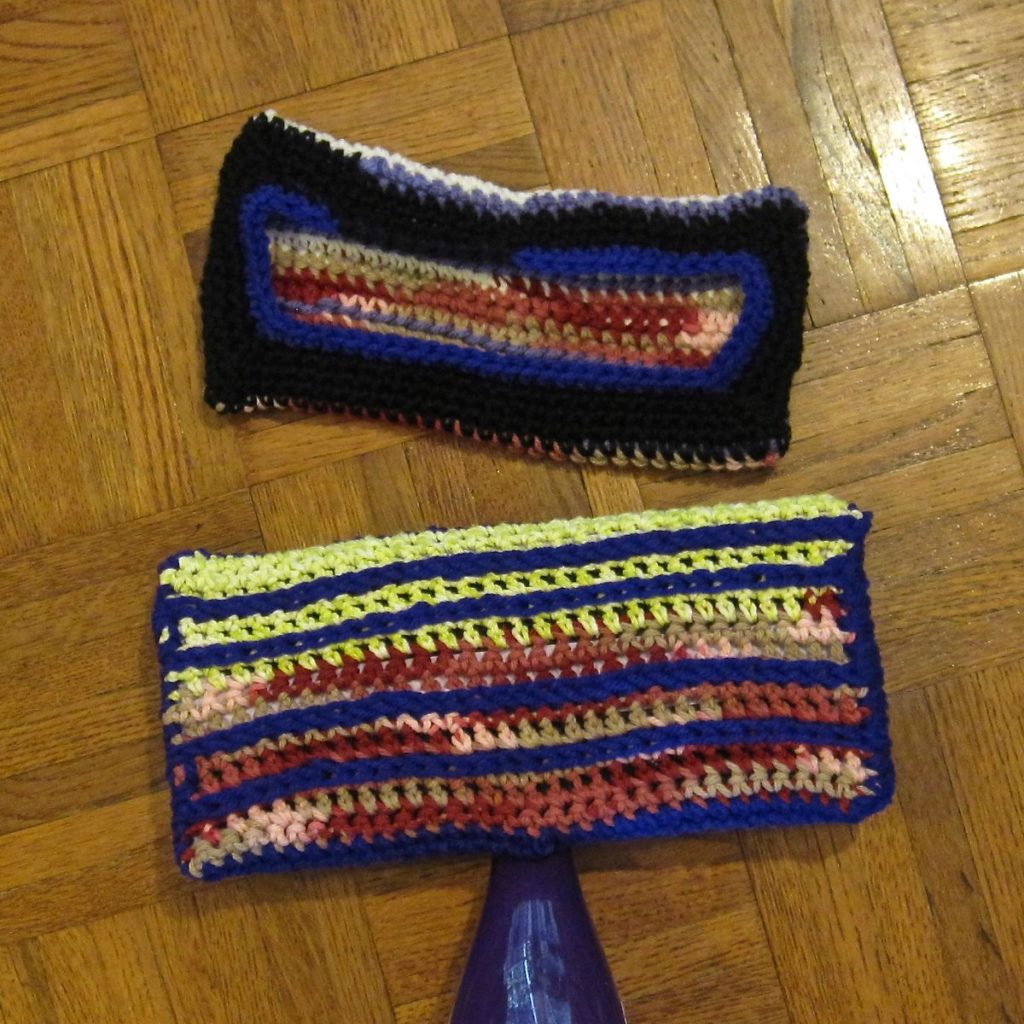
For mopping, though, I’d been using the Swiffer pads. They are much less good at their job than the sweeping sheets, but my regular sponge mop, which was supposed to squeeze out by folding shut like an alligator mouth, was no better and a lot more aggravating. What to do? Make new pads for the new Swiffer. I thought a smooth flat cotton pad with some acrylic slip-stitch stripes for scrub would work well. I also used acrylic for the upper part to hold it on to the Swiffer, though that choice was more to use up acrylic than anything else. The pad is also held by the velcro on the bottom of the mop.

photo of two crochet mop covers

I started by making two of slightly different size for testing: one that was the full 10.5″ by 4.5″ of the Swiffer itself, and one that was a scant 10″ by 4″. After testing I went with the larger size pattern but dropped a hook size. Size isn’t as crucial as with the sweeper because of the velcro on the bottom.

I soon realized they work much better after multiple washings, so for the remainder (I wanted 5 for the five rooms I mop, plus two spares) I made the cotton panel, put it in the laundry, added the acrylic stripes and upper sleeve, put it in the laundry again, and then put it into service.

My pattern

Your needs may be different depending on gauge! I use a G/4.25mm hook, but also seem to crochet more loosely than average. You may want to change hook sizes, stitch counts, or both.

I make the panel in cotton and the slip-stitches and upper in acrylic. This is mostly to use up acrylic, so if you want to use all cotton, go ahead.

Cotton panel:
Chain 31; make 14 rows of 30 sc. Wash this panel.

Scrub stripes:
Slip-stitch across in the valley between rows 3 and 4, 5 and 6, 9 and 10, and 11 and 12.
After a couple of panels I started slip-stitching from one row end to the next instead of stopping and starting each time.
If you run out of yarn slightly before the end of a row, don’t worry about finishing it. It’s not that important. I do find, however, that these stripes successfully catch gunk, so I wouldn’t leave them off.

Upper cuff:
Starting in the middle of a long edge, join yarn with a sl st, ch 1, and sc around the entire panel.
Join your round when you get back to your starting point and chain up for another. Make four rounds in which you decrease by 2 stitches in each corner. I accomplish this with what I call sk-dec, “skip decrease”: make a regular sc dec but skip a stitch in between the two loops you pull up at the beginning. This takes out two stitches at once with less bulk than sc3tog.
Join your final round and finish off. Wash again!
Crochet-covered earbuds

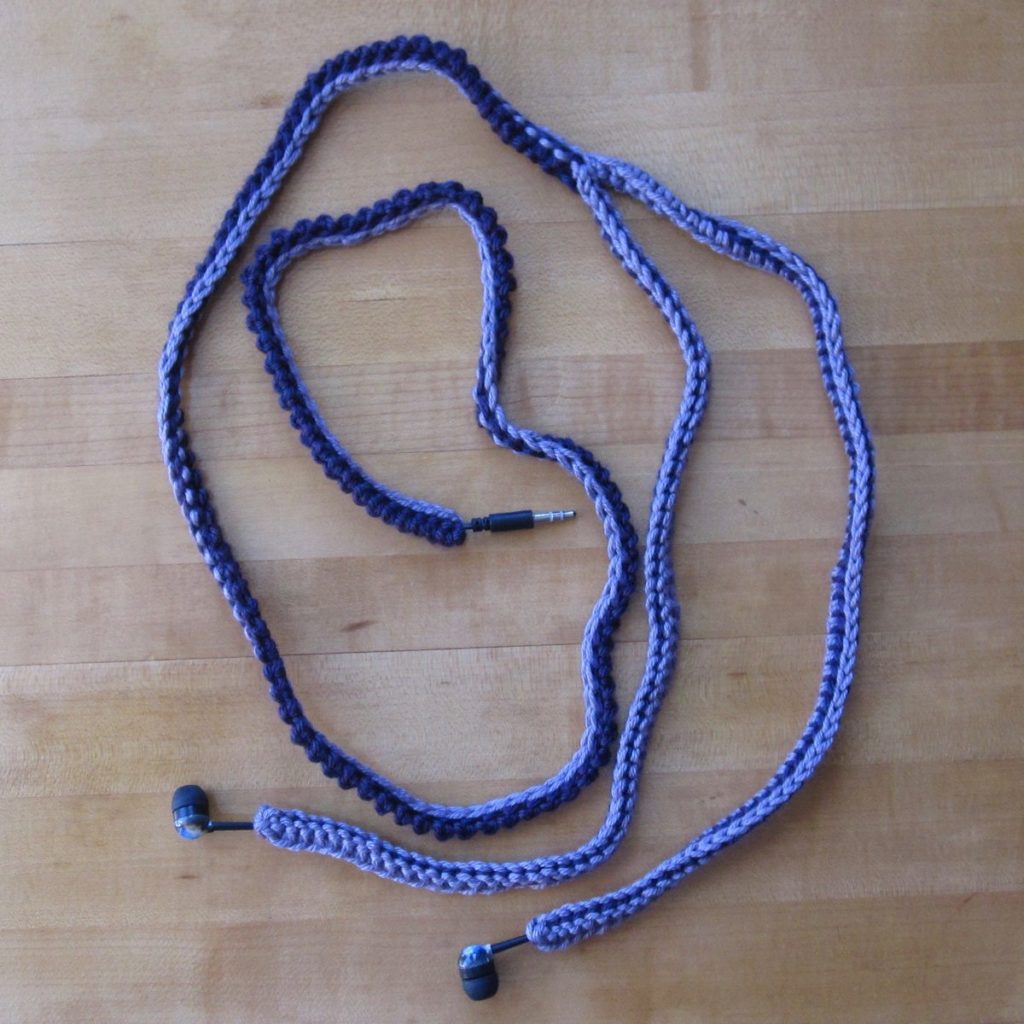
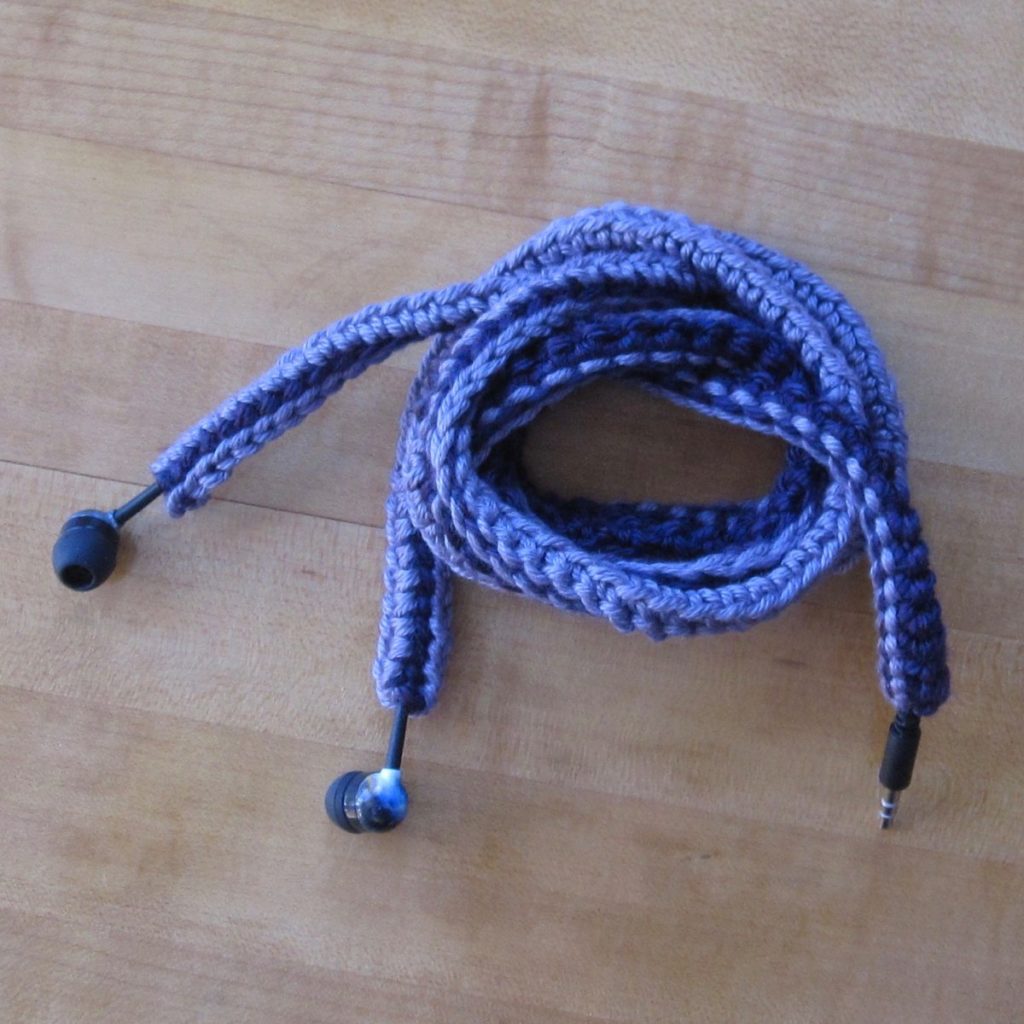
My young sister-in-law loves music (or at least Fall Out Boy) so for her birthday we thought we’d get her a new pair of earbuds and I would cozy them up to avoid tangles and kinks. Here they are:

photo of earbuds, coiled up

I went around in my head about how to do the covering, since crocheting a tube in the round that would be as tight as I wanted seemed awkward if not impossible. I ended up doing it semi-flat. My yarn was light worsted (on the level of Caron Simply Soft: marked as 4 but decidedly thinner than a lot of 4s) and I used an E hook (3.5mm)

In dark purple: make a chain the length of the wire, ear to jack. Don’t stretch the chain when measuring but don’t add slack either. Turn and single crochet in top loop only, slightly longer than the doubled part of the earbud wire. Chain to match the leftover starting chain. You now have a Y-shaped piece where the stem of the Y is wider than the arms.

In light purple: Attach at the base of the Y. With the earbud wire enclosed and the jack pointing out the base of the Y, slip stitch the sides of the dark purple strip together to make a tight tube. When you get to the junction of the Y, single crochet up one arm in top loop only. Then slip stitch back down, with a single earbud wire enclosed, earbud itself pointing out the top of the arm, to make the strip you just widened into another tight tube. Repeat on the other arm of the Y: single crochet in top loop only to the top of the arm; slip stitch to form a tube from the top back down the the junction, encasing the wire.

photo of earbuds laid out

I chose to stitch the arm in the front of the work first (closer to my final loop when I finished joining the base of the Y into a tube). When I got back to the junction the second time, I slip stitched in the back of the base’s last slip stitch so there wouldn’t be a gap in the light purple.

Your slip stitches will likely scrunch the tube so it doesn’t cover the full wire, but you can easily stretch it back out again, tightening the fit at the same time. When slip stitching I caught only one loop of the single crochets and one of the initial chains, and never worked in the back bump of the chain. When you’re done, secure your yarn and then weave it through the tube; there should be a lot of friction to keep it in place.

Instantaneous plant hanger

quick and simple knotted plant hangerLast year I had a pot of snapdragons that bloomed off and on all summer, despite the fact that I really didn’t take any care of them. Last week I bought myself a little sixpack of snapdragons, and potted them up together. We’ve been using the deck a lot more so far this year than we had been before, so I didn’t want them sitting on the table where they would make a mess that would have to be cleaned up all the time to use the table.

The deck came with a plant hanging hook that was perfect for the little pot of flowers. We straightened and sorted almost all day this past Sunday and early on I unearthed some cotton yarn, suitable for the purpose and in desirable colors (unlike the red/cream/ecru stuff which was all I’d found before). I made this up as I went along and it would be perhaps overly gracing it to call it “macrame,” but it is a plant hanger made by knotting yarn.

Instructions behind the cut (if you’re on a blog archive page). Continue reading Instantaneous plant hanger