Baby Grump

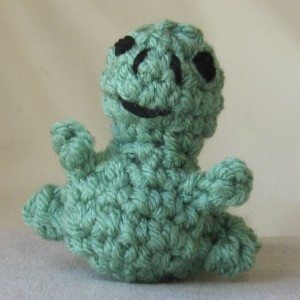
I realized earlier this week that the last free ami pattern I posted was in January, so it’s high time for another one. Baby Grump!

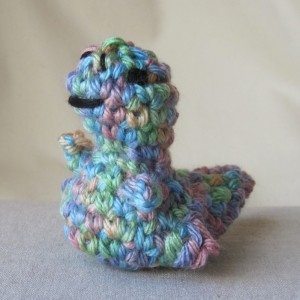
baby grump baby grump

This is, of course, the smaller version of Grumpasaurus Trogdoriensis. It starts by crocheting on both sides of a chain; the head, body, and hind legs are one piece and then the front legs are added by slip stitching new yarn on.

I’ve used my own abbreviations for increases: 2sc for a standard sc increase, 3sc for stitching 3 sc in the same stitch. Sc 4, on the other hand, means sc once in each of the next four stitches. Dec means sc dec. Other abbreviations and conventions are here and the pattern is past the cut below.

Continue reading Baby Grump

Coffee cozy

I used to go to a coffee shop at least three times a week, and until I procured a good reusable mug, I tried to conserve resources by reusing the cardboard sleeves they provide for insulation on the paper cups. I would keep one in my purse (clearly this was at a coffee shop that didn’t pre-wrap the cups in sleeves). This pattern dates from that era, when I thought as long as I was keeping a cup sleeve on my person, it might as well be one that protected my hands better than a thin scrap of cardboard.
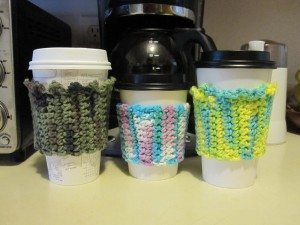
cozies - front

This pattern is highly dependent on gauge, or at least the row height part of gauge. With worsted-weight cotton yarn and a G hook (4.25mm), I stitch 6 rows in 1.75 inches. It could be a little tighter or looser, but if your gauge is very different from mine your sleeve will not fit well on the cup.

The basic idea is to make a tall rectangle of mostly single crochet, with the occasional row that gets taller as it goes across, to shape for the flare of the cup sides. My sleeve is 9 stitches across, and the shaping rows go sc 3, hdc 3, dc 3. They are all even rows, so they won’t cancel each other out.

Chain 10. All rows will have 9 stitches.
1-3. Sc across; ch 1, turn (3 rows).
4. Sc 3, hdc 3, dc 3; ch 1, turn.
5-11. Sc across; ch 1, turn (7 rows).
12. Sc 3, hdc 3, dc 3; ch 1, turn.
13-17. Sc across; ch 1, turn (5 rows).
18. Sc 3, hdc 3, dc 3; ch 1, turn.
19-25. Sc across; ch 1, turn (7 rows).
26. Sc 3, hdc 3, dc 3; ch 1, turn.
27-29. Sc across; ch 1, turn (3 rows).
Align the top of row 29 with the starting chain. Sl st across to join. Ch 1; FO or proceed around the top of the cozy to make a decorative edging.
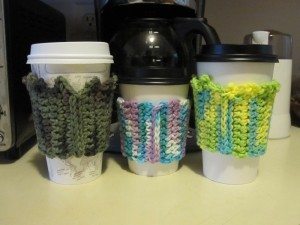
cozies - back

The white/blue/purple cozy is undecorated. The green “camouflage” cozy has a modified picot edging: [sc, ch 3, sl st] in same st, separated by 2 sl st apiece except the first and last, which are a bit further apart. It makes me think of Oscar the Grouch wearing a crown. The green/yellow/blue cozy has ch-3 alternating with sl st all around, one sl st every other row of sc, two in the top of each dc, one in the bottom of each dc, and two when I got back to the seam.
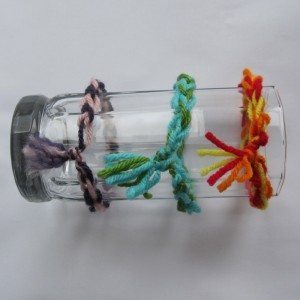
Magic chain bracelet

magic chain bracelets

The magic chain stitch in embroidery is structured like the standard chain stitch, but the links alternate colors. To make it, you load your needle with the full number of strands of each of two colors, and then when catching the thread for each loop you catch only one color at a time. It has a high fanciness-to-difficulty ratio.

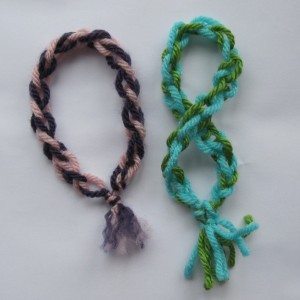
I’m sure I’m not the first to adapt the magic chain stitch to crochet chains. Make a slip knot with two strands, and then chain alternately with each color. It will probably end up looser than your usual chain; the samples below were both made with an H hook (5 mm). It looks pretty neat:

two-strand chains

After chaining the last link, bring the opposite color through it and tie the strands together in an overhand knot (or just tie the beginning and end together all at once).

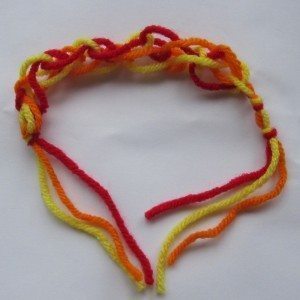
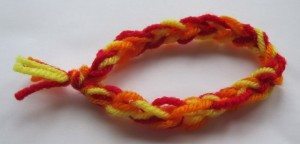
I tried it with three colors, rotating among them, but a loose strand stretching across two links was too messy. Instead, I bounced up to a K hook (6.5 mm) and used two strands at a time, rotating which was left out. That worked better, but I think I prefer the two color version.

threestrandexperimentthree-strand chain

You’ll notice I have three different-looking tassels. The red-orange-yellow one is just the yarn ends tied together. For the green-blue one, I cut two additional strands of each color and tied them on after tying the ends together, to fatten up the tassel. The pink-purple tassel was combed out with a large pin and then trimmed.

These would make great lanyards, or a summer project to introduce kids to crochet!