Red and gold tree

red and gold tree

Red and gold metallic floss! It gleams! I have a love/hate relationship with metallic floss (in contrast to my just-hate relationship with satin floss). It’s so attractive, and such a pain to work with (crochet or embroidery… as long as you’re not comparing it to satin floss). The floss is made of a fiber core with a metal strip coiled around it; as you work with it the edges of that strip poke out and turn into snag factories. That’s trickier with embroidery than crochet, fortunately for us here, but it can cause difficulties. I have some advice for crocheting with this material, with the ornament instructions below.

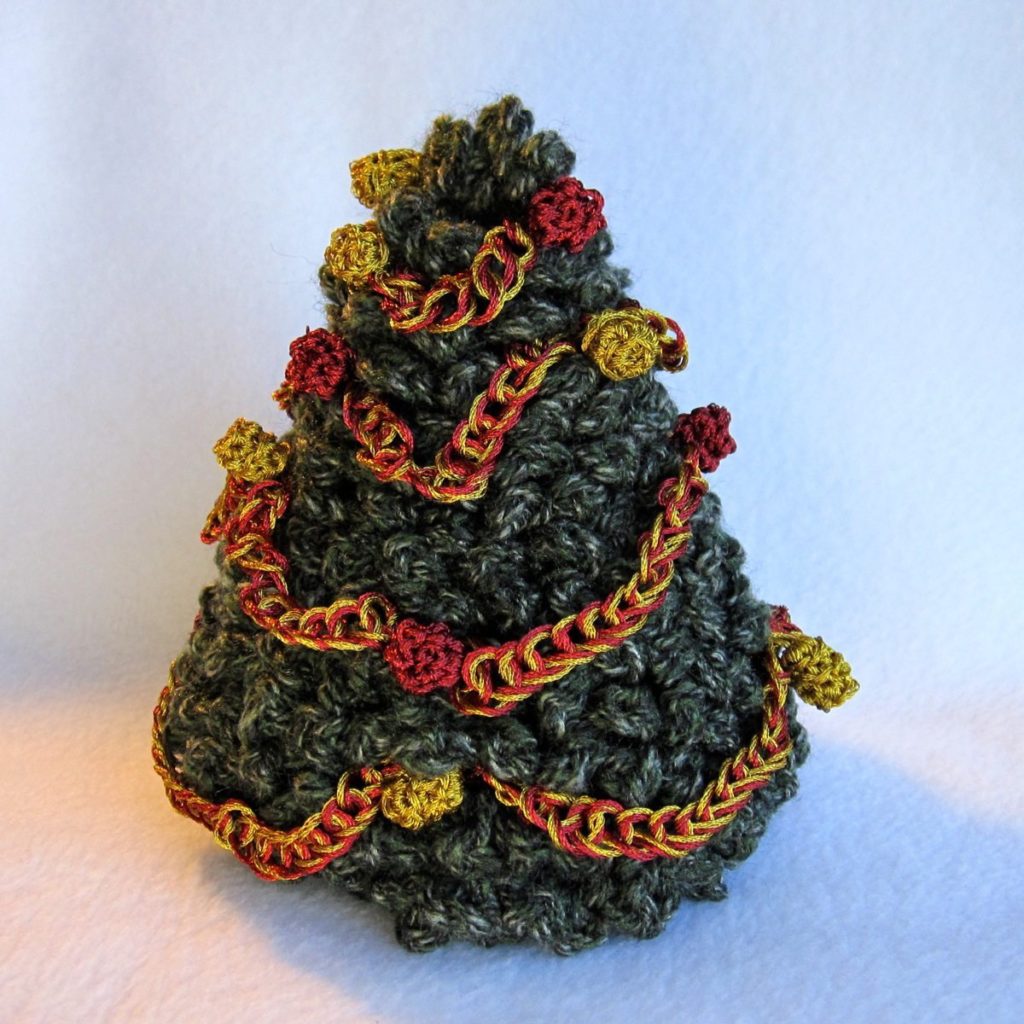
This tree is my Tabletop Tree made in Red Heart Tweed “Camo” yarn, through and through. It is denser and smoother than the other tree.

Garland: This tree also has a chain garland, made using the better part of a skein of each color, but not a magic one this time. I found the strands of the two colors were too intermingled – at least at first – to make a magic chain. I used an E/4 hook (3.5mm) and chained with both colors together, instead. A double thickness was too much for even the roughness of metallic floss, and the slip knot and knot at the end did not want to stay put. I augmented them with overhand knots. If I had knotted each color separately, I would have solved both the problem of the slippery slip knot and the strands intermingling.

Decorating: To put the garland on the tree I wound it around in a spiral, trying to tuck the chain into the branches from time to time to mimic how garlands are placed on real trees. I used a yarn needle to hide the floss ends inside the tree. The ornaments were hung by stitching through the tree, as before, and placed at the tucks of the garland to help hold it in place. I stitched straight through and then down and out the foot of the tree.

General floss crochet instructions: The two decorations below were made with embroidery floss and a size 4 steel hook (2mm). For these my abbreviations and conventions are relevant, though the only one you haven’t seen before is likely “2sc” for single crochet increase. “Dec” means sc decrease. I highly recommend the double magic ring to begin, since it does not require any additional floss-end securing. I also recommend the trick of inserting your hook into the first stitch of the round before tightening the ring so it does not get tightened down along with the ring (shown in the video at the link), under both loops even if you won’t be using both loops. After the second round of stitching, make sure the piece is fully right-side-out, rolling the rim up with your thumbs and index fingers if needed. Metallic floss needs encouragement to change position, which is also an advantage.

red and gold ornaments

Ornament balls (red): One skein of floss will comfortably make 7 of these.
1. Form magic ring, ch 1, and sc 5.
2. 2sc, sc, 2sc, sc, sc (7). Make sure the work so far is fully right side out. I like to loosen the current loop so I can take the hook out and roll the rim up with both thumbs and index fingers.
3. Sc, dec, sc, dec, sc (5).
This should not need stuffing beyond perhaps wadding the initial floss tail (and maybe not even all of that) into the ball. Cut floss leaving a long tail. Stitch a drawstring through the opening: up under the front loop of the first stitch, down through the first loop of the second, alternating to end with up through the front loop of the last stitch. Put the floss through the ball and out the middle of the magic ring. Pull the drawstring tight and roll the ball between your fingers as needed to round out the shape.

Pine cones (gold): One skein will easily make 8.
1. Form magic ring, ch 1, and sc 6.
2-3. Sc around in BL only (6 sc; 2 rnds).
As above, the initial floss tail should suffice for stuffing. Cut floss leaving a long tail and stitch a drawstring through the back loops only of the last round; I like to go from inside the round to outside under each stitch’s back loop. Pull it closed but don’t tighten too much. Put the floss through the pinecone from the center of the last round through the center of the magic ring. Roll the pinecone between your fingers if necessary to make the rounds taller and narrower (increase the distance between magic ring and drawstring).

Additional tips: A stuffing tool will be very helpful, a small fork of sorts to push the floss into the item. I use a plastic yarn needle with the back of the eye snipped off and the two resulting prongs sanded smooth. I have seen a stuffing tool of two pointy toothpicks taped together, but a wider end on the tines would be more helpful – perhaps two flat toothpicks, with half of a third one in between for spacing if needed, using the wider ends for stuffing. I also had a much easier time stuffing after I tried twisting the end of the floss until it was all coiled around itself – it gave me more to push against and I didn’t have the problems with individual plies looping up, impossible to hold onto with the stuffing tool. I had no problems with the drawstring staying closed, even though I didn’t secure the tail (well, except for stitching it through the tightly-stuffed item and out the tight magic ring).

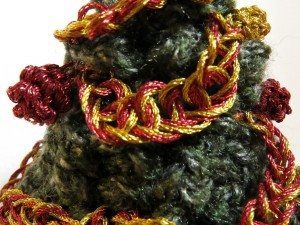
I hope you’ve enjoyed this little post blitz! Here’s a final close-up glamour shot courtesy my husband:

red and gold tree close up

I’ve made the decorations above and in the previous post, as well as my tips for working with embroidery floss, available as a name-your-price PDF for easy printing.


❄ Overview post ❄ Making the tree ❄
❄ Blue, silver, and white decorations ❄ Red and gold decorations ❄
Blue, white, and silver tree

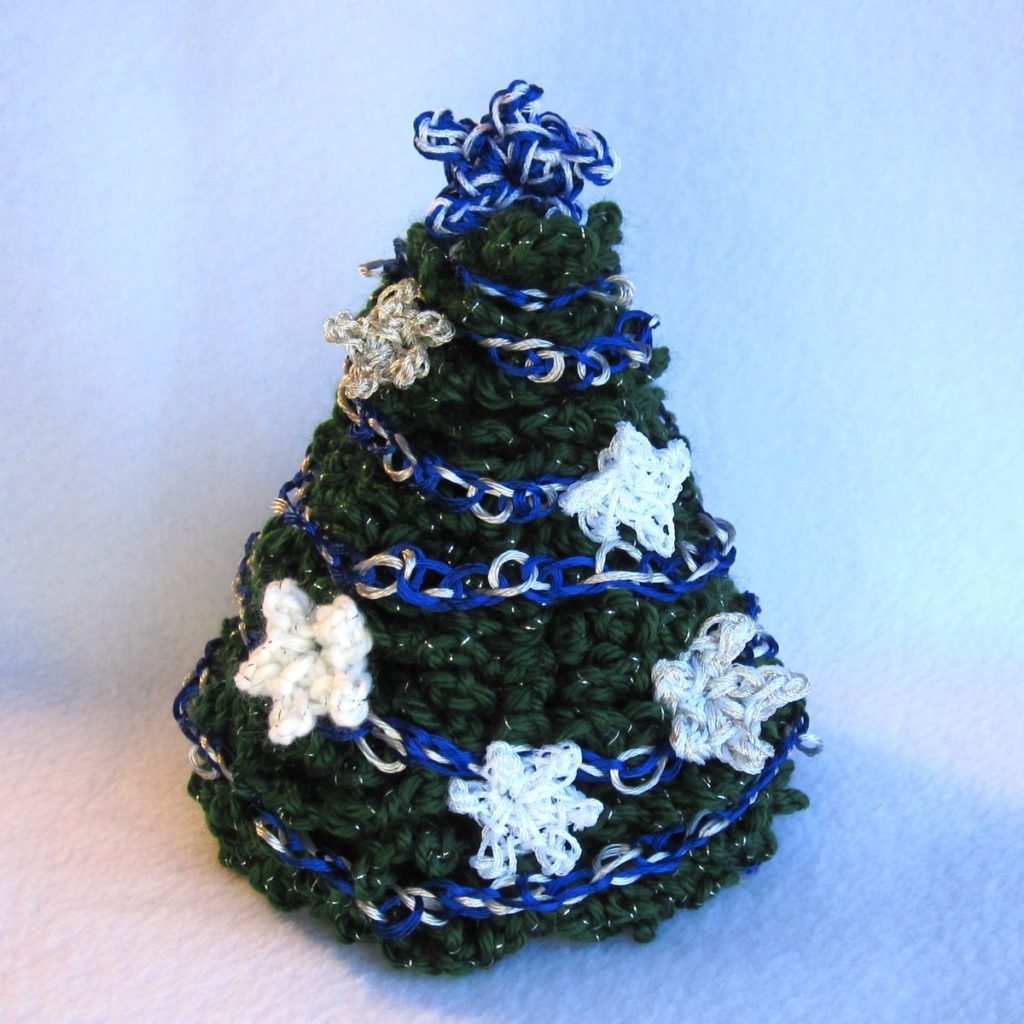
blue, white, and silver tree

I did not like the blue and silver options in metallic floss (though I fortunately picked up a white skein with my gold and red), so I got rayon/satin instead. As mentioned in the initial post, I now think that was a mistake. Many words not in keeping with the spirit of the season were said, and I may have even thrown the floss on the floor at one point in a fit of pique. I can neither confirm nor deny. The starting slip knot in particular does not want to hold well. I made different fixes for the two types of decorations, described below.

This tree is my Tabletop Tree made with a cone of Red Heart Super Saver “Hunter Green” yarn and branches of Herrschners Holiday “Dark Green.” The Herrschners yarn is finer and twistier than the Red Heart, which led to a shaggy, textured tree.

Magic chain garland: Chenille yarn in an appropriate color, metallic eyelash yarn for tinsel, or a simple chain make great garlands, but for a two-color garland I turned to my magic chain. To make one, hold two strands of yarn together, tie a slipknot, and place it on your hook. Now chain as usual, but grab only one strand for each chain and alternate which one it is. I did these with embroidery floss instead of yarn, though, and used a C/2 hook (2.75mm). To deal with the slippery knot, I held onto it with my fingers until I’d chained a few times, and then trusted to fate for it not to fall out (well, fate and the long tail I left) while I finished the chain. It didn’t, and after finishing I went back and tied the two colors in a square knot, with an overhand knot over top of it so the tails would be pointing the same direction. I pulled the end of one color through the last loop of the other at the end, tightened it a bit, and then tied overhand-square-overhand to secure. The garland used about 2/3 of a skein of each color, but more of blue and less of silver – I think this was due to shifting my grip upwards after the same color link most of the time, so the slippery floss that wanted to pull anyway was inclined to do so more on silver than blue.

This magic chain does not look much like a yarn magic chain, but it’s cheerful. The satin floss likes to keep its own shape and doesn’t have the benefit of friction to make it stay put. To put it on the tree, I used a yarn needle to hide the floss at one end inside the tree, wrapped the garland around in a spiral, and then hid the opposite end into the tree as well. And then I re-wrapped the garland, because it had slipped completely out of place during the end-hiding operation.

To add the ornaments, I stitched the beginning and ending yarn ends through the tree to hold the star in place – leave an extra long tail on both ends for ease of doing so.

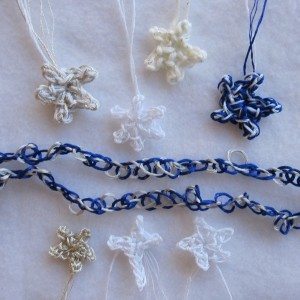
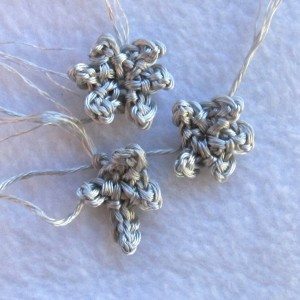
blue, white, and silver ornaments

Stars: I made the stars with embroidery floss and a size 4 steel hook (2mm), or with worsted weight yarn or two lengths of floss and an E/4 hook (3.5mm). You can make them with 4, 5, or 6 points easily, although 5 looks the most like a star – 6 looks a bit like a flower, and 4 like a cross or plus sign.
Here’s the pattern. Note that when I slip stitch into a chain other than to make a ring, I insert my hook in the back bump of the chain.
Ch 4, sl st into ring.
*Ch 3, sl st in 2nd ch from hk, ch 1, sl st into ring* as many times as desired; each iteration of *…* makes a point.
FO, putting the end of the yarn through the center of the ring, front to back.
To make one longer point, replace the *…* with:
Ch 5, sl st in 2nd ch from hk; ch 1, sk 1 ch of ch-5, sl st in next ch of ch-5; ch 1, sl st into ring.

The satin floss did not work well at all. Here’s a sample:

satin floss stars

Slip knot tips: I did learn some things, and made enough stars to say that a skein should make 3 each of 3 kinds: 6-pointed, 5-pointed, and 4-pointed with one longer point. In both metallic and satin floss, two lengths held together don’t make for a sturdy slip knot. With metallic floss by itself, the slip knot holds well. With satin floss, it doesn’t, but if you add another wrap to the knot before tightening it holds perfectly. That is: a slip knot is essentially an overhand knot with the working end of the yarn looped up through it. You want to convert the overhand knot to a double overhand knot. In the lower drawing of my slip knot instructions, the tail going off to the left gets wrapped around the last strand it passes under.

In the stars made from two lengths of embroidery floss I knotted each separately and then worked with them together. Metallic plus satin worked fairly well (blue and white); satin by itself was just mushy and hard to finish off. The silver floss in the photo is some I had at home, which of course was on an unlabeled bobbin.

I’ve made the decorations above and in the next post, as well as my tips for working with embroidery floss, available as a name-your-price PDF for easy printing.


❄ Overview post ❄ Making the tree ❄
❄ Blue, silver, and white decorations ❄ Red and gold decorations ❄
Sewing for sale

It’s been a while since my last blog post, and that mostly had to do with my sewing room (which is also my photography studio) being tied up. I’ve liberated it and am here to show you what was keeping it occupied: stuff.

The Sew-op is having a fundraiser/awareness-raiser sale the Friday before Thanksgiving, and we’re all pitching in to make items to put in it. Most of the fabric for my contributions came from the Sew-op, supplemented with my own stash when I couldn’t find enough that went together or were of the right kind.

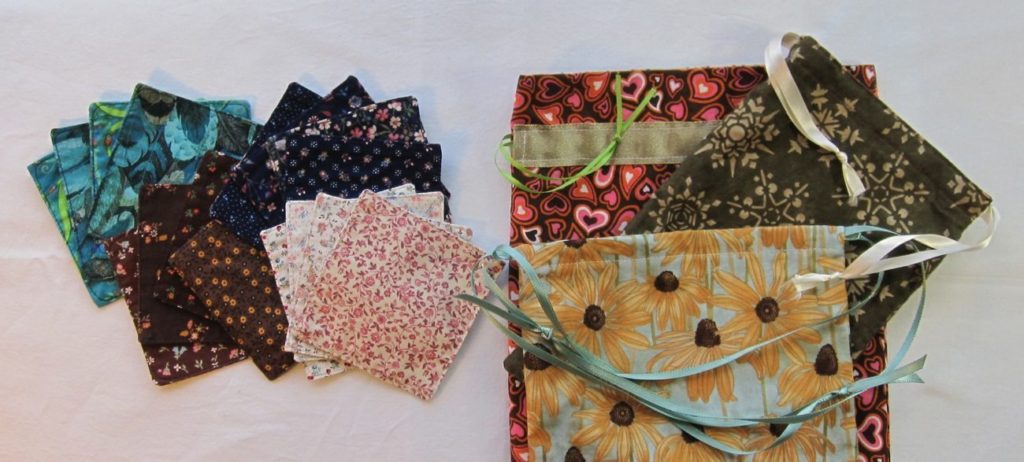
coasters and bags

The old standby, fabric coasters, was the first thing I tackled in earnest. I’ve also got a selection of drawstring bags, some reversible, some lined, some with zig-zagged seam allowances inside.

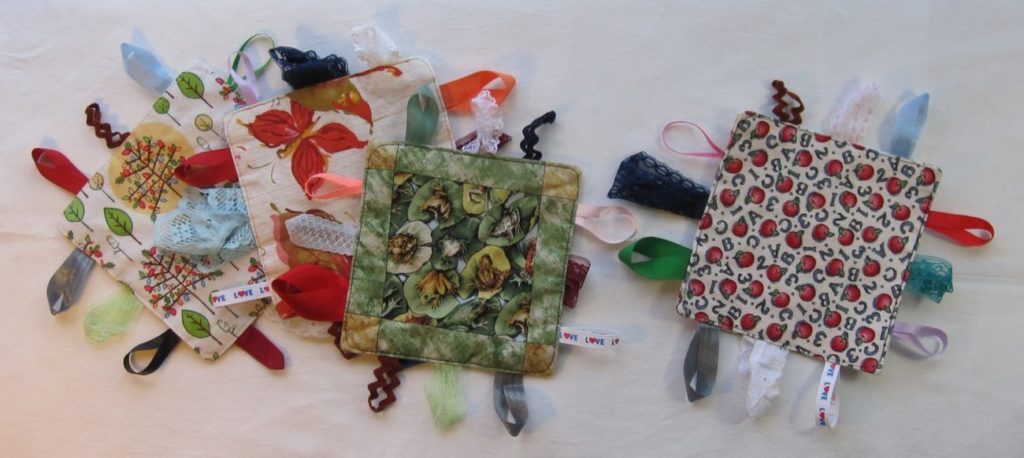
crinkle squares

The new item was what I call “baby crinkle squares.” They are quite easy: cut a 7″x7″ square from each of two differently-textured fabrics, and cut a 7″x7″ piece of a plastic cereal bag. I usually have a flannel and a quilting cotton. Cut 12 lengths of different ribbons, twill tapes, hem tapes, rickracks, and laces, each in the neighborhood of 5″ long and in a variety of colors and widths. Avoid anything that has bits that could come off, and if the square is for a gift or sale, anything that looks like it has bits that could come off, regardless of how well attached they are in reality. I’d also avoid elastic trims.

Iron your fabrics well because this is the last chance you’ll have to do so. Pin the plastic to the wrong side of one fabric; I usually use the lighter-weight one for this. Bend each trim into a U shape, adjust lengths as desired (remembering you will lose 1/2″ off the open end of the U), put ends adjacent or overlapping, and pin 3 Us to each edge of the remaining piece of fabric. Put the trim on the right side of the fabric with the bend of the U toward the center and the cut edges of the trim lined up with the edge of the fabric. Try to space them fairly evenly but leave at least an inch between the outside trims and the corner of the fabric. Stitch all the way around each piece of fabric at 3/8″ to secure plastic and trims. If you have narrow or net trims you may want to backstitch across them at this step, for security.

At this point it’s just like the coasters, with some easier bits and some harder. Choose the edge to leave open for turning based on your trims: solid, flat trims are best for the open edge. Place your two fabric squares right sides together and match and pin corners. Pin the sides next. Stitch at 1/2″ most of the way around, leaving the center of one side open but covering all the corners, and backstitch at both ends of your stitching. Trim the corner seam allowances and turn right side out. Through a combination of tugging the ribbon loops and pushing the corners out from the inside (a chopstick is great for this), get your edges as pushed out as possible. With the open edge turned under 1/2″, pin closed, and topstitch all the way around. I typically start and end by going all the way across the open edge, but don’t backstitch, and I cut the corners with a shallow curve. I also usually tug the ribbons out as I approach and stitch over them on the three closed sides.

The part where these are more difficult than coasters is the bulk of the ribbons making it more difficult to line the fabric pieces up. Sometimes the plastic makes problems under the presser foot, as well. The easier part is when you are topstitching; since it is more substantial and you have ribbon loops you can tug for guidance, turning the corners is much easier.

To my delight, these can be machine washed (cold or warm) and tumble dried, and they stay nice and crinkly. I don’t think my dryer is particularly hot, though, so if yours is, you may want to dry them on a low heat setting. Don’t iron the plastic part, but if the ribbons get crumply in the wash you can iron them as much as you ever could.