The very flower of nerdiness

The July CAL on Ravelry was flower themed. I had, of course, just recently made flowers for an Amigurumi Army mission, so I worried about ideas. However, I had also just been in Colorado for a wedding and become enamored of wild lupine, so I thought I would make something purple. My thought was penstemon, or beard-tongue, but my efforts turned into more of a bellflower, so I embraced that. The pattern is simple (as always, abbreviations here): sc 6 in a magic ring. *sc 3, 2sc* four times so there are 10 sc in the round. *sc, ch 2, sc in back bump of second ch from hk, sc in next st of rnd* five times. Sl st, sl st, ch 1 [do not sk any sts], sl st, sl st, FO. (The ch 1 helps with the point of the first petal, which seems to need it.)
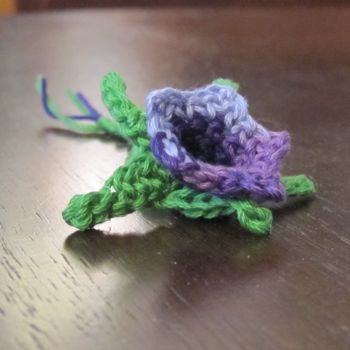
bellflower

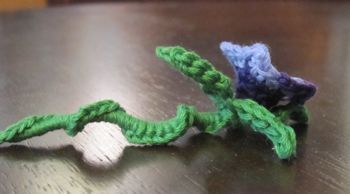
bellflower

Since it turned into the kind of flower it did, I made a calyx for it. If you’re making a calyx you probably want to leave the loose ends of the flower yarn hanging out the back center of the flower. Each sepal is a chain with stitches down it, and this works best (stays flattest) if you stitch into only the top loop of the chain. Make a slip knot. *ch 7, and starting in second ch from hk, sl st, sl st, sc, hdc, hdc* five times (each time you’ll have a ch left over). Sl st to join and then sc around the inside opening, one sc per sepal (5 total). Put the loose ends of the flower yarn through the center of the calyx, stitch them through a loop and tie them together. Braid them with the initial end of the calyx and sc onto that braid with the working end of the calyx yarn. You’ll need to tighten it down on the braid and have the top of the stitches spiral around the braid to make it stable and straight.

[Alternatively, of course, you can make a stem however you like, or just finish off the yarn and have a brooch-style flower.]
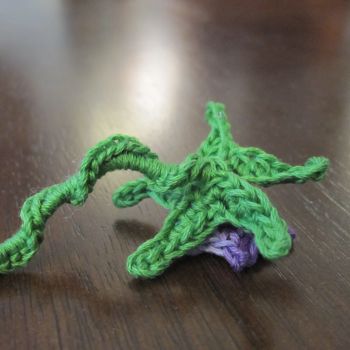
bellflower

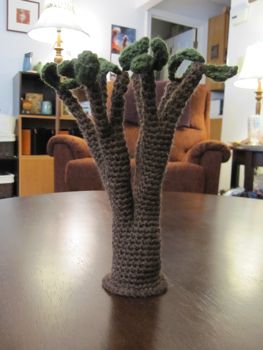
The Amigurumi Army mission for July was nerdy crochet. I thought about something from a fandom, but couldn’t come up with anything I wanted to make. However, as we know, I am mathematically minded, so I looked in that world and found this:
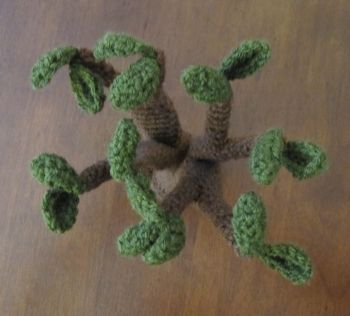
binary tree

A binary tree.

binary tree

I made it from the top down, sewing as little as possible: when the second piece of each pair was made I just continued into the next segment down, stitching around the first piece without a gap. This required just a little thought about the order of operations. The only significant sewing was the leaves, though that was pretty significant. The smallest bits are 5sc in a magic ring, continued without increase. Then I just put pieces together and stitched around without counting, trying to keep things fairly compact, which is why nothing is exactly symmetric after that. The whole shebang is held up by eight pipe cleaners, one inside each of the smallest branches.

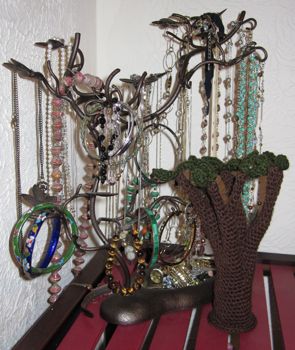
I finished it while visiting a friend with a jewelry tree, so I asked them to pose together.
trees together

Bright ideas

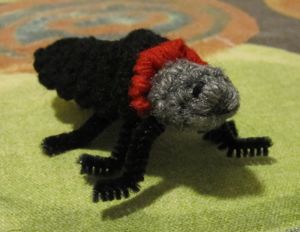
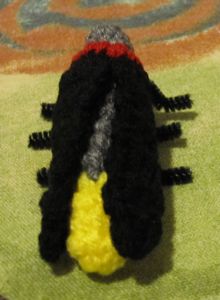
I was struggling for today’s blog post, because I have a lot of works in progress but nothing super-near finishing. I was concerned about deciding the topic and then having to stay up until midnight finishing the project! However, I found my way. The other day I finally started Planet M File’s firefly, which was a quick project.

from the front from the back

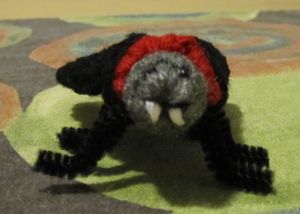
Using bright red instead of country red makes him look kind of like a vampire, to me, so I adjusted the facial embroidery accordingly.

I vant to suck your blood
He vants to suck your blood.

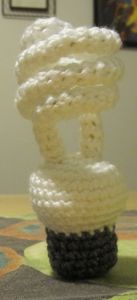
Thinking of ways to make this a longer blog post, I brainstormed other things that light up. I figured there was no way that starting on Tuesday evening I would finish another animal that lights up, but I could do a lightbulb. So I did. A compact fluorescent lightbulb, in fact.

eco-friendly

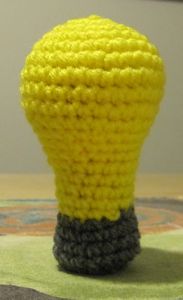
And then I made an incandescent light bulb to be his friend. I don’t know why cartoon lightbulbs are traditionally yellow, but I have a huge amount of mildly nasty-feeling yellow yarn so I went ahead and used it.

traditional

The incandescent was freehanded to match the CFL in size (which did not quite happen), but I have a pattern for the CFL.  

Compact Fluorescent Lightbulb (modeled after a 60 Watt equivalent, but is larger):

» A cleaned up version of this pattern is now available with two other lightbulbs (incandescent and LED) as a name-your-price pattern in the store.

You need: small amounts of white and gray worsted weight yarn, appropriate hook for a tight stitch (I used E/3.5mm), two white (or silver or beige) pipe cleaners, and a small amount of stuffing. I also used small rocks in the bottom of both bulbs to get them to stand up.

In white: sc a tube 20″ long and less than 1 1/2″ around. This will depend on your gauge; for me with soft worsted weight yarn and an E hook, 5 sc around gave 1 3/8″ circumference. It does not matter how you start the tube because the ends will be hidden; magic ring, ch 2 and sc in first one, ch and join with sl st. Dealer’s choice.

After about 12″, stop and insert the first pipe cleaner. Your tube should be barely big enough for it. I like to fold the end over so the cut end can’t snag the yarn, and I recommend cutting about 1 1/2″ off the pipe cleaner to put the join closer to the middle of the tube. You will find that you can only push the pipe cleaner in from the end for so long, and then you have to scrunch the tube onto it. Finish the 20″ and leave a long enough yarn tail to sew the tube ends to the base of the bulb. Insert the second pipe cleaner to meet or slightly overlap the first, scrunch the end of the tube down a bit, cut the loose end off (should be about 3″, or 1 1/2″ if you cut the first one) and unscrunch the tube.

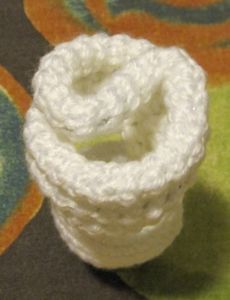
There is only so much you can do to get the tube into shape before it’s sewn onto the base, but to have the ends in the right places and orientation for sewing you should twist it now and fix it up later. At about 3/4″ from each side of the center point, fold the tube in opposite directions. You are looking at the top when it makes an S shape. Now coil the long ends around; each will make 1 1/2 rotations, interleaved with each other, before folding down to meet the base.

from the top

I’m not completely thrilled with the base, but as long as you shape it by hand it’s okay.

Edit, October 2014: I’ve cleaned up the pattern a bit to improve the shaping.

In white:
1. Form magic ring, ch 1, and sc 7.
2. 2sc around (14).
3. *Sc, 2sc* around (21).
4. *2sc, sc 2* around (28).
5. Sc 6, dec, sc 12, dec, sc 6 (26).
6-8. Sc around (26 sc; 3 rnds).
This is a good time to sew the bulb onto the base. Center the ends of the tube on row 2, across the center point from each other.
9. *Dec, sc 3* five times, sc (21).
10. *Dec, sc 2* five times, sc (16).
Needle join in 2nd st from end; FO white.

In gray:
Put slipknot on hook and sl st to row 10.
11. Beginning in the st after the sl st, *dec, sc 2* three times. Sc in same st as sl st (12).
12-15. Sc around (12 sc; 4 rnds).
Stuff! I used fiber until I got the the gray part and then switched to rocks.
16. *Dec* around (6).
FO. I had to stick some more rocks in before doing the final drawstring. Shape by hand; you could get a better form on the bulb if you stitched the coils together but I didn’t feel like it.

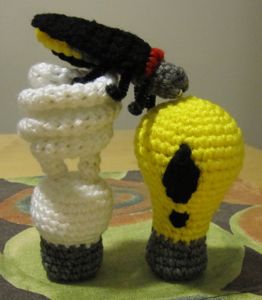
all together!

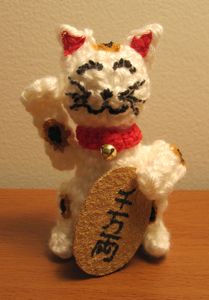
Maneki neko

While trying to think of crochet patterns I would like, I looked at my little ceramic lucky cat, bought in San Francisco’s Chinatown many moons ago. Locale of purchase notwithstanding, the maneki neko (beckoning cat) is a Japanese sculpture to bring luck, customers, and/or money to the owner – the raised paw is beckoning good fortune. The coin is labeled “ten million ryō”, which is something like ten billion US dollars.

I started the design process before really looking for existing patterns. I found a few, but only one at the level of detail I wanted, and it was not the shape I was looking for, so I persisted. Three heads, four raised arms, five legs, two lowered arms, and three bodies later, I present to you the pattern.

front view

Good Luck Cat (beckoning cat, maneki neko)
Use worsted weight yarn and an E or F hook, in white except for the collar, which is red. You also need:
* some stuffing
* a small gold bell for the collar
* yellow, gold, or gold-painted felt for the coin
* a black paint pen for the coin and optionally for the facial features (otherwise, black embroidery floss for the features)
* small amounts of red, black, and orange or tan felt, or the same colors in fabric paint (I used Tulip Soft fabric paint in gold metallic (on white felt for the coin), red velvet, ebony matte, and golden tan matte, and a DecoFabric paint pen in black)

Continue reading Maneki neko