Homemade Air Dry Clay

I went a little overboard some time ago and tested six different air dry clay recipes, plus a second variation on two of the recipes. I never posted about it then, but I’ve come back to it recently and wanted to share my findings.

Sources for recipes (immediate sources – none of them indicate they are the originators) are listed with links; it’s been long enough since I saved these originally that several links have died and now point to the Internet Archive.

A little English-to-English translation: “cornstarch” = “cornflour” and “white glue” = “PVA glue” (= “school glue”).

Clay Recipes: The Winners

There were two recipes that came out head and shoulders above the rest. They are the only two on this list I will ever make again.

First Place: Cold Porcelain

(Puffy Little Things, Mashia Crafts)

This is the best homemade crafting clay of all the recipes I tried. It allows fairly intricate shaping, is resistant to cracking while drying, and doesn’t leave residue on your hands. You pay for those qualities with the amount of work to make it, the fact that includes non-edible (though still non-toxic) ingredients, and that it dries to a yellowish color.

Ingredients: 1 cup each white glue and cornstarch, 1 tbsp each lemon juice and baby oil; may substitute lime juice or vinegar for lemon juice and cooking or mineral oil for baby oil.

Instructions: Mix glue and cornstarch, then mix in oil and lemon juice. Microwave in 15-30 second intervals, stirring thoroughly in between, until there are no wet areas anywhere. It is possible to overcook this, so shorten the microwave times as you go along. Knead smooth and leave overnight in a sealed bag. Both sites recommend wearing hand lotion to make the clay easier to work, both for kneading and when you sculpt with it, but if it’s sufficiently cooked that’s not strictly necessary.
cold porcelain objects Testing Notes: I’ve made this recipe four times now, and the instructions above are the result of my testing, not directly from either of the sites. The mixing instructions are to avoid lumps, and the real restriction is: don’t mix the lemon juice directly into the dry cornstarch. This recipe also does not reduce well – I made it successfully with 3/4 cup each of glue and cornstarch, but if you get down to 1/3 cup each it is nearly impossible to cook it enough without overcooking it into yellow rubberiness.

The two sites give different proportions for the oil and lemon juice – one of them says 2 tablespoons apiece when using a cup each of glue and cornstarch. In my testing I found that made it more difficult to cook it thoroughly, though I must admit I didn’t give it a completely fair trial. When I reduced to 3/4 cup I did not bother reducing the oil and lemon juice.

The blog instructions say to cook for 3 rounds, but my clay was never finished in that little time. The version with 3/4 cup of glue took a good 8 rounds or so; I never did it for more than 20 seconds, though, and if I’d begun with a couple of 30 second rounds it might have taken fewer total. I was concerned about overcooking it, but when you’re using a larger volume that is not as big of a risk.

Stir your hands off in between cooking rounds! This will avoid overcooking some parts while other parts are still wet, and will mean you need little to no kneading at the end.

My 3/4 cup version was the most successful of any, and although it may have been slightly on the soft side, it was workable, and didn’t stick (much). I made a few items, wrapped up some leftovers, and left them for a little over two weeks, and it was still completely usable.

Items made with cold porcelain dry very smooth and rigid, and paint easily with acrylics. The photo above is all from the earlier testing rounds; there are photos below of the final batch, including of unpainted clay. The dry items are quite sturdy – long thin pieces can be broken, but even thin flat pieces are resilient. I tried hard to break the oval-shaped “love” item in the photo above and was unable to.

Cleanup: I used a cheap plastic storage container to make this, because I didn’t want to be microwaving glue in something I would then prepare food in. I was pleased at how clean it came, though – once it dried I was able to flake most of the clay residue off, and the rest washed away easily. I also used plastic knives to mix, and broke two in the process, so the next time I make it I will find something metal or wood to mix with and just designate it a crafting implement.

Other Notes: The recipes below are given in parts, but I gave this in measurements instead for simplicity – it would be 1 part each lemon juice and baby oil, 16 or 8 parts each white glue and cornstarch, depending on the version. The Puffy Little Things tutorial has a section on troubleshooting at its end. Etsy New York has a variation they call homemade polymer clay with different proportions but the same ingredients, cooked on the stove; I did not test that one.

Second Place: Cornstarch and Baking Soda

(found all over: Southern As Biscuits, Growing a Jeweled Rose, Show Tell Share (with reduced water), De Tout Et De Rien)

This is the best play clay. Compared to cold porcelain it is far quicker and easier to make, all ingredients are edible and very inexpensive, and it dries very white. What kept it out of first? I was unable to find a way to prevent many items from cracking as they dried. The clay also leaves a powdery residue on your hands when you sculpt with it, and has a baking soda smell that I find unpleasant.

Ingredients: 2 parts cornstarch, 3 parts water, 4 parts baking soda.

Instructions: Cook and stir till the consistency of mashed potatoes, cool under damp towel, knead smooth on a cornstarch-dusted surface.
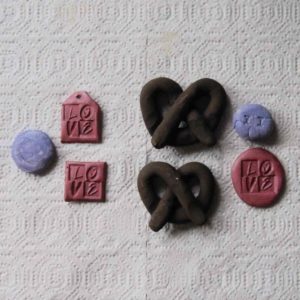
cornstarch and baking soda clay objects Testing Notes: This clay’s popularity is understandable: it’s easy to make and to work with. I have made it three times now. Use medium-low heat and stir frequently, scraping the sides and bottom of your pot. You want it fairly dry – not on the softer side of the mashed-potato spectrum. If you leave it softer it will be stickier to work with and curl more in the drying process.

If you cook it a little drier you can actually skip the cornstarch-dusted surface for the kneading step (in fact the kneading can be postponed until it’s fully cooled and you’re ready to work with it).

If I were really being careful with this I would throw the dry ingredients into a sifter and sift them into the pot – there are generally some little lumps when I make it, and sifting (and pre-mixing) the cornstarch and baking soda would probably help with that.

Items made with this clay dry with a white, powdery surface. Powdery in texture, that is – nothing comes off on your fingers when you handle dry items. It paints just about as well as cold porcelain; you can see items from my first two batches above and from the last batch below, unpainted. Items with this clay are slightly less sturdy than cold porcelain – I was able to break all of the “love” items in the photo – but still pretty resilient. Undercooked (wetter) clay seems to lead to more brittle results.

Cleanup: I used a stainless-steel pot and had trouble cleaning the residue off until I filled it with water and added a generous helping of white vinegar; after a little soak, it still needed the sponge but came right off.

Other Notes: Sand clay is a variation on this (these ingredients plus sand, with proportionally more cornstarch) that I have not tried.


What follows is general notes on air dry clay – specifically the two above but likely to translate to others as well – and a rundown of the other four recipes I tried and heartlessly rejected. Continue reading Homemade Air Dry Clay
Sewing Machine Repair Class

bobbin thread in the needle
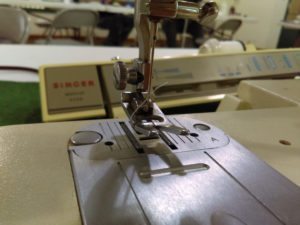
I am not sure how I managed, but once, in taking out my test fabric, I managed to thread the needle with the bobbin thread.
A few years ago I discovered the White Sewing Center Sewing Machine Repair Class – two three-day sessions (basic and advanced) on all aspects of non-computerized sewing machine repair. I couldn’t go at the time but I thought perhaps I could give the class to myself as a 40th birthday present. With my personal collection of machines (4 right now; hopefully not to grow more though I have developed a desire for a Singer Slant-o-Matic) and my unofficial responsibility over the Sew-op’s machines it seemed that it would be useful as well as simply interesting.

It was FANTASTIC. I couldn’t have imagined a better class. In the first part we covered:

  • Recommended tools/materials and what you use them for
  • How stitches are formed – in precise detail
  • The key to correct insertion and threading of needles on any machine
  • All about needles and their history; tracing sewing problems to the needle
  • All about thread; tracing sewing problems to thread
  • Cleaning and lubricating machines; detecting and removing varnish (sticky residue from old oil and dust/lint)
  • Testing machines including the clutch and externally-mounted motors; checking parts for wear and tear (and for being correct in the first place)
  • Clutch assembly
  • Feed dog timing, height, and orientation
  • Pendulum timing (for zigzag stitch), cams and cam stacks
  • Bobbin hook timing and how problems there cause skipped stitches
  • Causes for skipped stitches that have nothing to do with the hook
  • Needle bar height
  • All about bobbins: winding, cases, tension, insertion
  • Top threading general principles
  • Diagnosing tension and apparent tension problems
  • Check spring timing
  • Escapement (how top thread passes around the bobbin without the bobbin case being completely loose)
  • Dealer calibration of tensioners (if the number for correct tension is way off of the standard 4-5, how to change it)

We also went through all the machines in the room three times, once to find parts and adjustment points for clutch, feed dogs, and pendulum timing, once to look at the bobbin hook and its adjustment points, and once to look at the check spring timing, escapement, and tension calibration. It meant we weren’t limited to our own machines plus the ones Ray demoed on at the front of the room – we had a wide variety of machines to look at.

Ray’s approach is to teach you how machines work in general, what each part is supposed to be doing, and how to trace out the location to adjust each part on any given machine so you’re not dependent on having the exact service manual. The phrase of the week was “now, this looks different, but don’t let that confuse you – it works exactly the same as on every other machine.” It was perfect for me both because it matches how I learn best and because at the Sew-op we don’t necessarily have the operator manual, much less the service manual.

In the first three days I learned more about sewing machine operation than I’d managed to learn in my 25+ years of serious sewing and self-study. The formation of a stitch is finally not just magic to me! Ray is incredibly knowledgeable and clear, and he has great visual aids.

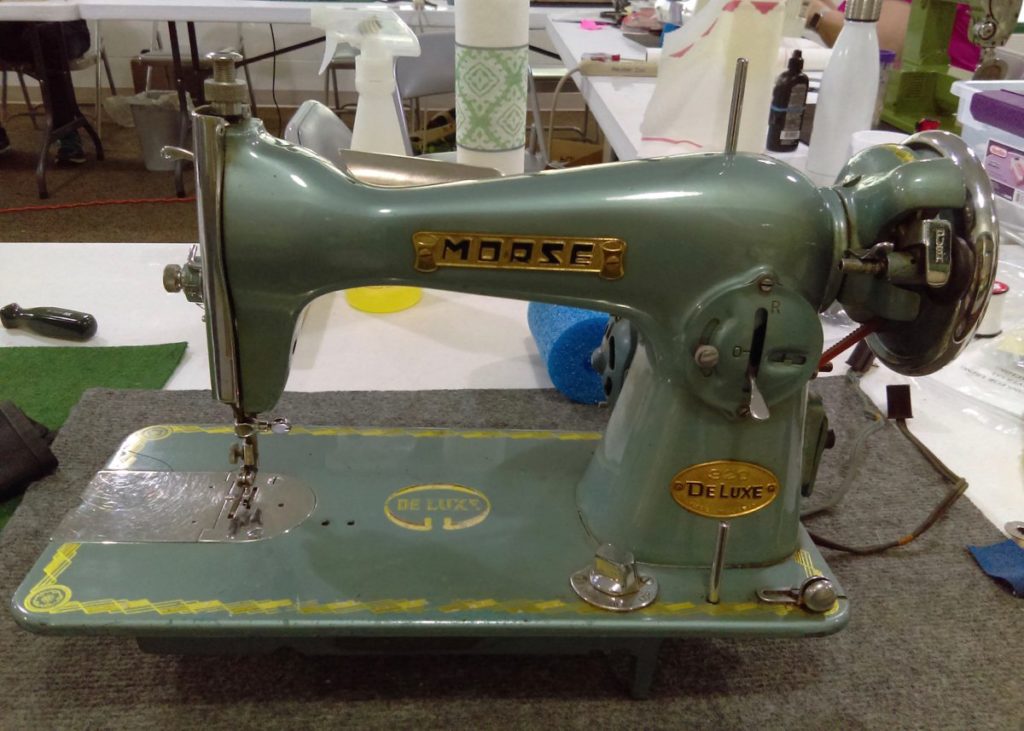
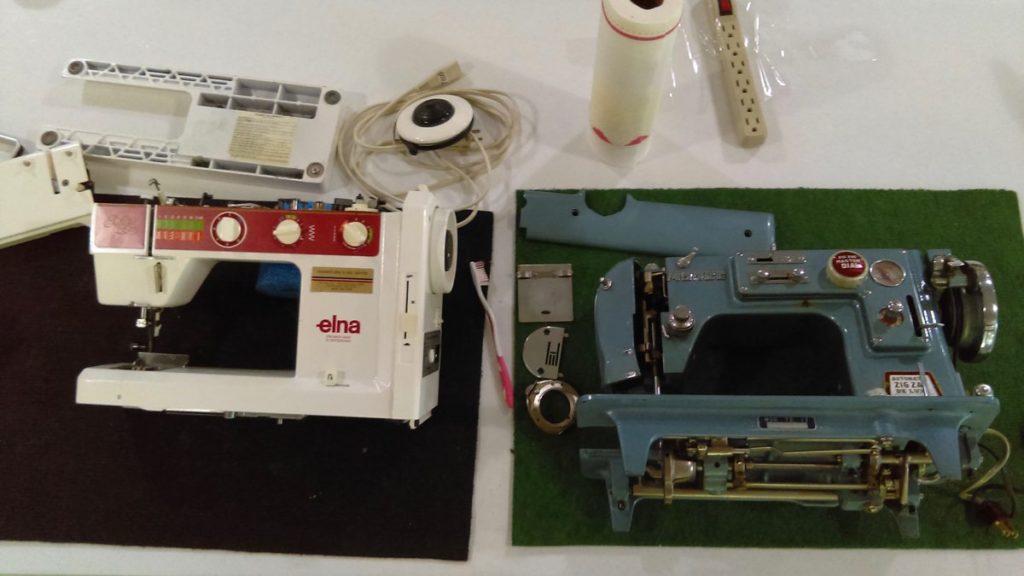
Two semi-dismantled sewing machines, an Elna and a Morse
A Sew-op Elna and my Morse: my setup for most of the first three days.

The second part was more of a guided work session, where we put what we’d learned into practice (we did some work in the first part, but there was a lot of lecture and demo time) with individual help from Ray and his assistant Cathy, and mini lessons on topics that came up from a given student’s work. During that part we had lessons on sergers, motor wiring, and foot pedals, and I learned more about diagnosing hook timing problems.

Before the class I was unsure how many machines to bring, and it’s hard to give advice on it because the number of machines you want will depend a lot on how much work each one ends up requiring. Ultimately I brought six: two that needed basically no work as far as I knew, two that I knew or suspected needed something moderate adjusted, and two that seemed likely to need significant work. It was the perfect amount, as it turned out. We had two no-show students and I was sitting next to one of the empty places, so I was able to have two machines out at a time. That way I could work on one till I got stuck (or until I needed to give oil time to penetrate) and then switch to the other until Ray or Cathy made it around to me to help me through my stuck point.

Here’s what I did (all machines got general cleaning and lubrication, and upper tension adjustments to balance the stitch):

  1. Extra work to clean and lubricate where handwheel mounts on main shaft (fixed clutch problems); adjusted bobbin tension
  2. Feed dog timing adjustment (fixed what looked like tension problems)
  3. Lowered bobbin tension (this machine had feed problems but they were cured by cleaning packed lint out of the feed dogs)
  4. Extra work to clean and lubricate where handwheel mounts on main shaft; replaced belt connecting handwheel and motor; re-bent bobbin case tension spring to increase tension (Ray did that); adjusted feed dog height (ditto)
  5. Oiled motor shaft (motor was seized); moved feed dogs forward (they were hitting in back on long stitches); adjusted bobbin hook timing (twice; went too far the first time); adjusted check spring timing; adjusted bobbin tension; recalibrated top tension knob
  6. Recalibrated top tension knob; tightened presser foot pressure dial (Ray did that, apparently just by turning it as tight as it would go – after that you could loosen it without it just spinning as it had before)

Those machines are in order of work I thought was needed – very little on the first two, a moderate amount on the second two, and a lot on the last two – so you can see my estimates were not always the best!

If pressed for advice, I’d probably say to bring as many machines as is practical for you but not expect to necessarily get through all of them. Since the class involves going through all the machines in the room multiple times, you don’t have to worry about trying to bring some kind of representative sample. You may have classmates with extras, too. At least two people in the room borrowed machines from other students, and there was a third person with extras to offer. Ray is also happy to make “adjustments” to your machine that mess up the sewing so you have to diagnose and fix the problem. Quite happy. 🙂

A straight-stitch-only Morse machine
My Morse’s big brother showed up.

Other advice would be to bring your checkbook, not just a prewritten check – a few people in the class did that, and then they had to get cash out because they wanted to purchase the myriad tools and supplies Ray makes available.

I think I got a lot more out of the class because of taking apart the Morse last summer (post on that adventure still forthcoming) as well as cleaning and oiling so many machines at the Sew-op. I had better context for what Ray was teaching; I knew what the guts actually looked like so I had some scaffolding instead of everything being new.

It was so very fun, too. At the morning break the first day I texted my husband, “I have found my people.” I never ate (or even drove to) lunch alone, and we laughed and made nerdy sewing machine comments and geeked out on each other’s cool machines.

Rubber stamps from fabric paint

Every once in a while you come across a tutorial that is truly different from the herd and makes you think “What an interesting idea!” Such was my reaction when I came across a post on Mel’s Own Place about making rubber stamps with puffy paint and plastic bottlecaps. Amazing! I’d been wanting some custom stamps but didn’t think cutting them out of erasers with X-Acto knives was going to go well.

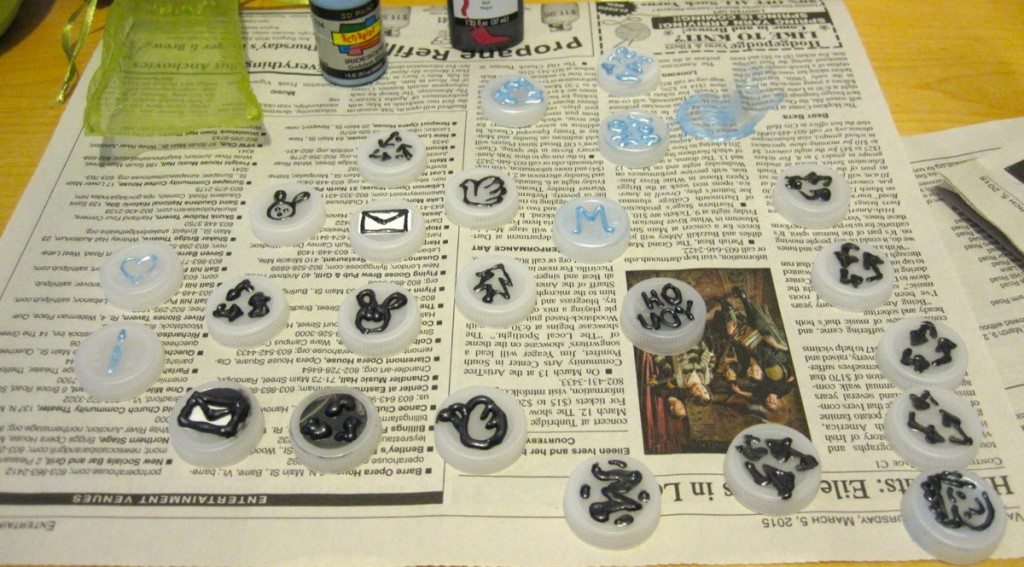
Making stamps from bottlecaps and 3D paint.

The stamps I wanted were planner stamps: a recycle symbol to mark recycling pick-up days, and an envelope back to make occasions for which I want to send cards. That way they could be large and visible without really taking up space, because I could write over them easily. I indentured my husband to play with paint with me.

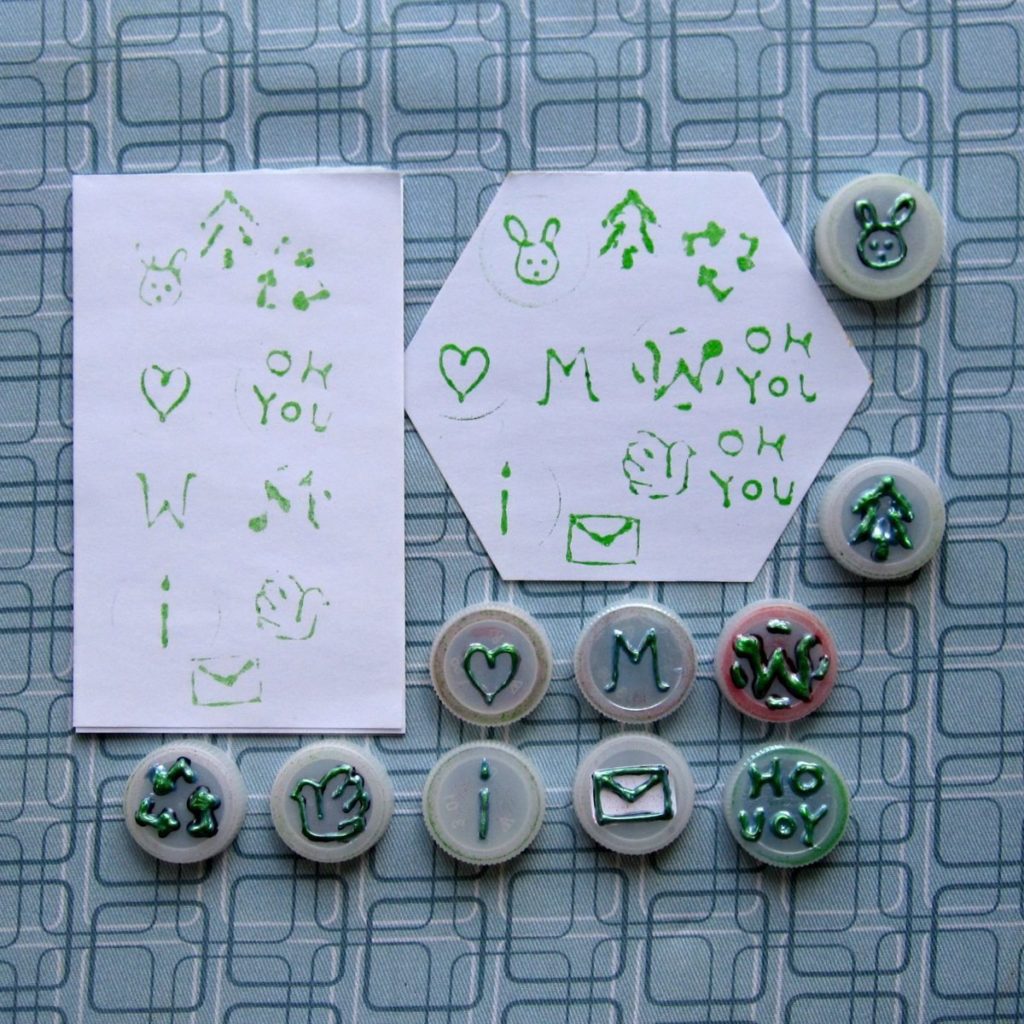
I had two kinds of 3D paint in my stash: Tulip dimensional fabric paint and Scribbles 3-dimensional paint. The taller bottle of the Tulip was easier to control (more in squeezing than aiming), but the Scribbles seemed to keep its shape better while drying – Tulip flattened out a bit. We found we needed 3 rounds to get truly good images. The papers in the picture below show the images after 2 rounds (rectangular) and 3 rounds (hexagonal) of painting – the third round was really just local touch-ups.

Stamps made from bottlecaps and three rounds of 3D paint; impressions after 2 and 3 rounds of paint shown.

As you can see from the Oh You stamp on the hexagonal paper, you still have to be careful and press on all areas of the cap to get a good impression. If you catch the paint at the right moment you may be able to flatten it down a bit while it’s dry enough not to stick but still soft in the middle; I was able to do that to some extent with the recycling symbol.

All in all, though, it’s a great idea – quick, easy to correct errors (more than just heightening low spots: you can see the giant smear of paint in the first image, and there were others on different sheets of newspaper), and fun.