Coffee cozy

I used to go to a coffee shop at least three times a week, and until I procured a good reusable mug, I tried to conserve resources by reusing the cardboard sleeves they provide for insulation on the paper cups. I would keep one in my purse (clearly this was at a coffee shop that didn’t pre-wrap the cups in sleeves). This pattern dates from that era, when I thought as long as I was keeping a cup sleeve on my person, it might as well be one that protected my hands better than a thin scrap of cardboard.
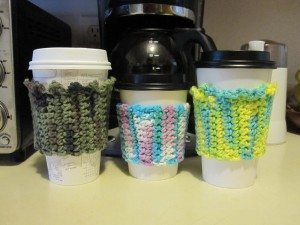
cozies - front

This pattern is highly dependent on gauge, or at least the row height part of gauge. With worsted-weight cotton yarn and a G hook (4.25mm), I stitch 6 rows in 1.75 inches. It could be a little tighter or looser, but if your gauge is very different from mine your sleeve will not fit well on the cup.

The basic idea is to make a tall rectangle of mostly single crochet, with the occasional row that gets taller as it goes across, to shape for the flare of the cup sides. My sleeve is 9 stitches across, and the shaping rows go sc 3, hdc 3, dc 3. They are all even rows, so they won’t cancel each other out.

Chain 10. All rows will have 9 stitches.
1-3. Sc across; ch 1, turn (3 rows).
4. Sc 3, hdc 3, dc 3; ch 1, turn.
5-11. Sc across; ch 1, turn (7 rows).
12. Sc 3, hdc 3, dc 3; ch 1, turn.
13-17. Sc across; ch 1, turn (5 rows).
18. Sc 3, hdc 3, dc 3; ch 1, turn.
19-25. Sc across; ch 1, turn (7 rows).
26. Sc 3, hdc 3, dc 3; ch 1, turn.
27-29. Sc across; ch 1, turn (3 rows).
Align the top of row 29 with the starting chain. Sl st across to join. Ch 1; FO or proceed around the top of the cozy to make a decorative edging.
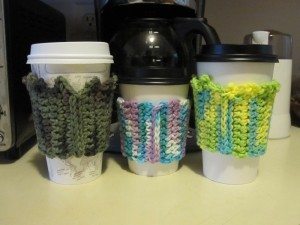
cozies - back

The white/blue/purple cozy is undecorated. The green “camouflage” cozy has a modified picot edging: [sc, ch 3, sl st] in same st, separated by 2 sl st apiece except the first and last, which are a bit further apart. It makes me think of Oscar the Grouch wearing a crown. The green/yellow/blue cozy has ch-3 alternating with sl st all around, one sl st every other row of sc, two in the top of each dc, one in the bottom of each dc, and two when I got back to the seam.
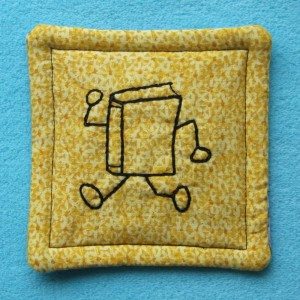
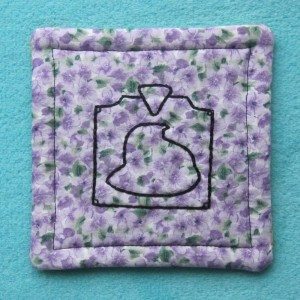
Plush fabric coasters

Sometimes, an ordinary fabric coaster doesn’t suffice. At least, that’s what my sister told me a few years ago. Her water bottle at work was sweating through the paper towels she used as coasters. In those situations, you need terrycloth.

I made her one then, and decided to make her another one this year featuring some of her favorite hobbies.

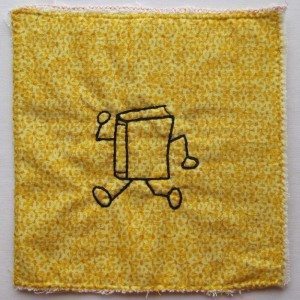
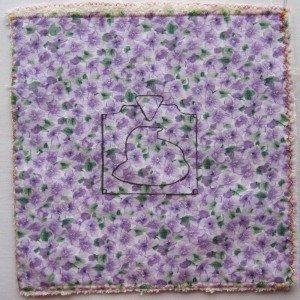
finished ballycumber face finished marker face

I use a double layer of terrycloth and made the coasters a bit larger than my usual ones to accommodate the thickness. It is also much easier to quilt the sides individually than the whole coaster together – and in this case I think it counts as quilting rather than “quilting.”

I don’t have records of measurements and so forth from the previous coaster; this time I cut fabric into approximate squares 7″ to 7.5″ on a side. After finding the images I wanted to use, I traced them onto the fabric (roughly centered) with a fabric marker. Finally, I zigzagged them onto terrycloth and then cut them out, in an effort to reduce the amount of terrycloth lint in my sewing machine.

The quilting on the previous coaster was your usual concentric squares and parallel lines, but this time it was accomplished by embroidering the images. I covered and widened the marker lines with stitching through both the fabric and the terrycloth.

stitched ballycumber unstitched peep in historical marker

When I went to construct the coaster, I decided on a 5 1/4″ square. From the center of each image I marked out 2 5/8″ in each direction, discovering they were not at all centered on the fabric, and drew in the stitching line for the outer seam with a pen. I stitched around each face individually. To align the faces, I put a pin through each corner of the stitching on one face, with the pinpoint on the fabric side, and then put the pins through the corresponding corner, fabric to terrycloth, on the other face. “Up” is the same direction on each. After pinning, I stitched around the previous stitching lines, leaving the middle of one side open. I trimmed the seam allowance to between 3/8″ and 1/2″ and then turned it right-side-out, working the corners as far out as I could. I hand-stitched the opening shut and then top-stitched by machine between 3/8″ and 1/2″ from the edge (evenness was hard).

Incidentally, the yellow side of the coaster features Ballycumber, the yellow book mascot of Bookcrossing, a world-library project. The other side is for Markeroni, a historical marker with my sister’s Markeroni mascot on it. The colors even fit: many historical markers are green, and Peep the mascot is lavender. (I think. He may be a well-traveled pink.)

Wishes won’t wash dishes

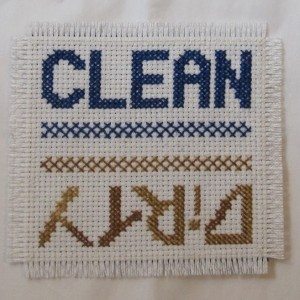
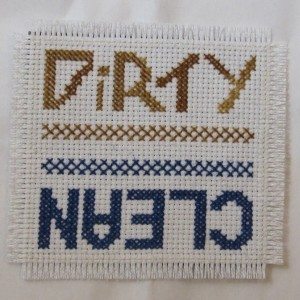
Now that I have a second person in the house, dishes get done by someone who is not me (this is a wonderful thing). Because of that, it became a Good Idea for the dishwasher to indicate whether the contents are clean or dirty. Being me, I designed such an indicator from scratch. It’s a cross-stitch square to be applied to a piece of self-adhesive magnet sheet.

magnet clean side up magnet dirty side up

This one isn’t actually ours, it’s one I made for a friend, which is why it looks pristine. The pattern is available as a pdf download. Colors are not included; I used unlabeled floss left over from other projects, and neither of them appears to be DMC (according to my color card).

If you want to make one that looks like the one above, you’ll need a crisp dark blue floss and one that variegates between tan and sand color. Don’t worry about matching up the colors in the variegated side; sudden changes, stitches that are half one color and half another, and pools of one or the other extreme color add to the “dirty” vibe. I used 2 strands on 14 count Aida; you might decide the fuller look of 3 strands would be better.

After stitching the middle, I used a single strand of white floss to secure the edging inside the fringe (which had yet to be cut) with a neat whipstitch. I secured each end of each strand in the colored floss of the interior, came out one square away from the image, and went back down two squares outward of that. Repeat in the next square over, so the back of the work shows gently slanted stitches. At the corners, five stitches share an inner corner.

For extra security (our magnet is showing most of its wear in the fringe region), I backstitched across the middle of the whipstitches all the way around and out to the edge of the whipstitch (i.e., the 2nd and 4th whipstitches sharing an inner corner actually share two inner corners, because a second stitch goes from their outer end to the corner of the backstitch line). This thread was also secured in the colored stitching.

To make it easier to remove the magnet from the dishwasher without pulling the fringe out, I wanted to bevel the magnet with my utility knife. However, I realized it was far too thin for that, so I beveled it by rubbing the outer edges on sandpaper. After wiping off the dust, I peeled off the paper backing and pressed it onto the back of the stitching.

Finally, for extra extra security, I taped off the fabric outside the white stitching with masking tape and brushed a thin layer of Mod Podge on the interior. After that dried, I peeled off the tape, trimmed the fabric to 3 rows outside the white stitching, and pulled out the crosswise threads of the fabric outside the white stitching to make fringe.