Knook review

I received a Knook kit for Christmas this year. This is a way to knit with a crochet hook; the hook has a hole through it near the foot, you thread a cord through that hole, and the cord acts as your left needle. To start, you chain as usual for crochet, but then yarn wrapping and hook insertion change to methods standard for knitting rather than crochet.

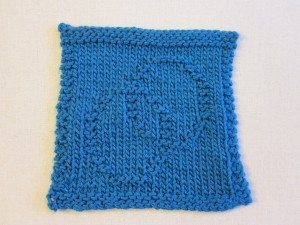
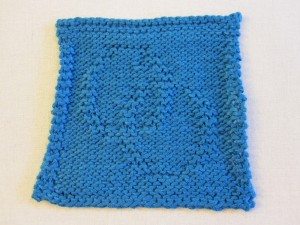
I made an entire project with the Knook, the Circle of Love Mini-Cloth. The included Knook instructions only tell you how to cast on, knit, purl, and bind off, not how to slip stitches, increase, or decrease, so the patterns you can make are somewhat limited. Fortunately there is a large community of people designing simple squares for knitting, to use as washrags and so forth – two others I really liked showed a bat and a squirrel.

knook project front knook project back

You can see blocking couldn’t cover up the tension change that happened as I proceeded.

Verdict? The Knook is good at what it does. The instructions are clear, the methods are pretty easy, the materials are good quality, and it really is knitting. However, I doubt I will ever use it again. I was faster at knitting when I was stumbling along with two needles and no real idea what I was doing. On the other hand, I believe that if I do try knitting again, I will be far better at it having used the Knook. I think it helped me understand how knitting works.

In sum, I would recommend the Knook as a gateway to actual knitting, a lesson allowing you to learn the motions of knitting and purling separate from the management of knitting needles. If you want to knit much of anything, however, I would say buck up and learn to do it the usual way.

Snowflakes for you

In the spirit of my emergency pumpkins, I have a brief seasonal pattern for you today.

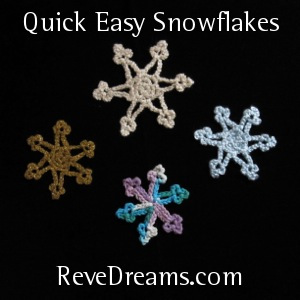
snowflakes!
You like the fancy picture?

The pattern! Abbreviations and links to general instructions here.

Quick Easy Snowflake
Ch 4 and join with sl st into ring.
Ch 1. *sc into ring, ch 3* three times (3 sc, 3 ch sp made).
Join to first sc with sl st; ch 1. In each ch sp: sc, ch 2, sc, ch 2 (6 sc, 6 ch sp made).
Sl st in first sc to join. Sl st into next ch sp, ch 1.
*Sc in same ch sp; ch 8, sl st in 4th ch from hk. Ch 4, sl st in same ch as previous sl st. Ch 3, sl st in same ch as previous sl st. Ch 3, sc in next ch sp.* around (6 points made).
Last sc will envelop the sl st that preceded the first *…*; sl st into the ch 1 immediately after that sl st. FO.

[pardon my edit, here and below. that last ch 3 used to say ch 4; that was in error from a previous version of the pattern. the legs decidedly lean if you ch 4. apologies for the error!]

I like to pull that last yarn end to the back of the snowflake through the chain space that those first and last single crochets were made into. Weave in the ends, yank on opposite pairs of points to straighten them, tug the side nubs of each point apart. Sometimes the points want to lean a bit, which can be helped by holding down the beginning chain of each point while tugging the first side nub away from the center of the flake. If your snowflakes want to curl up, iron them (all snowflakes above were ironed). You can stiffen them like thread crochet snowflakes, if you want to hang them.

The yarns used above were Lion Brand Vanna’s Glamour (gold), Red Heart Holiday (off-white), Caron Simply Soft (light blue), and Lily Sugar ‘n’ Cream (variegated). All were made with an F/5 hook (3.75mm).

“But, Reve,” I hear you saying, “one of these things is not like the others!” I applaud your Sesame Street reference and reply with another pattern!

Quick Easy Snowflake – Variation
Ch 4 and join with sl st into ring.
*Ch 8, sl st in 4th ch from hk. Ch 4, sl st in same ch as previous sl st. Ch 3, sl st in same ch as previous sl st. Ch 3, sl st into ring* six times (6 points made).
FO. That’s all!

Wishstones

The hubs was taken over by the urge to make things with clay, so I sat with him with the idea of making a little soap dish. We recently bought some solid shampoo, and I thought it would be nice to have something with narrow drainage slots, so when it gets smaller it doesn’t want to slip through and fall. I finished the dish – really more of a tray – earlier than he finished his doodads, though, and since I had chosen Fimo Effects in “granite” for the dish, I rolled my leftover worked clay into a rock shape. And then remembered something!
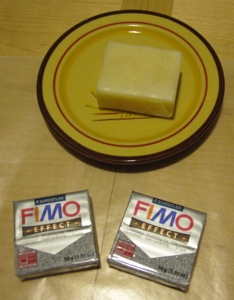
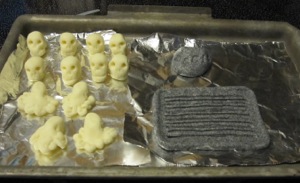
soap dish materials first round

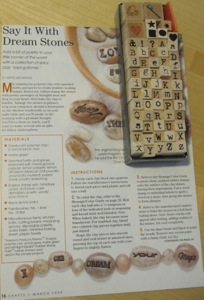
Years ago I pulled a craft idea from a magazine. I assume it was Better Homes and Gardens, but the page doesn’t say and the article doesn’t seem to be online anywhere. The craft was called “Say it with Dream Stones” and was about using translucent polymer clay and spices to make stones, imprinting them with rubber stampers before baking, painting the impressions but wiping off the excess so only the stamp would be dark, and then varnishing them. I just so happen to have a set of typewriter letter stamps, which I retrieved post haste.
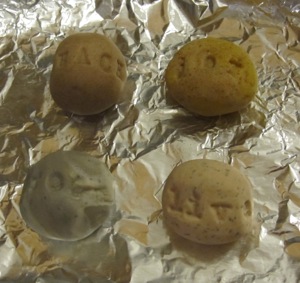
materials after baking, before painting

The second picture is another set of wishstones, after baking but before any painting or varnishing. Those were made with Sculpey III instead of Fimo.

I have close-ups of the second round of stones, linked from their names. “live” is beige clay (really a sort of pink) with mace, preground black pepper, and celery seed mixed in. “dream” is pearl clay with black pepper and poppy seed, marbled with elephant gray clay with salt and poppy seed. The gray really didn’t show the spices through, it just became more textured. I thought the salt would perhaps show and add some sparkle, since the pearl clay has some shimmer, but it did not.

“REACH” is translucent clay with cinnamon, and “joy” is translucent clay with turmeric and mace marbled with translucent clay with coriander and chili powder. The translucent clay darkened quite a bit when baked – my husband described it as being “like teeth” when it was baked, which is slightly translucent and slightly yellowish, and when it is unbaked it is plain white. I think the spices may have shown through more when it was baked as well. This was better in the case of “joy”, which was an unnatural yellow in the turmeric-colored portions before baking.

I painted the words on “magic” and “dream” with a mix of metallic black and silver acrylic paint. “REACH” is gold acrylic, and “live” and “joy” are both a mix of gold and copper.

The unmarked stones were experiments. The marbled one is leftovers from “dream” mixed with turbinado sugar. The unappealing gray one is elephant gray clay with turmeric (the mistake), salt, poppyseed, paprika, and chili powder (the efforts to rescue it), with a surface rub of paprika and black pepper. I painted both with clear nail polish. In the case of the marbled stone, this was so the sugar wouldn’t dissolve in a water-based finish, and in the case of the gray stone, it was an effort to salvage its attractiveness.
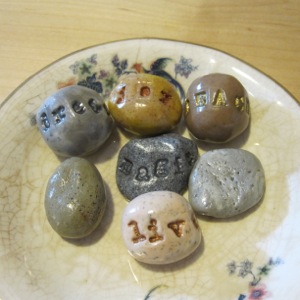
all the wishstones

This would be an easy craft to do with children or in a group setting, provided you had the capability to bake the clay and the time to wait. It could be great in a daycamp type setting, where the kids could make the stones one day, someone in charge could bake them that night, and then they could paint the letters at the start of the next day and have them dry in time to take them home. The varnish is really optional.