I taught my husband crochet last fall, and he took right to it. He’s completed three projects, including a scarf he gave me at Christmas, and has two in progress. He got his own embroidery scissors and set of hooks for Christmas, and I gave him some large pins last week for his upcoming multi-piece projects. Today I’m giving him a place to put those pins.
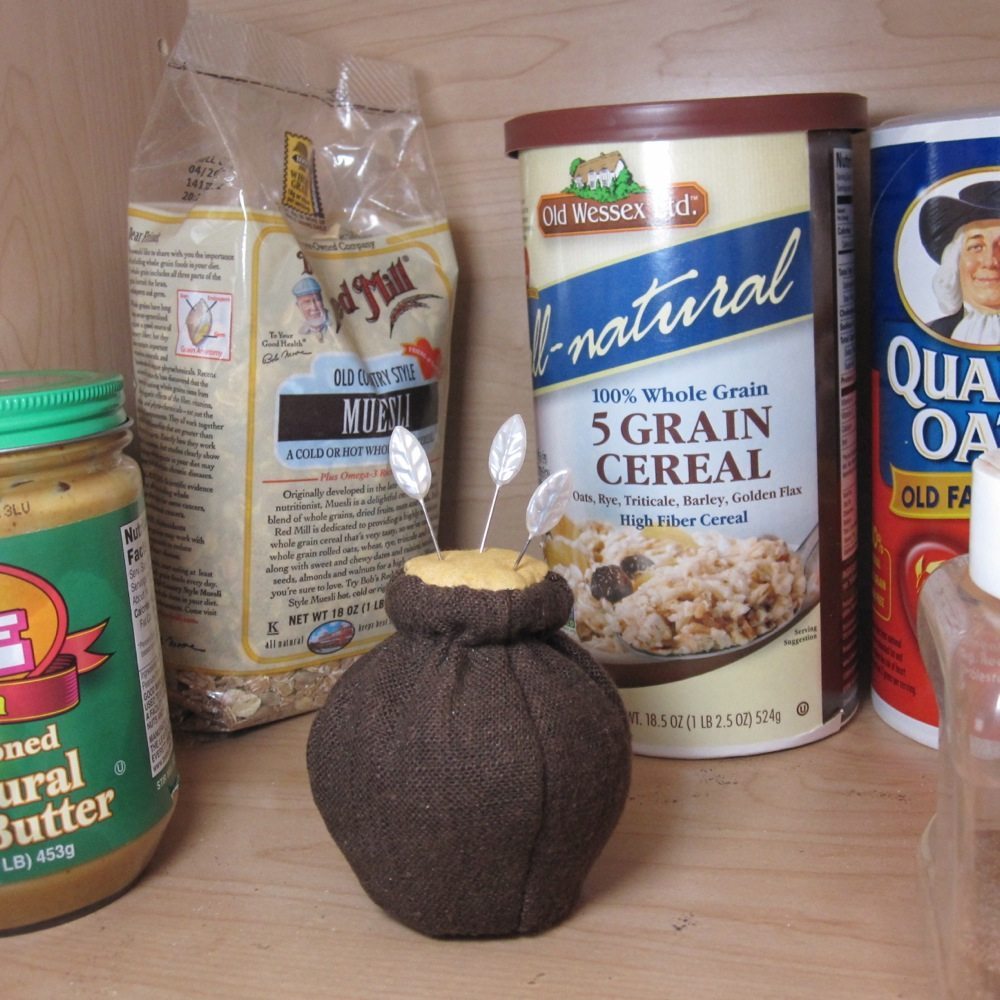
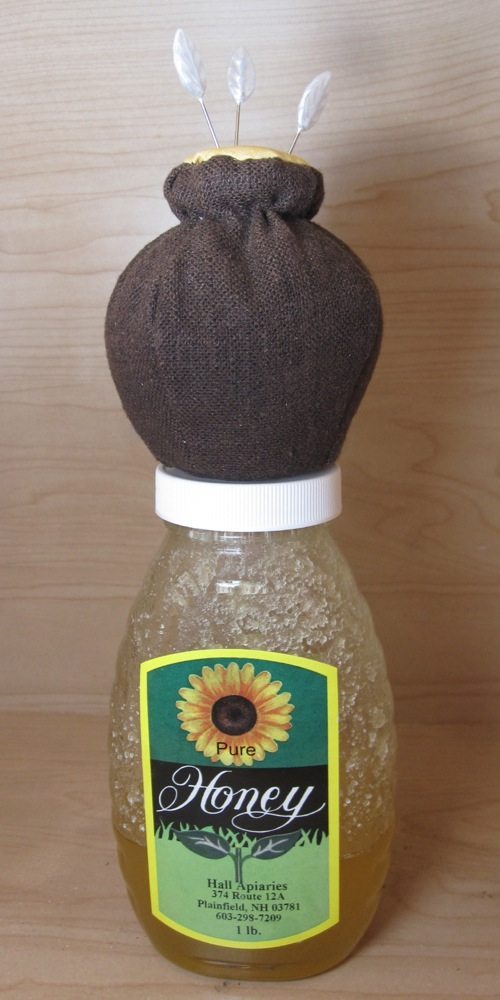
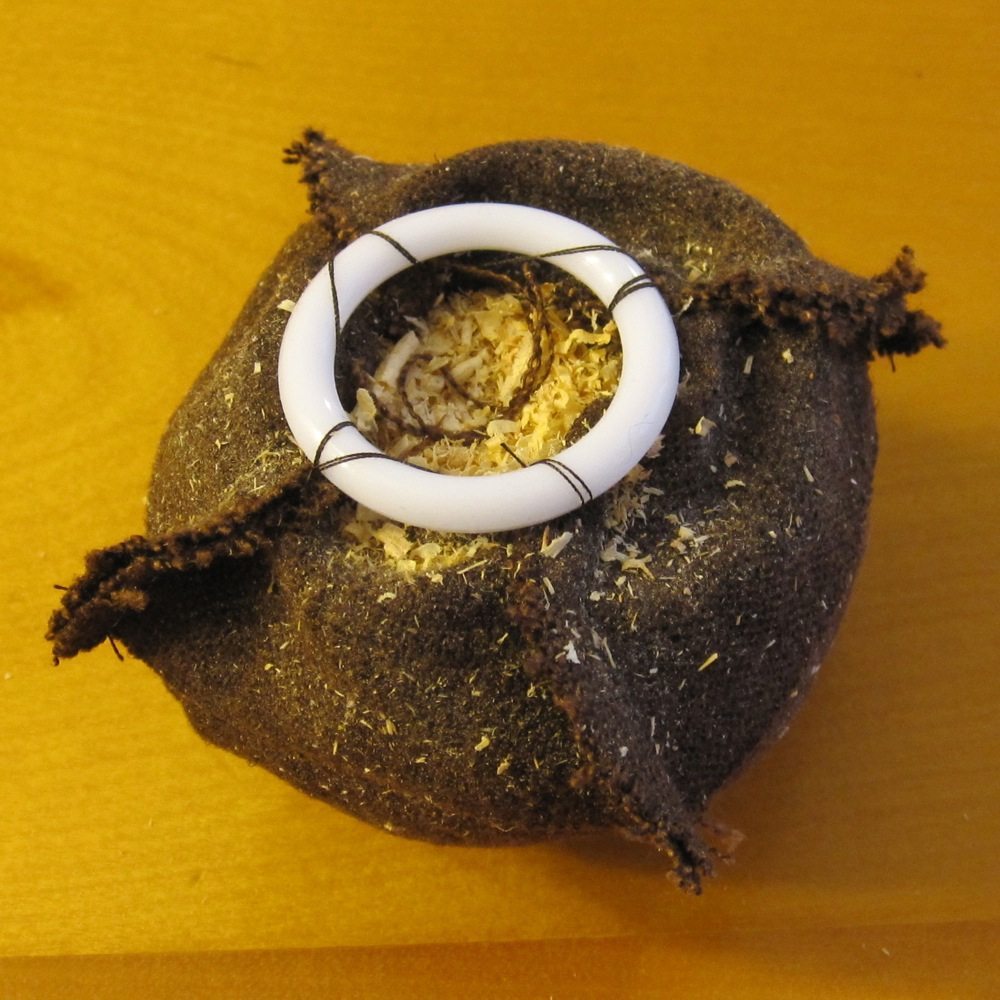
Honey for my honey! I began by tracing the outline of a Winnie-the-Pooh type honey pot, making four identical, symmetric pieces (of course it came out with much more extreme contours than that). I left out the tuck-in below the top rim and extended above the rim symmetrically to below it. After stitching those pieces together into a contoured tube, I added a disk of fabric across the bottom and sewed in a plastic ring (1.5″ diameter, outer edge) to hold the shape.
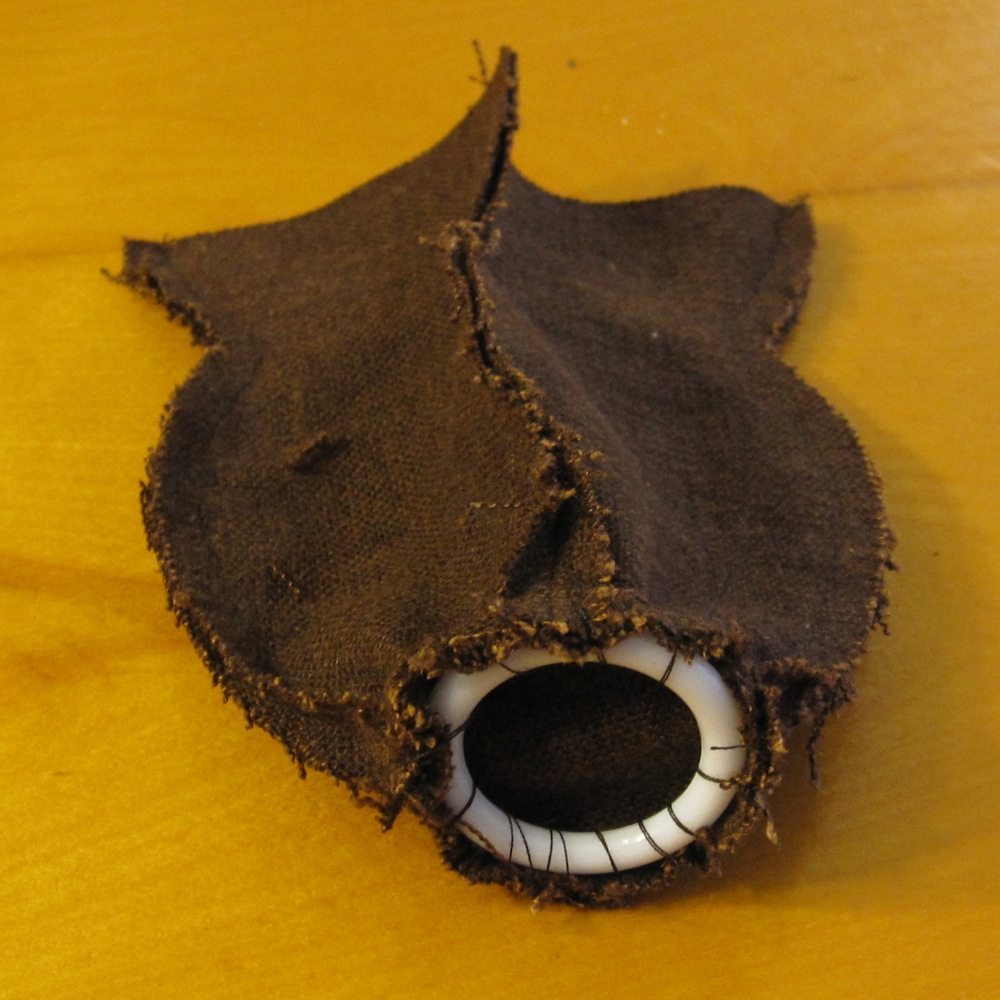
For the top rim, I had marked how far up the tuck-in should be and ran a running stitch around that part by hand. I filled the pot most of the way with sawdust, gathered the fabric until the opening was not much more than an inch across, then laid a second plastic ring above the gathers and took a few stitches to hold it in place. I folded the fabric at the rim to the inside of the pot.
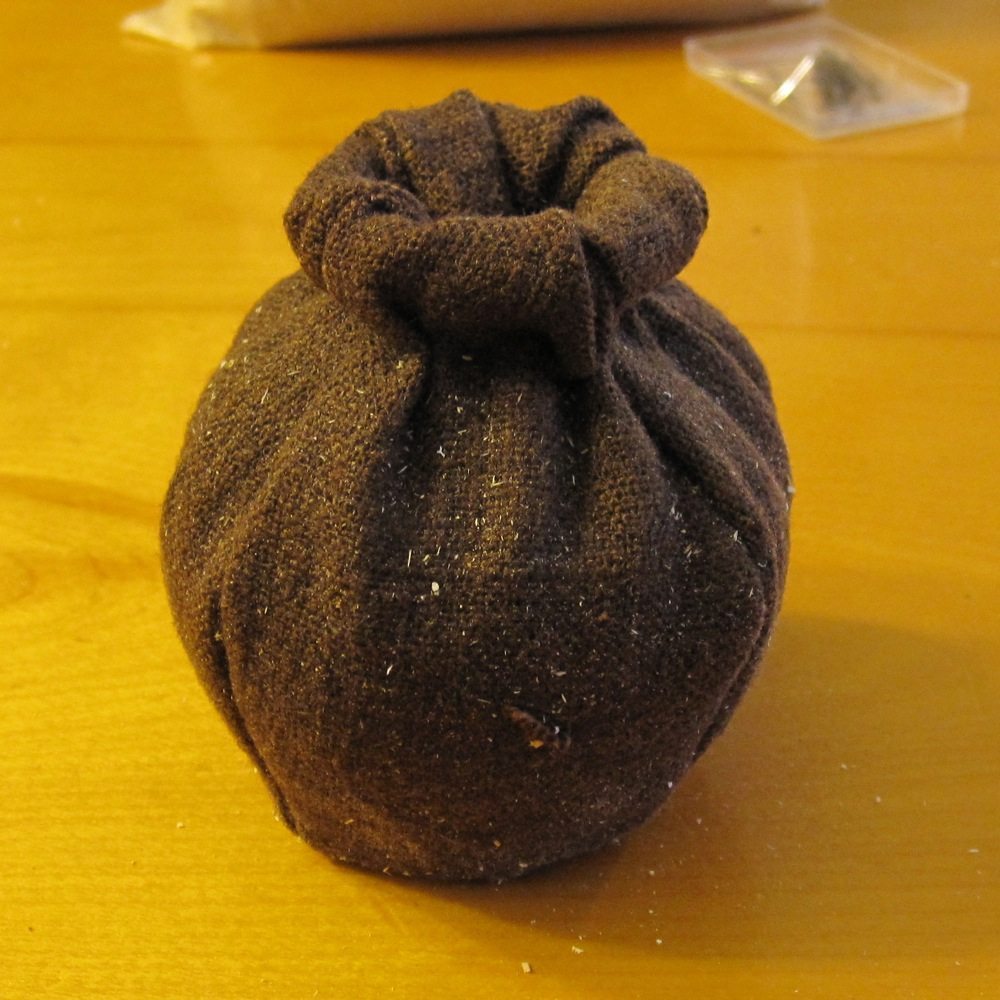
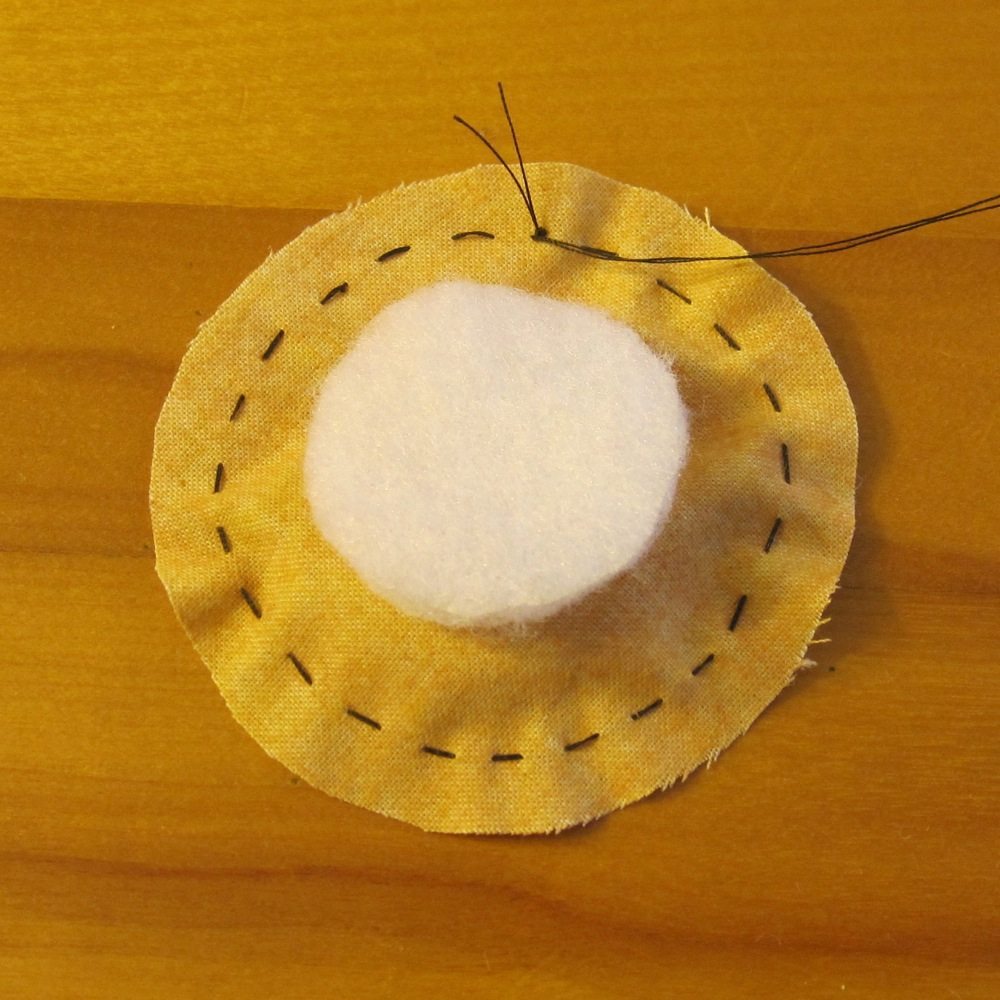
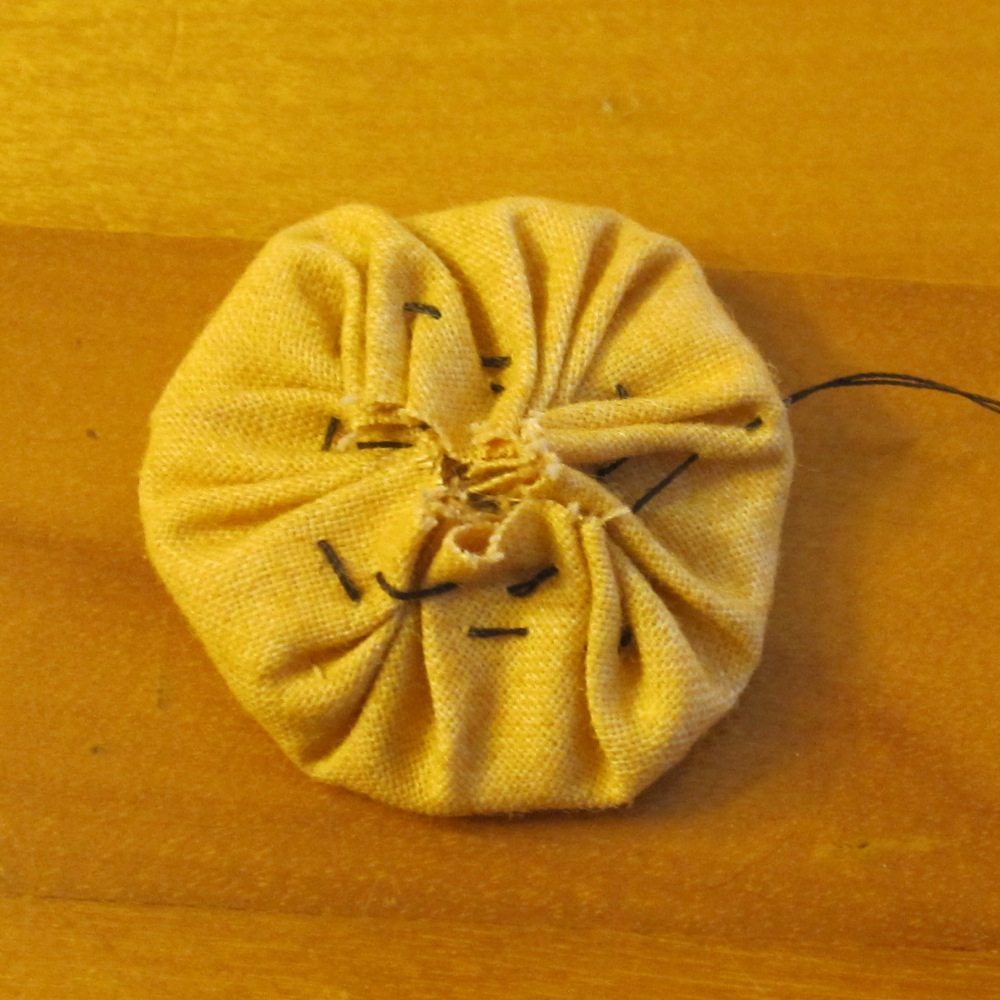
For the honey, I first had to locate proper color fabric! That turned out not to be possible in my stash, so crayon tinting came to the rescue. I cut a 2.5″ circle of honey fabric, ran a gather stitch around about 1/4″ from the edge, and laid two 1.25″ circles of batting on it to keep the surface of the “honey” smooth. I drew up the stitches to make a disk and stitched across roughly to keep the fabric contained. Finally I topped off the sawdust on the pot, laid the honey on top, and stitched it on. I used a sticky lint roller to remove the sawdust from the outside of the pot.
If you want to make your own honeypot, I have a pdf pattern of the pieces, with brief instructions. Enjoy!
This one surely sweetened up my morning!
I am so glad!
Cute gravitar!
I saw this and thought of this post:
http://peneknitcrochet.blogspot.com/2011/09/hook-monster.html
So cute!
Nice find! Maybe I’ll get some googly eyes and try this. Also, googly is defined as “a ball bowled with a deceptive bounce.” I find that amusing:)