When I made my new weekender, I made a little matching tag that had my name, number, and address written on muslin in fabric pen. I didn’t have time to make a little strap to hang it from the handle, but in the meantime I decided if I were going to keep the bag for as long as I hoped and put a lot of effort into constructing an attractive tag, it should be one for which the information was changeable.
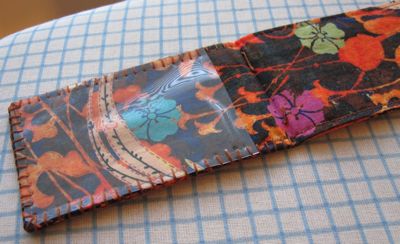
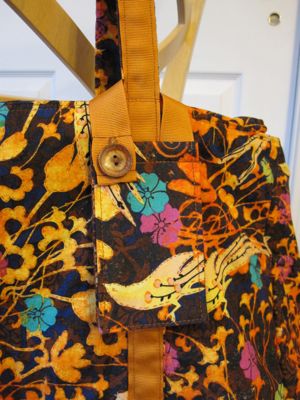
When I returned from the inaugural trip with my bag, I did just that. The tag buttons onto the handle of the bag so that it can be removed for bag-laundering purposes, and inside there is a clear vinyl pocket slightly larger than a business card.
You need small amounts of fabric, interfacing, and clear vinyl, and a button and ribbon that coordinate with your fabric. I had the vinyl on hand from a project I did ages ago, pulled a lovely wood button from my late grandmother’s button box, and had the rest leftover from bagmaking.
Cut two pieces of fabric and one of interfacing, 10 1/2″ by 3 3/4″. Cut one piece (or two pieces, if desired) of vinyl, 3 7/8″ by 2 5/8″. If your button is between 3/4″ and 1″, cut 10 1/4″ of ribbon of comparable width; if your button is much larger or smaller, lengthen or shorten the ribbon by twice the difference in button diameter (or don’t; the strap will be longer or shorter but there’s give to it).
Pin the fabric right sides together with the interfacing against one wrong side and stitch together with a 1/2″ seam allowance, leaving an opening on one long side for turning. Trim the corners. I pressed the seam allowance out before turning it so it would be easier to get crisp edges when I turned.

Once you’ve turned, topstitch around the edges, fold it in half, and press a crease into it. The next step is to stitch the vinyl on to one or both sides. If you are only doing one pocket and have a preferred front side to your tag, put the vinyl on the back side. First make sure it fits, with about 3/4″ clearance between it and the fold line. Trim as needed. I used a nail to perforate the vinyl so I could use my regular light needle without trouble. The nail had a big flat head and I was able to make the holes pushing it with my thumb. I also trimmed a tiny bit off of two corners that shared a short edge, to be at the corners of the fabric. I made a template for the holes and scanned it in before poking holes in it. I used blanket stitch to attach it to the fabric, going only from fold to fold because I am lazy. I didn’t bother being neat by the fold because the last half inch will be hidden away.

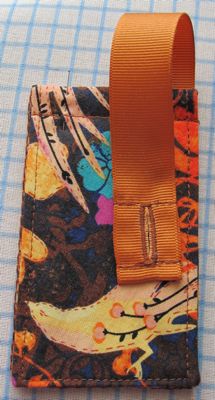
Fold the tag in half and stitch a half-inch from the fold to make it want to stay shut. Now prepare the strap. Since my button was 7/8″, I turned one end of the ribbon 1 3/8″ and then folded it in again. You want your button diameter plus 1/2″ to be the depth of the first fold. Stitch it a quarter inch from each fold line. On the other end, fold it 1/4″ and then fold it again, and stitch very close to the first fold line. You can decide whether to fold them toward the same side of the ribbon or opposite. I did the same side, but opposite would be more standard for how it’s going to attach to the tag.

Make a buttonhole on the side with the deeper fold, essentially down the center of the ribbon from stitch line to stitch line. It will be a snug fit for your button, most likely, but you don’t want this to come off accidentally. Pin the opposite end of the ribbon to the back of your tag (the side with the pocket, if there is only one) so that it lines up with the outside edge and slightly overlaps your original stitch line, and restitch along that line to attach it. Line the other end of the ribbon up with the opposite outside edge and mark how far in the center of the button should be.

Finally, sew on the button, centered just above your original stitch line and at the marked distance from the edge. Button the tag onto your bag!
