Giant curtains… of doom

I haven’t done much of my own sewing recently, and it’s because (as I have mentioned offhand) I am sewing curtains for a client. Big curtains. Big, thick curtains. They are insulated, with a layer of fabric toward the window, some padding, a layer of mylar, some more padding, and a layer of fabric toward the room. Fortunately all but the last layer of fabric come already attached together, but the whole shebang is still incredibly heavy and awkward. With just my regular machine-in-cabinet, I can’t do them at all. My trusty 1984 Singer can sew them, but there’s no chance of a straight seam with the curtain flopping around dragging itself all crookedly. They’re big enough that rolling them up out of the way on the side only increases the problems fore and aft, and there’s no way to roll them up in both directions simultaneously.

My solution, after crying, was to move a drop-leaf table behind my sewing machine and a filing cabinet to the left in front of it. I also have an end table/plant stand in front of the filing cabinet; it is significantly shorter but still a lot taller than a chair, and while something taller than it would be better, it is still an improvement over just the filing cabinet. The filing cabinet, end table, and I hold the curtain before it goes through the machine, and the table catches it as it comes out the back.

from the door from the machine

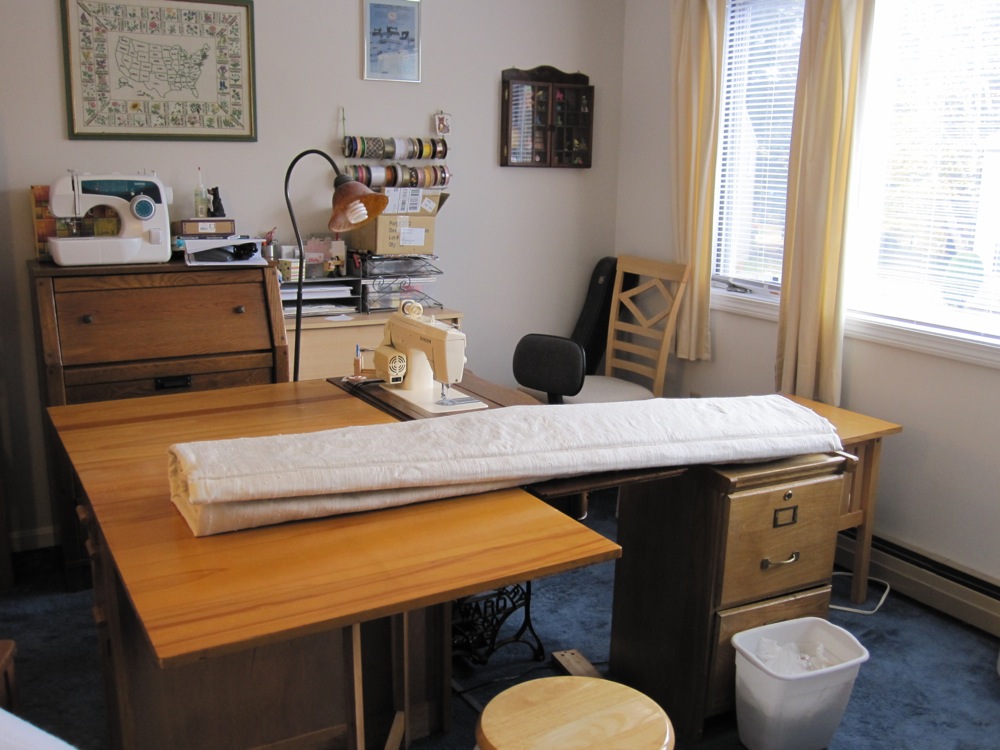
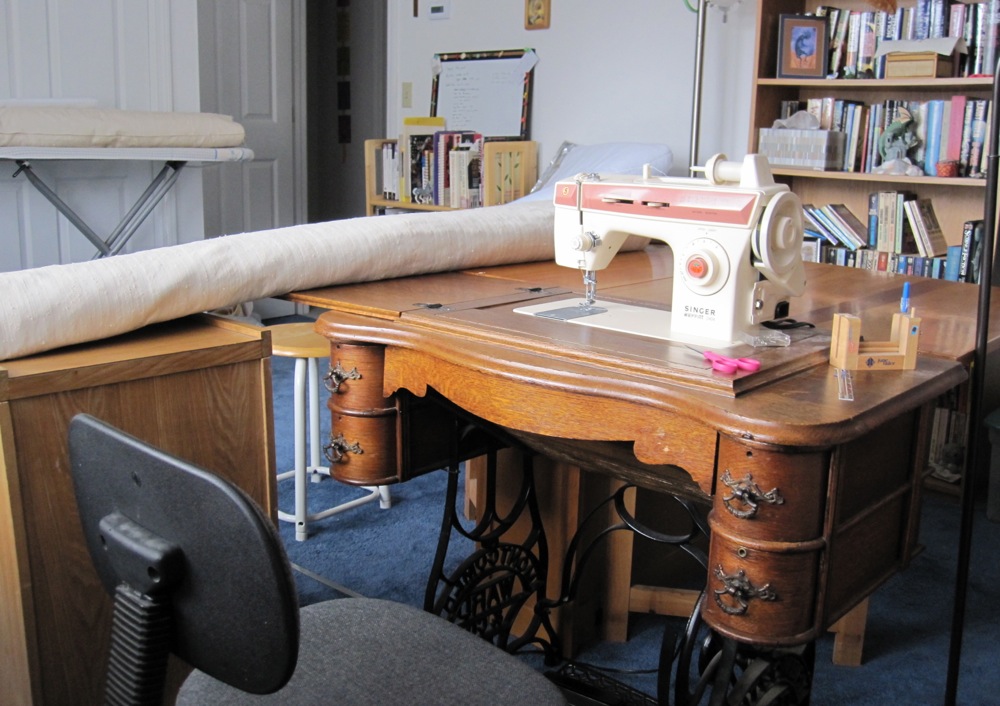
This improved the situation immensely. I also had to lower the thread and presser foot tensions to avoid skipped stitches and make the curtains feed more smoothly.

I later talked to a quilter and she told me she has a table behind her machine and a table to the left of her machine. If I hadn’t exhausted all the appropriate-height furniture in the house (well, there’s the dining table, but that won’t fit in the sewing room now), I would be extending my support system more to the left. Which would leave no floor space on which to work, but you can’t have everything. I do feel somewhat like an executive behind a big desk.

Anyway, I’m just sharing in case anyone out there has to sew big, heavy items, and was looking for others’ experience. I’m looking forward to having space in my sewing room again, and catching up on my own sewing projects!

A drop of decoupage

I acquired a strange obsession with Mod Podge after a friend brought some over the night we made pie charts, when I used it to make the candy wrapper collage shown on my About page. I also went through a long phase of saving all the wine, beer, and other alcohol labels I could, going to lengths to soak and scrape them off the bottles. I have long since stopped that, as it is far more laborious than it is worth to me, but I had an envelope of labels and finally (years after the pie chart night) purchased my own Mod Podge.

Also in my possession was a wooden box with grapevines on it.

closed box

So what is one to do but decoupage wine labels all over the interior and foot of the box?

open box bottom of box

I learned that Mod Podge is not the best glue, though it is an adequate glue. I kind of wish I’d glued the labels down with rubber cement originally and used the Mod Podge only as a finisher, but it worked out. I used many, many layers of Mod Podge. The oval label in the middle of the interior bottom had a ridge around the edge where it was poking up, and my efforts to sand that down led to the entire coating on the oval label peeling off! Fortunately, it only peeled off exactly over the oval, which meant further layers of Mod Podge helped smooth the surface – there was still a buildup of Podge outside the oval, so the ridge was diminished. I did, however, add a label from the neck of a vodka bottle to cover where I’d sanded off the oval label’s color.

box ceiling box floor

All in all, I would call this a fun and incredibly easy project, though it takes a lot of time. Not at once, but spaced out over a number of days. I used a foam brush and wrapped it in aluminum foil between uses, though I still had to replace it once or twice over the life of the project when it got gummy.

Wishstones

The hubs was taken over by the urge to make things with clay, so I sat with him with the idea of making a little soap dish. We recently bought some solid shampoo, and I thought it would be nice to have something with narrow drainage slots, so when it gets smaller it doesn’t want to slip through and fall. I finished the dish – really more of a tray – earlier than he finished his doodads, though, and since I had chosen Fimo Effects in “granite” for the dish, I rolled my leftover worked clay into a rock shape. And then remembered something!

soap dish materials first round

Years ago I pulled a craft idea from a magazine. I assume it was Better Homes and Gardens, but the page doesn’t say and the article doesn’t seem to be online anywhere. The craft was called “Say it with Dream Stones” and was about using translucent polymer clay and spices to make stones, imprinting them with rubber stampers before baking, painting the impressions but wiping off the excess so only the stamp would be dark, and then varnishing them. I just so happen to have a set of typewriter letter stamps, which I retrieved post haste.

materials after baking, before painting

The second picture is another set of wishstones, after baking but before any painting or varnishing. Those were made with Sculpey III instead of Fimo.

I have close-ups of the second round of stones, linked from their names. “live” is beige clay (really a sort of pink) with mace, preground black pepper, and celery seed mixed in. “dream” is pearl clay with black pepper and poppy seed, marbled with elephant gray clay with salt and poppy seed. The gray really didn’t show the spices through, it just became more textured. I thought the salt would perhaps show and add some sparkle, since the pearl clay has some shimmer, but it did not.

“REACH” is translucent clay with cinnamon, and “joy” is translucent clay with turmeric and mace marbled with translucent clay with coriander and chili powder. The translucent clay darkened quite a bit when baked – my husband described it as being “like teeth” when it was baked, which is slightly translucent and slightly yellowish, and when it is unbaked it is plain white. I think the spices may have shown through more when it was baked as well. This was better in the case of “joy”, which was an unnatural yellow in the turmeric-colored portions before baking.

I painted the words on “magic” and “dream” with a mix of metallic black and silver acrylic paint. “REACH” is gold acrylic, and “live” and “joy” are both a mix of gold and copper.

The unmarked stones were experiments. The marbled one is leftovers from “dream” mixed with turbinado sugar. The unappealing gray one is elephant gray clay with turmeric (the mistake), salt, poppyseed, paprika, and chili powder (the efforts to rescue it), with a surface rub of paprika and black pepper. I painted both with clear nail polish. In the case of the marbled stone, this was so the sugar wouldn’t dissolve in a water-based finish, and in the case of the gray stone, it was an effort to salvage its attractiveness.

all the wishstones

This would be an easy craft to do with children or in a group setting, provided you had the capability to bake the clay and the time to wait. It could be great in a daycamp type setting, where the kids could make the stones one day, someone in charge could bake them that night, and then they could paint the letters at the start of the next day and have them dry in time to take them home. The varnish is really optional.