Snowflakes for you

In the spirit of my emergency pumpkins, I have a brief seasonal pattern for you today.
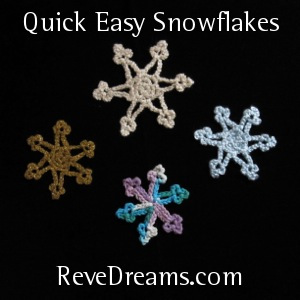
snowflakes!
You like the fancy picture?

The pattern! Abbreviations and links to general instructions here.

Quick Easy Snowflake
Ch 4 and join with sl st into ring.
Ch 1. *sc into ring, ch 3* three times (3 sc, 3 ch sp made).
Join to first sc with sl st; ch 1. In each ch sp: sc, ch 2, sc, ch 2 (6 sc, 6 ch sp made).
Sl st in first sc to join. Sl st into next ch sp, ch 1.
*Sc in same ch sp; ch 8, sl st in 4th ch from hk. Ch 4, sl st in same ch as previous sl st. Ch 3, sl st in same ch as previous sl st. Ch 3, sc in next ch sp.* around (6 points made).
Last sc will envelop the sl st that preceded the first *…*; sl st into the ch 1 immediately after that sl st. FO.

[pardon my edit, here and below. that last ch 3 used to say ch 4; that was in error from a previous version of the pattern. the legs decidedly lean if you ch 4. apologies for the error!]

I like to pull that last yarn end to the back of the snowflake through the chain space that those first and last single crochets were made into. Weave in the ends, yank on opposite pairs of points to straighten them, tug the side nubs of each point apart. Sometimes the points want to lean a bit, which can be helped by holding down the beginning chain of each point while tugging the first side nub away from the center of the flake. If your snowflakes want to curl up, iron them (all snowflakes above were ironed). You can stiffen them like thread crochet snowflakes, if you want to hang them.

The yarns used above were Lion Brand Vanna’s Glamour (gold), Red Heart Holiday (off-white), Caron Simply Soft (light blue), and Lily Sugar ‘n’ Cream (variegated). All were made with an F/5 hook (3.75mm).

“But, Reve,” I hear you saying, “one of these things is not like the others!” I applaud your Sesame Street reference and reply with another pattern!

Quick Easy Snowflake – Variation
Ch 4 and join with sl st into ring.
*Ch 8, sl st in 4th ch from hk. Ch 4, sl st in same ch as previous sl st. Ch 3, sl st in same ch as previous sl st. Ch 3, sl st into ring* six times (6 points made).
FO. That’s all!
Glue

At the Sew-Op, we have a lot of fabric that is too small to sew with, unless you are extremely dedicated. In looking for things that can be done with very small scraps, I found many projects that use Mod Podge to glue fabric to a number of different surfaces. With the idea that, project in hand, we might be able to donate our fabric to a good home (a local art gallery that holds classes and after school programs), I decided to test this Mod Podge theory.

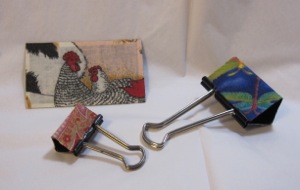
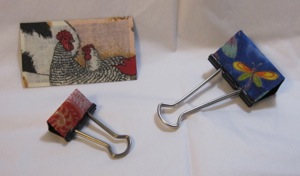
I used ordinary cotton calico, the kind sold for quilting. I have some doubts that Mod Podge would work terrifically well to glue anything very heavy or thick. I cut pieces to wrap around two binder clips and cover a promotional magnet, brushed Podge on the surface of the item, pressed the fabric onto it (this required trimming to fit in all cases, more so for the binder clips), and brushed more Podge onto the surface of the fabric.

mod podge projects mod podge projects, alternate view

As you can see, it worked beautifully, with the caveat that the color of the base shows through the fabric a bit. On the other hand, the glue made the fabric sparkle a bit, which was an unexpected bonus.

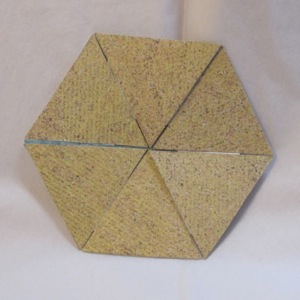
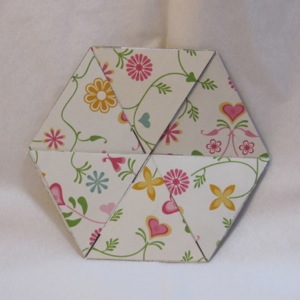
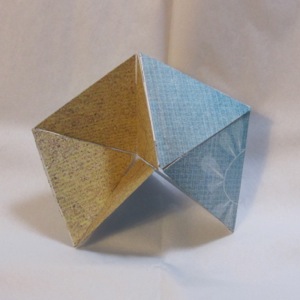
If you are disappointed in the post so far, never fear, there’s more. Recently a video was going around about flexagons. It made me think of the old fortune tellers we made in grade school (I’ve also heard them called cootie catchers) and I decided to make one. I was ambitious and cut out pieces for a dodecahexaflexagon (twelve faces, each a hexagon, two of which show at any given time), but came to my senses and made a trihexaflexagon first. I cut six equilateral triangles of each of three decorative papers, two inches on a side, and a bunch of half inch squares of plain paper for the hinges. I glued them together using rubber cement, following the instructions on the Flexagon Portal, with only a front side on one end. After folding the whole thing up I glued the back on.

face 1 face 2

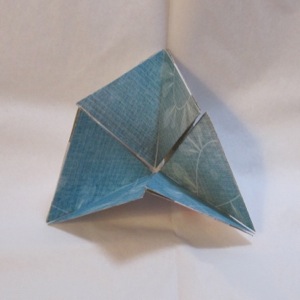
Changing from the second face to the third…

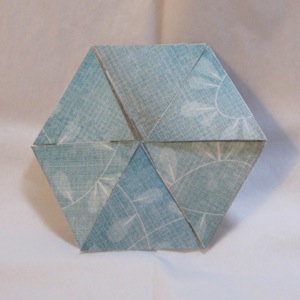
from 2 to 3 face 3

And back to the first…

from 3 to 1

Even more recently I discovered an old flexagon I made in middle school (I think). I’m not sure whether it officially counts as a flexagon, but it has more than two faces. In fact, it has four, and each consists of six squares in a two by three rectangle. With Thanksgiving I did not have time to explore it for this post, but it will appear at some point in the future!

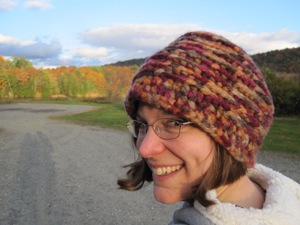
New hat!

Saturday was my second crochetiversary, which makes today my second crochetiversary, observed. So it is only fitting to have a crochet post.

I have been on a quest for a winter hat that fits my big head and doesn’t become completely useless when the wind blows. Last time I used two strands of worsted weight held together, and while my Strawberry Shortcake hat is a favorite now, it’s not what you would call warm.

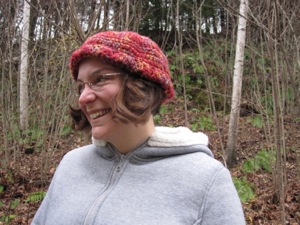
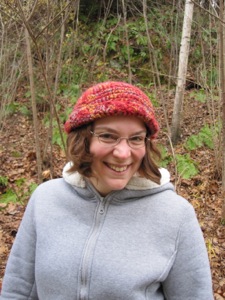
side view front view

I made a second hat shortly after the hat above, also with two strands held together, and while it was more snug, it still wasn’t warm. I tried lining it with a second layer of hat, but then it was just floppy and unwieldy – without really being that much warmer, because now it didn’t come down far enough to protect my forehead or ears.

Enter two skeins of Lion brand Jiffy Thick & Quick and my N hook. There aren’t many pure-acrylic bulky yarns that are easy to crochet (the homespun types cause me no end of aggravation putting the hook through them instead of around them), and I can’t have even 20% wool against my forehead without being itchy to distraction. Fortunately, this kind comes in a variegated autumn color scheme I like.

Following the idea of a pattern I saw online, I made it from the bottom up. This made fitting a lot easier, since from the start I had something I could actually put on, rather than resting a pancake on my head and wondering “should I stop increasing now?” For extra density I used back post half double crochet, and for ease of real-time fitting I started with foundation half double crochet. For the latter, I did exactly futuregirl’s method for foundation single crochet, including starting with a ch 2 (ch 3 was too much, oddly), but with a yarn wrap before the first hook insertion. Back post is when the post is to the back of the stitch; it is the one where your hook goes into the back of the fabric, around the post, and back out through the back of the fabric.

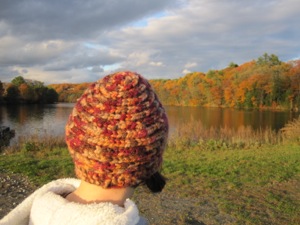
front back

I realized I don’t know how to decrease properly in hdc, and instead of looking it up I made it up: make an hdc except for the final yarn over/pull through (3 loops on hook), pull up one loop in the next stitch, yarn over and pull through all four loops on the hook. Similarly for bphdc. I tried it with a yarn over between the two loops pulled up through stitches, which is the accepted method, and it was just too bulky. The way I did it you get a nice little triangular stitch.

I wanted to relax and not pay attention to the pattern, and of course hats are very sensitive to personal size and gauge, but the idea was this:

1. fhdc until you have something that fits around your head, over your ears and nape of neck to forehead. Sl st to join; this is the back of your head.
2. ch 2; hdc around with a dec on each side of the head [foundation stitches are supposed to be true to size, but even when I focus on pulling the link and chain through a good ways, mine are still a little tight]. Sl st to join.
3. This is the first back post round. Ch 1 and bphdc around, with an extra bphdc at the end (in the sl st). Here you start working in a spiral, so no joining.
4-5. bphdc around with 4 increases: two near the start of the round and 2 near the end [this puts them towards the back of your head where more of the size is].
6-7. bphdc around.
8. in this rnd you start decreasing. Put one dec about 1/6 of the way from each end, and otherwise bphdc around.
9. put three dec in the first quarter of the round and three more dec in the last quarter.
10. put 8 dec in, concentrated toward the front.
11. put 7 dec in, evenly spaced.
12. as in 11.
13. back to 8 dec, but evenly spaced. After this rnd I had 23 sts. If your head is smaller you might have fewer.
14. as in 13.
15. dec 7. Stitch around so the top loops show to the outside like in the bphdc and FO.

side

It is an incredibly warm hat that covers my ears almost completely, without being insufferably thick or floppy. Success!

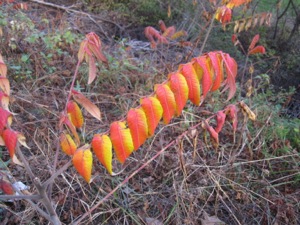
We took these pictures on the same day as the kappa pictures, and the leaves were gorgeous. So, a little bonus picture of one of the most beautiful fall colorations I’ve ever seen:

gorgeous

Also: happy birthday to my brother Jason!