Jet setting

Ready for takeoff!

jetside

A friend had told me about the paucity of airplanes for babies, which she discovered when her daughter and jet pilot son-in-law had their first child (I’m told Disney is planning a Cars-like movie about planes, so that’s likely to change soon), and I thought that was the perfect push for me to design one.

jettop

The pattern is not ready for prime time just yet, but I am very pleased with how this came out. The wings and tailfins are, of course, kind of floppy, but I think that just gives the plane personality.

I washed it the night before giving it to her and it was, unfortunately, not dry by morning (despite over a half hour in the dryer before sitting out overnight). However, that was not the worst thing, because I was able to blow-dry out the marks left by my overnight shaping method:

jetblocking

That photo just amuses me. The plane is about 10 inches long in sport weight yarn (100% acrylic, with 95% polyester/5% silk fiberfill), made with an E hook (3.5mm), and while the engines and base of the tailfins are sewn to the jet body, the wings are crocheted directly onto the body, the base of the tailfins is crocheted directly onto the fins, and the fins are then crocheted together across the top.

Incidentally, I’m pretty sure one of my design drafts looks like a comic book character – a specific one – but I can’t for the life of me figure out which. Any identification out there? The darker color is purple.

superhero?

Embroidery: before you begin

I thought I’d put out my basic embroidery information. I’m not going to try to make an online stitch dictionary (at least no more than happens naturally from my own explorations), but I have thought a lot about embroidery for beginners through teaching it.

Fabric and thread to start: I like to start people with calico fabric (quilting cotton) and two strands of embroidery floss. That is a good combination weight-wise and those materials present no special challenges. Try other fabrics (coarsely woven, fuzzy or fluffy) and other threads (the full six strands of floss, perle cotton, ribbon) after becoming comfortable with the motions of embroidery. That shouldn’t be long, though, and then there are some rules of thumb for matching. Six strands of floss or something heavier like perle cotton is good on a very coarse fabric or to achieve a dimensional effect. On a puffy fabric such as fleece you’d likely want at least four strands of floss to keep the stitches from disappearing. For a smooth-surfaced fabric such as cotton or felt, two or three strands is good (for detail work a single strand might be employed).

thread comparison

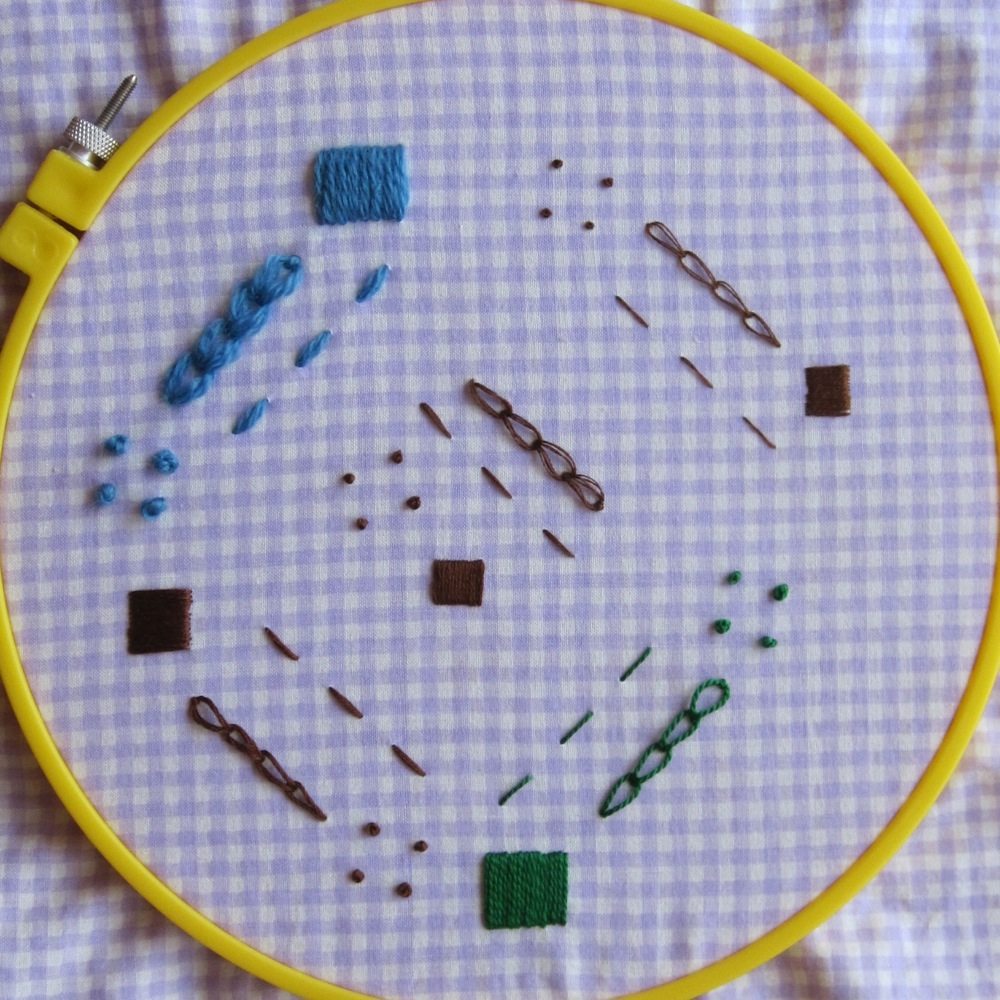
Above: A sampling of materials. The fabric is cotton calico. The brown thread is Coats and Clark 6-stranded embroidery floss (6, 4, and 2 strands shown, left to right), the green at bottom is DMC perle cotton size 5, and the blue at top is Columbia-Minerva 100% wool “Persian-type” needlepoint and crewel yarn.

Tip 1: It is very difficult to separate a single strand of floss from more than one other strand without tangling to the point of knots. I find it easiest to separate two strands at a time, and if I want an odd number of strands, to separate a pair into singles and put the appropriate number together. Tip 2: While stitching, your floss will want to twist, which can lead to tangles. One way to lessen this is to separate all your strands, run your fingers all the way down each to smooth them, and then put them back together. Wetting the strands when you smooth them helps as well.

Needles: Embroidery needles tend to be fine and sharp, but unless you are working on unforgiving fabric (delicate silk, say), use whatever needle is comfortable to work with, has a large enough eye for the thread, and is sharp enough to pierce the fabric. Wetting and twisting the end of the thread between your fingers will help in threading.

Knots or Not Knots: Knotting is typically not done in embroidery; instead, you leave a few inches loose at the back and weave them under your stitches later (or to start, if it is not your first length of thread). The same is done to secure the opposite end. Sometimes you have to knot, however, such as if you are stitching around the edge of a piece of fabric. In that case two or three overhand knots to start and a half hitch to end are easiest.

Overhand Diagram Half Hitch Diagram
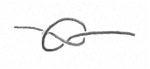
Above left: Overhand knot. Above right: Half hitch.

Tip 3: Let your needle dangle from the fabric after every dozen stitches or so. Its weight will help unwind the floss before tangles can happen. For more help, slide the needle down the thread until it is against the fabric, and use your fingers or a pin to separate and re-smooth the strands. Tip 4: In a situation where knots are appropriate and you have two layers of fabric, provided the thread does not show through a single layer you can hide its end easily. After making your final knot, stitch through one layer only and bring the needle out a short distance away. Pull so the fabric is slightly compressed and snip close to the fabric. The end will disappear between the layers, and the tail should be long enough to stay put inside.

Comfortable Stitching. To keep your hands and forearms from getting sore, stretch and rub them frequently. Make sure you are not gripping the work too tightly, and change your hand position regularly. If it is difficult to get the needle through the fabric, use a thimble to push and a bit of rubber to pull (you may buy one for the purpose, or cut a 1.5-2″ square of a rubber jar opener). As a right-handed stitcher, I find it is most comfortable to stitch with the needle pointing somewhere between left and forward, and to tighten the thread up or to the right. Experiment for the best solution for you – for me it is frequently not the direction given in stitch instructions.

First Friday

Happy June to you all!

My list of crochet techniques to try only grows: playing with the crocodile stitch and Jacob’s Ladder technique, crocheting with wire or cassette tape (provided I am convinced it’s not hazardous to my health to do so), beaded crochet, more intensive color work, and (the most recent addition) overlay crochet.

Overlay crochet is a technique that produces flat but multi-layered motifs in the round. In its fullest version the “background” is stitched in back loops only and the front loops are used to stitch outer-round colors into the inner rounds either by chains connecting them or by very long stitches. It is a great elaboration of spike stitches; I found simpler patterns that have this idea on Ravelry and Crochetville (both free).

Online patterns for overlay are not abundant. There is a woman in Germany who sells beautiful patterns on Etsy and Ravelry under the name CAROcreated; I chose this pattern of hers as my entree into overlay crochet. I ordered 2-ply afghan yarn (sport weight) from Herrschners, below, to make it, in colors chosen on a whim.

overlay project yarn

There is a much simpler free pattern of an overlay crochet heart available as well, but I went to the CARO pattern because I had some confusion that twisted me up when I looked at it. I think it is not so hard as I thought at first. The only other pattern I found that was called overlay crochet was an afghan block with overlaid hummingbirds, though I believe these Tangled Web and Celtic Cross afghan blocks both qualify. Offline, there is a book called Overlay Crochet Jewelry, by Melody MacDuffee, who really developed and popularized the technique, and one chapter (also by her) in the book Crochet Master Class.

I would have to consult the books to know what overlay crochet does and does not consist of “officially.” This flower (free) is three-dimensional because each layer of petals is made in two rounds of stitching. To add a layer of petals, you start by making a round of single crochet in the spaces between the petals of the previous layer, joined by enough chains to make a circle but no more. Those chains lie behind the previous layer of petals and well below their tips; the second round of stitching creates the next layer of petals on those chains. I’m pretty sure that technique alone is not overlay crochet, though there is a beautiful stained glass afghan square on Ravelry that combines this technique with “proper” overlay crochet.

Finally, on the stained glass topic, here is another stained glass crochet project – this time far, far larger – that also uses a technique that ends looking similar to overlay crochet. However, the description says the front is made first and the back after, so I doubt the construction details are the same as the overlay patterns I’ve linked to.

Anyway! That’s my plan. You will certainly see my CAROcreated pattern when I finish, and I’ll let you know what I learn about overlay crochet!