Stitching vistas

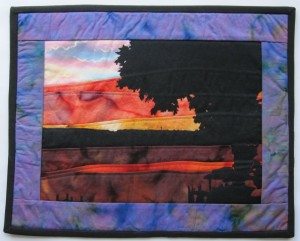
Through the Sew-Op, I had the chance to take a two-part course from one of my fellow teachers, Sally Munro, on landscape quilting. We used the method in the book Accidental Landscapes, by Karen Eckmeier. I chose a photo of sunset as seen from my grandparent’s backyard when I was growing up (appearing in speckly scan form below). See what you think of the interpretation:

Williams Bay sunset finished landscape quilt

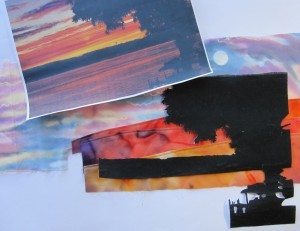
I took a few progress photos to give you a sense of how it went together.

landscape materials

The sky and water were made from pieced fabric, through a technique called texturing where you cut a slightly wavy edge, press it down a quarter inch, and topstitch it to the layer above. After trimming the lower layer to a quarter inch below the stitching, you can add the next one. Cutting a wavy edge rather than a straight one gives a more organic feeling to the piece. The perfect colors miraculously came out of Sally’s fabric stash.

The tree was black fabric on Steam-A-Seam cut out by hand with a previous copy of the photo on top of the fabric. It is on top of the sky but extends below the top edge of the water, for extra security.

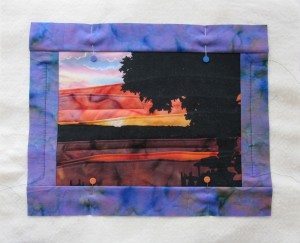
landscape unbound

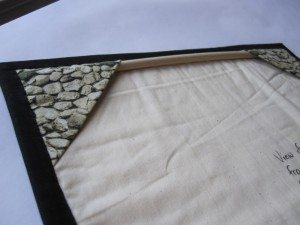
The binding is one continuous strip, joined into a loop after being sewn on three sides and a couple of inches into the fourth on each side. It is turned to the back and hand-sewn down. I used corner pockets for a hanging rod; the binding is what’s called a French twist and is supposed to create its own rod casing, but the fabric I used was too narrow to accommodate anything but the tiniest of dowels, with virtually no overhang at the ends.

landscape quilt back

Unfortunately I basted by machine, which was not Sally’s intent, and couldn’t get the needle marks out. It’s a good thing I had basted with the direction of the design! I will know better next time. It was a wonderful learning experience, though, and I am more than happy with the way it came out.

Reviving

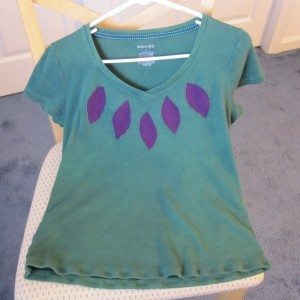
I live in t-shirts all year round, the nicer kind, typically with v-necks or scoop necks. They last me a long time, but sometimes I lose the desire to wear them well before they are actually worn out. When that happens I have two choices: give them away, or try to alter them somehow. After talking to an alterations student who happened also to be a Sew-Op teacher, I decided to remake the most recent batch: two shirts that were faded and floppy, and one that was too high in the neck and hem and had a tiny bleach spot. Here’s the first result.

leaves dyed

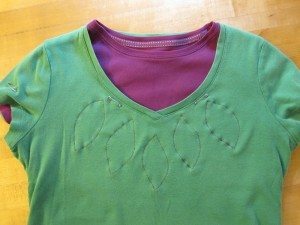
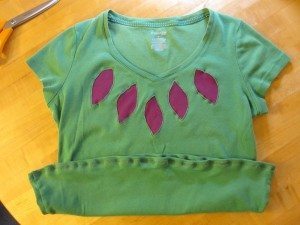
I combined the high-necked shirt with one of the floppy ones to try out reverse applique a la Hope Studios, though I did not plan to retain both full t-shirts. First I put them both on and lined them up so any parts that have stretched with time to accommodate my shape matched. Then I freehanded some leaf shapes at the neckline and pinned there. I used a narrow zigzag to sew around the outside of the leaves, with the thread tension turned up and the presser foot tension turned down in an effort to avoid stretching out the fabric. I cut away the excess fabric of the inner t-shirt, leaving the leaves connected and a decent amount at the bottom so I could smooth it out and avoid it being obvious from the outside that there was an extra layer ending at a random spot. Only after that did I clip out the insides of the leaves on the top layer, using small pointed-tip scissors. My advice to anyone who wants to do this is: go slowly. If you nick the bottom layer there’s not much you can do about it.

shirts pinned leaves stitched

The top layer had a pinhole just above the hem stitching at center front, and to secure that as well as help with some of the floppy feeling, I turned the hem to the inside and stitched it up with a wider zigzag. All the stitching was in a thread that approximately matched the inner layer, though far from exact. I knew it didn’t matter too much because of the next step: overdying the whole shebang to harmonize the colors (which does not affect the thread). I gave them a 15 minute bath in a somewhat weak solution of royal blue RIT. I think that step might have been enough by itself to save the green shirt, because I love the finished color (which is richer than the photo at top makes it look).

Before I began the blog, referenced in my post about stitching with a twin needle but with mysteriously disappeared photos, I shortened several shirts, and bleached and re-dyed some others. I was using benzoyl peroxide on my face at the time and it was seemingly never possible to avoid damage to my clothing. I was pleased to realize that was almost three years ago and three of the four shortened shirts are still in rotation; the redyed shirts, however, are all retired. I don’t think I would bleach if I were doing that again. It is too hard on the fabric.

I’ll show you the results of the second project soon – it took a lot longer than anticipated!

Repurposed denim

The Sew-Op got involved with a local art gallery, AVA, as part of their 40th anniversary year. They are located in a former denim overall factory, and wanted denim to be part of their activities for the year. They were very interested in straddling that blurry line between art and craft, using denim for purely decorative endeavors, useful items that are attractive but not decorative per se, and everything in between. We discussed the limitations of the medium (we have no industrial sewing machines, so there is a bound on how many layers of denim can be sewn in the Sew-Op) and some possibilities. As part of this meeting a few Sew-Operators, myself included, volunteered to make some sample denim items for the kick-off repurposing session. That was this past Saturday. Let me show you what I did!
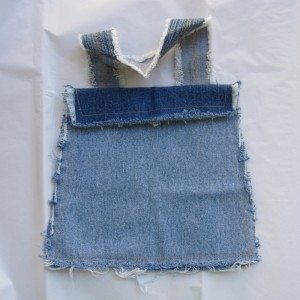
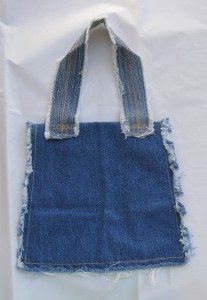
denim bag front denim bag back

This simple bag was actually whipped up for the organizational meeting. It’s two pieces of leg trimmed to equal size and sewn flat against each other, left open at the top and a little way down each side, after a strap had been sewn to one of them and the part of each that would be left open had been stitched across. I made a straight stitch about a half inch in from the edge so it could fray, and the strap has two slightly offset lines of zigzag stitch down the center. It’s all done in the thread color I refer to as “jeans gold.” After washing it I trimmed the sides, combed the bottom and gave it a little haircut as well.
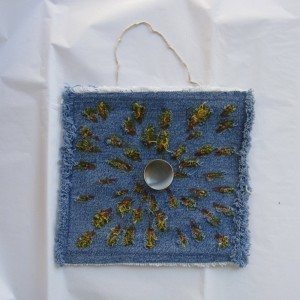
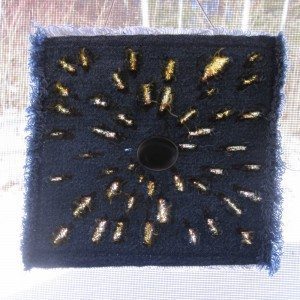
sunburst front sunburst backlit

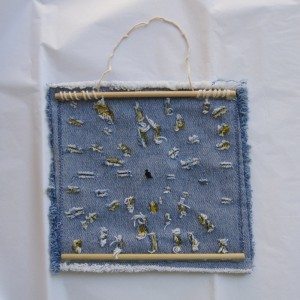
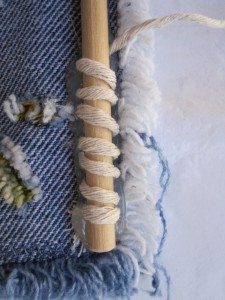
This wall hanging was primarily to demonstrate the hanging method, dowel with string wrapped around it and hot-glued in place. I stitched around with a narrow zigzag about 5/8″ in from the edge, cut the fabric with a utility knife, washed it, and colored the slits with Crayola fabric markers. After stitching the button on I cut dowels to size and sanded their ends, and ran hot glue along the dowel against the fabric. If I had a higher temperature glue gun I may have been able to run the glue on the fabric and stick the dowel on afterward, but with low-temp the beginning of the line had solidified by the time I got to the end.
sunburst back dowel and string

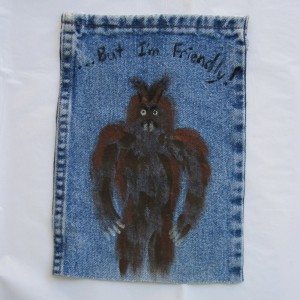
painted monster

This guy was whipped up quickly with acrylic paint and those cheap plastic-bristled kids’ paint brushes. I used brown, copper, black, pearl, and glow in the dark. I couldn’t get a good picture, but the eyes, teeth, and claws glow.
jeans bag front jeans bag back

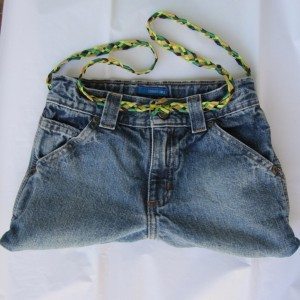
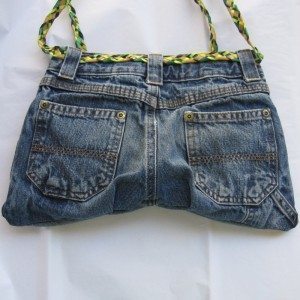
The most admired item, however, was this bag made from the top of a pair of jeans. I cut off the legs, undid the inseam, and sewed a seam across. Since the back of jeans is wider than the front, I added a pleat just inside each back pocket to accommodate that. I had originally placed the side seams to minimize the width difference (the outseam is the topstitched one, so you have to fold on one or the other side), but the jeans had additional pockets below the right back pocket so I changed that to try to minimize the number of layers I was stitching through. To line it, I cut a rectangle of fabric a bit wider than the base of the bag, folded it in half and sewed the seams adjacent to the fold. Then I folded down the top so the pocket was as deep as the base of the bag to the bottom of the waistband (as measured by eye from the outside), pressed it, and hand-stitched it to the bottom edge of the wastband inside. I also stitched the inside of the waistband shut, but you can actually access the space between the bag and lining through the fly. All the pockets still work, as well.
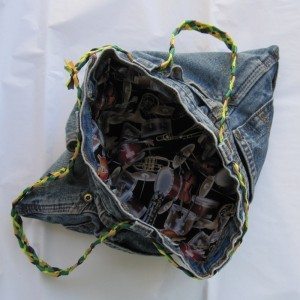
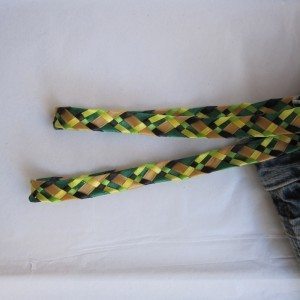
jeans bag open five-part braid

The strap was the most time-consuming of the whole operation, because I braided it out of five lengths of ribbon (using these braiding instructions). I very much like it, though, and it seems to want to stay smooth and flat. After threading it through the belt loops I tied the like-color ribbon ends together in interleaved square knots (tie half of each, then the second half of each, so some of them are entangled), trimmed them, and glued them with Fray-Chek.

I also brought along my denim coaster from the craft countdown. I had one more idea for a bag but not enough time to complete it… perhaps in the future.