As promised, I made another fiddlehead project for the Upper Valley Fiber Crafts’ April craft challenge (still time to get in on it should you wish!) — or at least, I am making one.
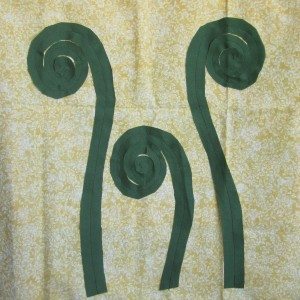
I thought I’d show you the steps so far. I started with a large piece of yellow fabric and some pieces of green that I cut out into fiddlehead shapes. I sewed the spirals on with a straight stitch down the middle of the strip of fabric and zigzagged the outer edge of the background.
Then it was time for paint. I wanted a darker green than the fiddleheads at the bottom, and for whatever reason was completely attached to a rosy pink at the top. I also wanted an irregular gradient, so I diluted fabric paint (green with a little black) in a fairly tall, narrow jar, rolled up the fabric, and dunked it in. I happened to have a rolled-up piece of light cardboard — originally the center of a roll of wrapping paper — that could hold the fabric tube upright during the dunking. My hope was that the fluid would wick up the fabric, but gravity would keep it most concentrated at the bottom. I also expected the white design on the yellow fabric to resist the paint.
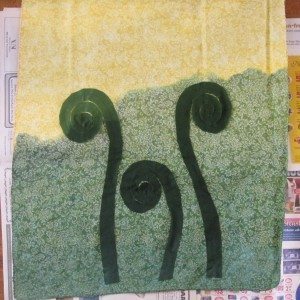
And it did! There is the green, still wet, not as dark as I imagined but just fine as is. I left the fabric in the jar overnight, and it crawled much further up than I expected (especially given the amount of fluid left in the jar the next morning). I love how much further up it extends on the right, which was on the inside of the roll, than the left.
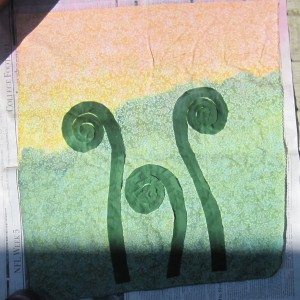
For the rosy pink I mixed pink with a little red and gold, and decided not to repeat the capillary action method, lest I get a muddy mess where the colors met. Instead, I mixed up less-dilute paint, scattered it across the top of the fabric, and used my hand (and water in a spray bottle) to distribute it to be unbroken across the top, with an irregular bottom margin. There was some drippage, which was perfect, although I did have to rescue one fiddlehead from a pink splotch with a judicious spray of the water bottle. Here’s a very sunny picture of the wet pink paint.
The next step will involve heat-setting and washing the fabric, but the paint has to set for 72 hours first. This project will see you again next week.
