Baby shower gifts

I went to a baby shower this weekend for a dear friend and tried to give her something cute and something practical, but also cute.

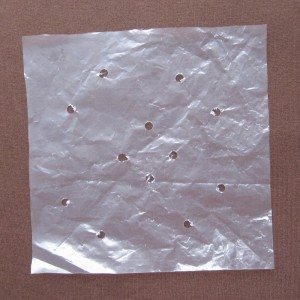
The first was a crinkle square. I don’t actually have a photo. I ruined the one that I made for the occasion, and had to draw on a backup. I do have an innovation to share, though: crinkle squares shouldn’t be a suffocation hazard to begin with, considering their small size and the fabric layer preventing a seal from forming, but for an additional point of reassurance you can hole-punch the plastic.

hole punched plastic for a crinkle square

I tried something new for the rest of the gift: burp cloths made by backing cloth diapers with flannel. The diapers are quite absorbent and the flannel clings to your clothes, preventing the burp cloth from slithering down off your shoulder mid-spit-up. This was not my idea originally but apparently I did not bookmark the site I found it on (which was also not the origin of the idea, so I don’t feel too guilty). I got a package of 10 diapers by Gerber and washed them all twice (the first time their edges were quite crumply and I thought that might indicate they were mid-shrink – sure enough a second wash smoothed them out a bit). They seemed rather thin so I doubled them up.

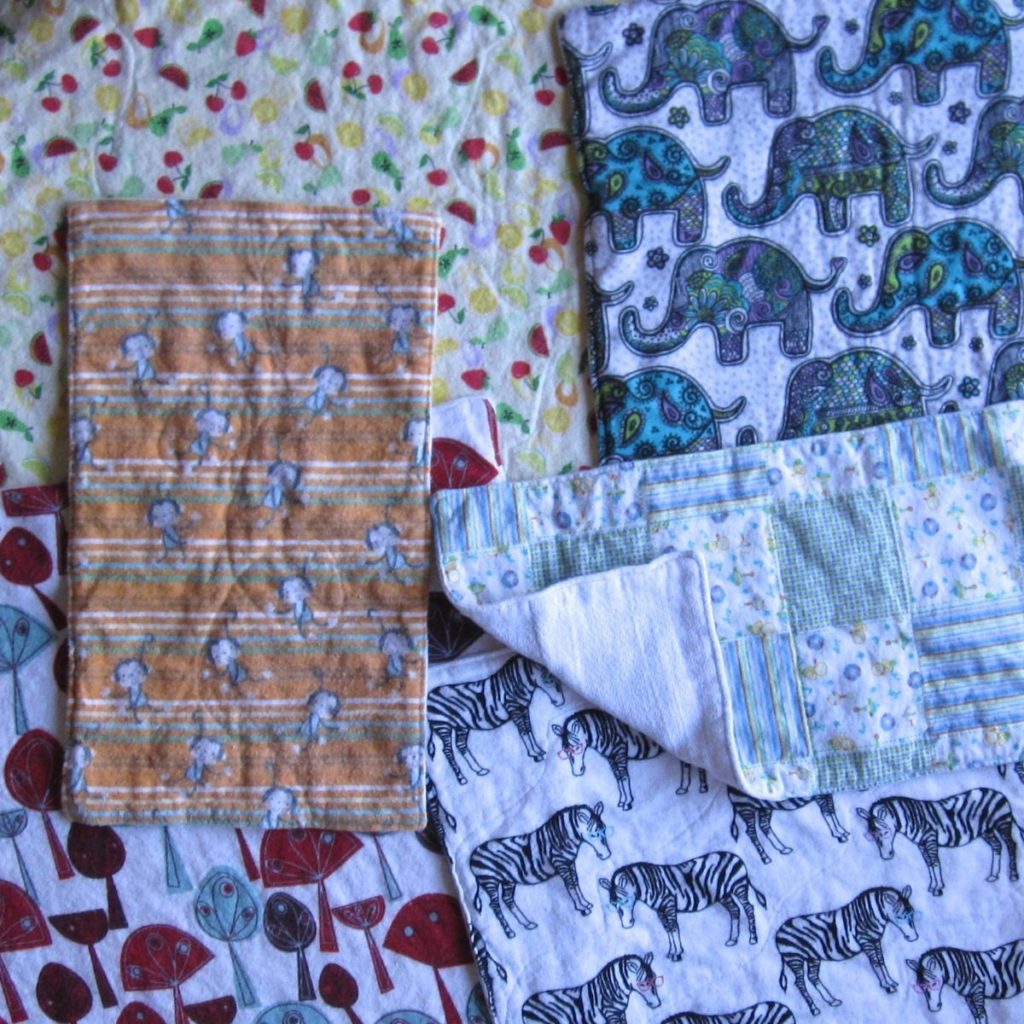
The first three burp cloths were large: fabric cut 16″x18″, sewn face down to a pair of diapers at 3/8″ (i.e., presser foot at the edge of the fabric but needle ticked over to the left) with an opening for turning, then diapers trimmed around the edge and the whole thing turned right-side-out. After a good press I topstitched around the edge and did a little quilting to keep the diapers from sagging on the flannel. For the mushroomy one and the elephants I outlined parts of the design, and for the fruit I made some jagged lines. I had a lot of trouble with catching strands of the diaper cloth and shoving them down into the bobbin housing instead of piercing them, even with a brand new fine needle. Fortunately nothing was ruined.

cloth diaper and flannel burp cloths

After I made those three I put one on my shoulder and found it was rather large for its use (though the parents to be are both taller than I am and might not find them quite as overlarge), so with the remaining four diapers I made smaller cloths. Two of them had shrunk enough in the wash that they didn’t have a 16″x18″ flat region anyway, so theirs would have had to be reduced. I ended up making two with fabric that was 9.5″x16″ (out of the two diapers that hadn’t shrunk as much) and one with 15″x15″ fabric (out of the smaller pair). Their quilting was simple: for the checkerboard one, a sort of zigzag the long way, outlining the boxes, for the zebras wavy diagonal lines, and for the monkeys a single continuous stitch line from top to bottom that looped around the monkeys nearest its path.

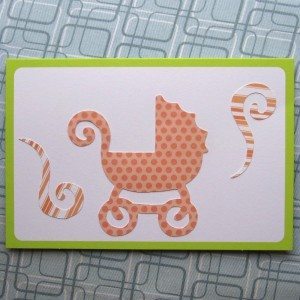
I tried one other new thing as well: making my own card. I have a Cricut die-cutting machine that mostly sits on a shelf, and it was time to start really using it. The card took an unreasonable length of time given its simplicity (three die cuts on a purchased blank card with a colored border), but most of it was set-up. I’m pretty happy with how it came out.
baby shower card

FF: Candy Crafts

Design Seeds: Swirled Sweet The recent Design Seeds at left inspired me to round up candy crafts for this month’s First Friday. I realized shortly after beginning, though, that the category is far too big for a single post. For example, gingerbread houses (and their Johnny-come-lately relatives for other seasons) could certainly be a post unto themselves, and then you have crafts made with candy, reuse of candy packaging, and non-food items made to look like candy (such as my crochet candy sticks). I like all of these but we have to focus, and for this edition I chose crafts made with candy.

Much of what you’ll find if you look around the Internet for candy crafts is dressing up candy for party favors, teacher gifts, and the like. Wordplay is popular. Although the bright shiny packaging of candies makes them well-suited to crafting, these crafts aren’t terribly candy-specific, so we’ll just make a brief survey of the highlights. Roll candy, such as Rolos or Lifesavers, can be decorated to look like any long cylinder: I saw firecrackers (my favorite version was from 30 Minute Crafts), dynamite, pencils, cigars, candles, rockets, rolled-up diplomas, even a snowman and Santa. You can use candies as the centers of flowers (especially lollipops) or bodies of butterflies or spiders. A variety of candies can be mounted on skewers and made into a bouquet, or attached all over a paper cone or wine bottle to make a Christmas tree. The standout in this category was a Tootsie roll sundae from Cheri’s Creations. Small candies or stick candies can be glued all around a candle or straight-sided vase; this is one way to turn a can or jar into a nice-looking vase. And, of course, there is the traditional sleigh with candy cane runners.

You can use candy in place of any small tiles, beads, buttons, or similar items. That’s Country Living suggests using seasonal candy in a votive holder in place of the glass marbles or pebbles you’d usually find. There are many tutorials for decorating picture frames and similar wallhangings with candy. If you want to hang on to such a project, though, you’ll want to preserve the candy somehow. Woman’s Day recommends drying out candy and then coating it with a Krylon product to preserve it, all prior to the crafting. Another preservation idea is given in this Craftster tutorial for an “art glass” lampshade made with Fruit Roll-Ups and gummy candies. It is worth seeing.

A few candies are or can be converted to aromatic clay-like substances. Marshmallow Peeps are popular for dioramas and art projects, but you can also completely destroy them and make them into play dough. Gumdrops are also a good dough-like craft item; you can easily cut, roll out, or skewer them, but then they will keep their shape. They are a time-honored substitute for Tinker Toys, and you can also make them into people. I also found a tutorial for bracelets braided from AirHeads, which sound really sticky to me, and AirHeads shot glasses, which do also, but at least you’re not wearing them.

I have thought for a while it would be fun to crochet with licorice; a small flat heart with red licorice would be a cute Valentine. However, I have yet to find long enough licorice ropes, and then there’s the whole sanitation issue. Housing a Forest showed me a different use for licorice that doesn’t require length: sticking it on acrylic blocks to make stamps. In that post she also discusses painting with Nerds and Laffy Taffy. Apparently painting with candy is popular; you can also do it with M&Ms and Skittles.

Finally, we melt. Peppermint candies can be melted into platters, as shown on Crafty Home Improvement (Mis)Adventures. While they are warm you can shape them, even going so far as to mold them into bowls. Note that those two links advise wildly different temperatures and correspondingly different times. I suspect peppermints do better with the lower temperature.

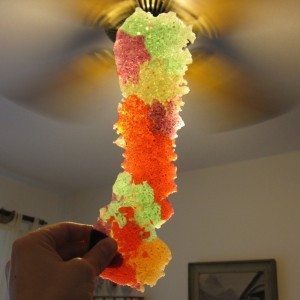
backlit stained glass candy Our last candy craft, which is similar to the peppermint trays, is my favorite: hard candy stained glass. By crushing clear hard candies, arranging them on parchment paper on a baking sheet, and melting them in the oven, you can make ornaments, cupcake toppers, or other decorations. They’re basically edible suncatchers. To shape them, you can either let them cool and break them into shards, melt them within cookie cutters, or use greased cookie cutters to score them thoroughly and break them apart on those lines once they’re cool. The recipes generally say 325 to 350 degrees F, but it is forgiving. In fact you can make stained glass cookies: use a sturdy cookie dough, make shapes with cut out regions, and bake them until they have 3-5 minutes left to be done. Take them out of the oven and add crushed candy to the cut-outs, and then put them back in to finish baking. Make sure you let them cool completely before removing them from the paper. The Cooking Channel has a gingerbread version, and Wilton has directions that include adding icing after baking for additional detail. A non-seasonal version of that can be seen at Tasty Morsels Bakery.

The picture above the description is from our attempt earlier this week, which was with Lifesavers. They crushed easily and melted in six minutes (we preheated to 355 but turned it down to 345 before putting them in), but after crushing they clumped back together and everything we melted inside a cookie cutter broke during removal. Now they are sticky and oddly wet, though that could be the weather. I think the ideal material might be those cheap suckers with loop handles: harder than Lifesavers and hence probably less sticky, but thin enough to break easily, unlike Jolly Ranchers. More on this another time; we haven’t finished experimenting.

Did I include your favorite candy craft?

FF: Paper flowers

lovely white rose from my hubby In early April, I got the idea to make a bunch of origami flowers. I never actually did, but the idea stayed with me and inspired this month’s First Friday: making flowers out of paper. As you might imagine, I’ve been knee-deep in wedding sites this week, but the ultimate sources are a wide variety of DIY sites.

Since origami was the inspiration, let’s begin with it. Origami-Flower.org (a subsite of Origami-Make.com) has a long list of flowers organized by difficulty. Fewer but quite different flowers are available from the Origami Resource Center. There are many origami sites, so if you are looking for a specific flower a quick web search should set you up.

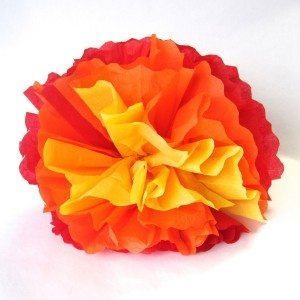
large tissue paper carnation

For successful non-origami flowers, the themes I’ve gleaned are patience and generosity with petals. Let’s survey some made with different kinds of paper. First, the accordion-folded tissue paper carnations many of us learned as children are given more nuance in a tutorial by Pink Paper Peppermints. I tried this, shown above, and the trimming made a big difference to the effect, though using fewer sheets of paper meant my flower shows its two-halves nature more. You can also make them tiny, as on Zakka Life.

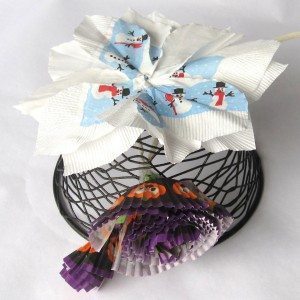
Since they are already crimped, cupcake liners are a popular flower paper. My favorite versions were from DIY Network and Lia Griffith (who has many lovely flower tutorials; the picture below is two of her tutorials, albeit in inappropriate materials).

napkin poinsettia and cupcake liner peonies
Snowman napkin poinsettia and Halloween cupcake liner peonies, after Lia Griffith.

Crepe paper is likewise popular, especially for roses, which are all of the tutorials in this paragraph. Its main appeal is that if you have the grain lengthwise along the petal, you can stretch the center of the petal sideways so it cups, or the top edge of the petal so it ruffles. You can use a long strip as on Folding Trees or Country Living, a strip with petal shapes cut into it as on The Bride’s Cafe, or individual cut out petals as on Foofanagle. With the right kind of crepe, you can even make them huge, as on Martha Stewart (alternate instructions with more photos are at Green Wedding Shoes).

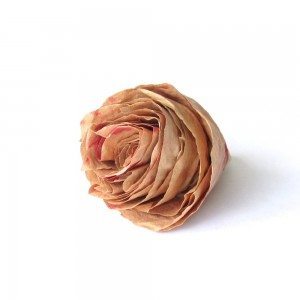
Since they are designed to survive being completely soaked, coffee filters take well to subtle (i.e., dilute) painting, and make lovely flowers. Martha Stewart has a rose tutorial, and although I wish it had more detail and progress photos, the result at the top makes me want to try it anyway. There’s a lot more detail in the tutorial for large peonies at Design Sponge if you want an easier entree to coffee filter flowers.

Coffee filter rose
Experiments in filter flowers. This is neither of the tutorials above.

Ordinary paper becomes more malleable if you crumple and then smooth it, as used in this Instructables tutorial. (I usually avoid the crowd-sourced tutorial sites because of their grossly uneven quality, but I’m glad I clicked through on this one.) The comments on that tutorial are useful too. Cardstock can even be wet and shaped, and when it dries it will hold its shape but still look soft (in that link there are two tutorials, and the second does not require a special die or punch).

What should you do with paper flowers? Many sites recommend mixing them with real greenery for better-looking bouquets. Wire and Paper is a brief blog (plus a few extras on Facebook) about paper flower decorating: for vases, hand held bouquets, and shop displays. The photos there are lovely and you can get good ideas for materials and colors as well as uses. Although, of course, once I decided to add this section I could no longer find them, I saw a number of sites with stemless flowers attached to boxes, book covers, gift bags, headbands, and hair clips. You can string them together for a garland or hang them individually, make them into wreaths and cover picture or mirror frames with them.

I wanted to keep the number of links manageable but I can’t exclude the following lovely versions of specific flowers: crocuses and snowdrops (crepe paper), poinsettias (cocktail napkins), poppies (watercolor paper), and Chinese lanterns (coffee filters). I also want to include this tiny rose made from a strip of paper. The tutorial uses a special slotted tool but it could be done with a stuffing tool (large plastic yarn needle with the end of the eye snipped off) or perhaps two flat toothpicks taped together so their wide ends are close but not too pressed together.

If you want more or different tutorials, so, so many flowers in all sorts of materials are on Pinterest boards by manekibeader and zurina, with surprisingly little overlap. Also, in many cases you can make paper flowers with fabric: ribbon for long strips of paper, and lightweight fabric (starched if necessary) for sheets.


The real rose at the top was brought home by my husband and was three days old when the photo was taken, still looking as fresh as on day 1.