Storing stickers

This fall I finally decided to break away from commercial greeting cards as much as possible. I’ll pay for wit, but if I just want sweet or pretty I’ll go the less expensive route and make them in-house. Of course, I got a die-cutting machine as a gift that I use for them, and if I had to count the cost of that in the cost of making them myself it would be a long time before the savings in card purchases caught up, but as-is I believe I can make a hundred cards for the price of a dozen in the store. My disintegrating sticker and card storage folder was due for replacing anyway, so I tried to figure out something to accommodate leftover die cuts.

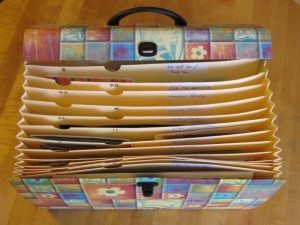
the original expanding folder that was my sticker and card storage

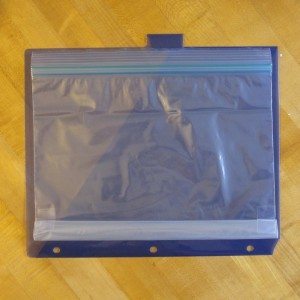
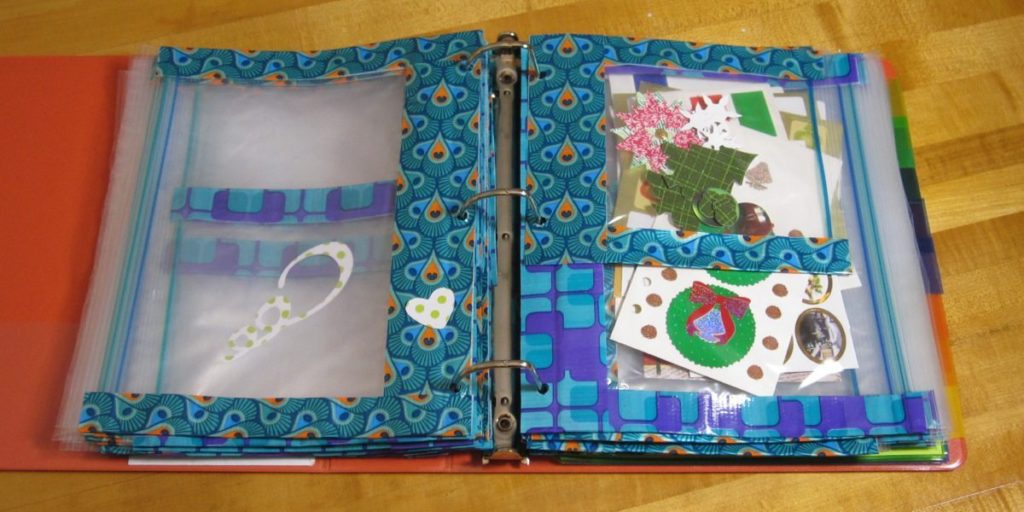
I decided to put the cards in their own box and keep the stickers and die cuts together in another container. I thought about some kind of plastic envelopes in a binder, but found they were priced above my pain point. There were kinds that were a bit cheaper but didn’t have the panel with hole punches for a binder. Finally, when looking for ideas on making things “binder-able,” I stumbled upon an Instructables about making a pencil pouch. Essentially, you cover a shortened gallon zip-top bag with duct tape. I wanted to be able to see what was in the pouch, though, at least a little, so I bought generic unprinted bags and applied duct tape just around the edges. That should improve the longevity and help avoid the bags getting crumpled up.

my new sticker storage: taped bags in a binder

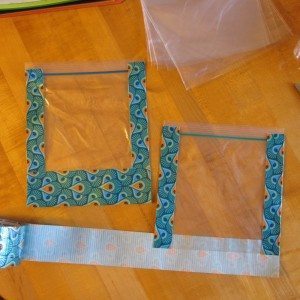
To make them the right size for a binder, instead of cutting off the bottom I folded it up: first to the top of the hole-punched panel, then that section in half, and then the whole folded section up again and taped near each end. That should keep any stickers or die cuts from getting pushed down into a sticky section. The small bags, of course, are just as-is, taped around the outside and with a duct tape extension at the bottom for the hole punches.
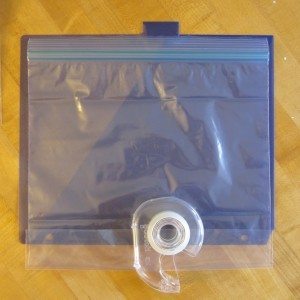
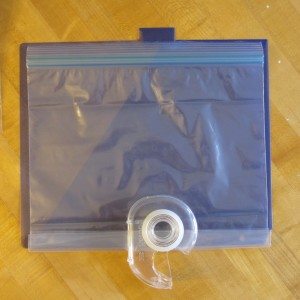
first gallon bag fold second gallon bag fold

third gallon bag fold taping the bags

The tape along each side is a single length folded over, and the tape along the bottom is full width, two lengths stuck to each other. I didn’t take a photo of it, but when I duct-taped the gallon bags, I made sure the tape came up a little above the folded part.

Note that if you use scissors on your duct tape you’ll be saying goodbye to them for the duration of the project. In fact, if you make as many bags as I did (20 of each size), you’ll need to clean the scissors at least once during the project, because they’ll get too sticky to use. I used Citrasolv, which worked wonders, and then dish soap because the Citrasolv left them oily.

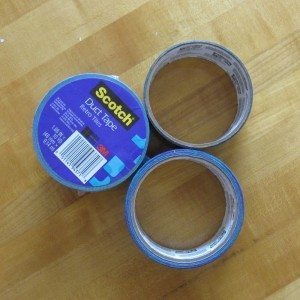
One roll of patterned duct tape will do just over 9 gallon bags, or (I estimate) at least a baker’s dozen sandwich bags. Ten gallon and ten sandwich bags took most of two rolls – the photo below shows what I had after finishing the first 20 bags, done with most of two rolls of duct tape.

two new and one leftover roll of duct tape

Next up is my favorite part: reorganizing the contents. I also need to figure out a new storage system for my cards.
FF: Learning to Draw

sketch-148769_640 I’ve declared 2015 to be the year I learn to draw adequately. The plan is to make three drawings a week all year, and devise a sort of curriculum for myself. The beginning is a Lynda.com class called 21-Day Drawing Challenge, which is intended to be a daily activity but will fill out January and most of February just fine; I think it’s best if I spend the remaining part of February, and any later last-bits-of-months, attempting to draw items directly relevant to my life. After that I have choices: Foundations of Drawing on Lynda, other online material, or a book from my shelf: Architectural Graphics by Frank Ching (the Amazon link is a much more recent edition, and he’s been elevated to “Francis”), Graphics for Architecture by Kevin Forseth, How to Draw Animals by Jack Hamm, and Creating Characters with Personality by Tom Bancroft. You can see my now-obsolete desire to be better at drawing graphs of equations on chalkboards in those first two, but they should still be applicable to pattern illustration and website sketching.

Back to that “other online material,” though – I haven’t forgotten that First Friday is supposed to be where I curate the web for you!

The best free drawing instruction I’ve found online is at Learn to Draw.com, by a professional illustrator. He talks about drawing specifically and logically, and gives exercises. Here are a few highlights of the long series: materials, including a useful-looking picture frame, an upside-down drawing exercise, hand tracing for understanding foreshortening, and perspective. Drawing basics leads into a whole series on shading, and then additional series on drawing people and drawing caricatures.

A brief high-level lesson can be found at Diane Kraus’ site, where she covers the steps of drawing (but not how to draw). If you’re interested in drafting, Bob Borson has tips for architectural graphics.

Other specific kinds of drawing: fashion sketching is briefly covered at College Fashion and Fashion Club. For additional unrealistic people, you’ll find a good number of caricature tutorials at Tom Richmond’s blog (an illustrator for MAD magazine). Realistic anatomy for drawing can be taken from Anatomy for Sculptors.

Diane Wright has a quite nice series of nature drawing tutorials; note that most if not all of these have 2 parts, but the link doesn’t stand out so look for it. You’ll find brief but decent still life tutorials at Artyfactory and Art Academy (scroll down; actually, scroll down on both). The first is the traditional fruit and vases, and the second is a shoe.

If you’d like to find more specific tutorials and don’t mind sifting, I have a few last links for you. The John Muir Laws website has a lot of individual tutorials on nature and animal drawing. More animals, realistic or cartoonish, are covered at Drago Art in short and simple tutorials. Finally, there’s a large collection of drawing tutorials from various DeviantArt users you can sort through.

Happy drawing! You won’t see everything I draw this year (that’s a relief, I’m sure), but expect periodic updates with a few favorites and whatever lessons I feel I’ve learned.

Wire crochet experiments

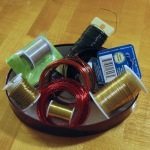
my wire collection - some of it. As promised, I crocheted with wire for the first time last night. The evening began with me teaching my Crochet Via Granny Squares class, so my first idea was a little wire granny square.

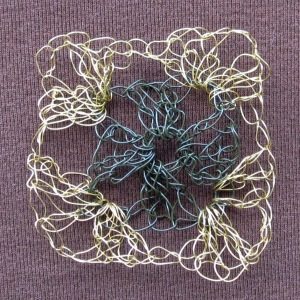
It didn’t go so well. I started with green floral wire, probably about 28 gauge, maybe 26, which was stiff with its coating. Second round was 30 gauge gold wire. Both were with a size 1 steel hook (2.75mm). My tension was all over the place – with the gold wire especially, it was impossible to get a grip on it without bending it and risking kinks. Not that I didn’t get kinks regardless. After the fact it occurred to me that finger cots on two or three fingers of my left hand might be a help, but by then I was getting ready for bed.

wire crocheted granny square

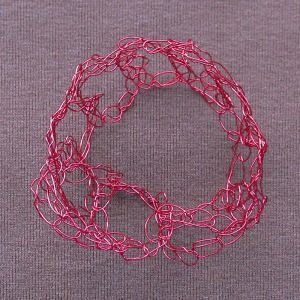
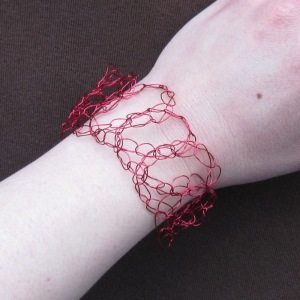
I did feel like I was starting to get the hang of it, as uneven as that second round is, but by then I was kind of over the whole granny square idea and decided to make a chained chain. I used the same hook, and red wire that was unlabeled, but probably 28-30 gauge. That went better, especially because the unevenness of my loops is not as apparent as the uneven height of the double crochet stitches.

wire crocheted bracelet wire crocheted bracelet

Speaking of kinks, as we were a while ago, I tried to reel the wire straight off the spool instead of letting it come off the end, coiled, because I read a hint somewhere that I’d get fewer kinks that way. I didn’t have much luck getting the gold wire to unreel like that, but the red wire was better behaved. I think it did result in fewer kinks, but not their complete elimination.

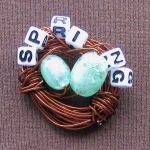
wire wrapped bird's nest I thought about trying beaded wire crochet, but it was getting late and I didn’t have any ideas that appealed to me much. Instead, in honor of how birds-nest-y my wire crochet is (especially the granny), I made a wrapped wire bird’s nest.

Frigid rain all day yesterday. I do like winter, but not that aspect. 🙂