Achieving closure

Three seasons of the year, I live in outerwear collected over the last decade-plus to meet the following criteria: openable in the front and not wool. One of my sweaters was simply open in the front rather than openable, which made it less useful – three temperature options are better than two. For a while I wore it with a shawl tied around my waist as a belt, but that was bulky and impractical. A better solution was to add a closure to it, and after perusing my options (hidden hook and eye, decorative hook and eye, frog, button and buttonhole, two buttonholes with “cuff links”) I decided on a large decorative button in the center of one front panel with a buttonhole symmetrically placed in the other. I had just such a button, a beautiful glass one I bought at a flea market. Furthermore, I decided to stitch the buttonhole with embroidery floss matching the colors in the button, so if I were wearing the cardigan open it would still be symmetric.
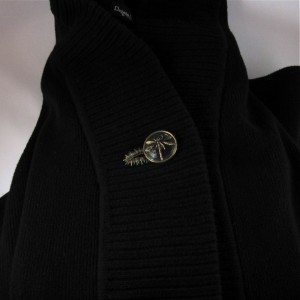
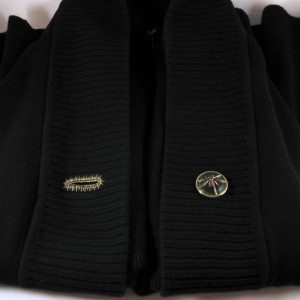
sweater closed sweater open

I can say with some confidence that the garment district need not fear my takeover any time soon, but I like how it came out. I finished this in the middle of last week so I’ve had a chance to try it out, and not only do I still like the look, I am pleased by the warmth difference.

In other keeping-warm news, I made a neck warmer for my husband a week or so ago, out of 100% cotton flannel and rice. I threw in some mace, allspice, cinnamon, cloves, and coffee beans (the spices were chosen according to which I had in unground form), which I can’t smell when it is heated but he says he can. It takes about 2 minutes in the microwave to warm up, but it stays warm a nice long time.
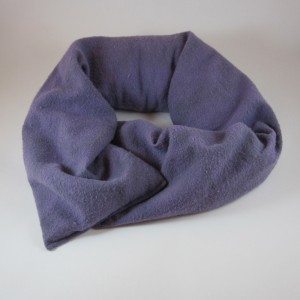
neckwarmer

Babies and babies

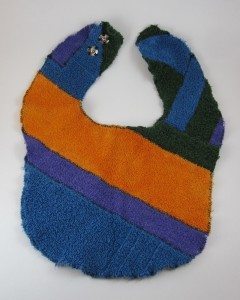
Many moons ago, I wrote a quick tutorial on making baby bibs from a commercial pattern and terrycloth. Recently I had reason to use that tutorial, to make gifts for friends who’d had a baby Christmas Day and another pair of friends who had a baby in early January. Here they are!

First, a stained-glass bib.

stained glass bib

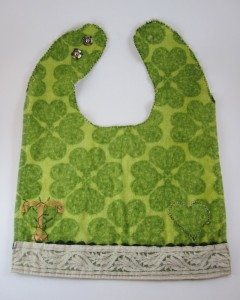
For the same couple, an Irish bib with illuminated initial of the baby’s name, made from a St. Patrick’s Day guest towel.

monogram bib

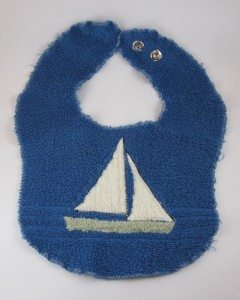
For the couple with a sailing husband, a sailboat bib.

sailboat bib

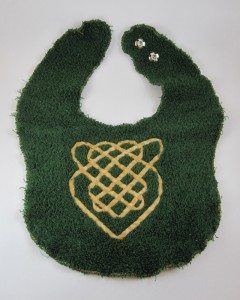
The second bib for the same couple, with an Eire-loving wife, a Celtic shield knot.

celtic knot bib

When I went looking for a Celtic knot to applique on a bib, I did not expect to find one that was traditionally placed on children’s clothing to protect them, but that is exactly what I found!

The knot and letter are done in ribbon, hand-sewn in place with matching thread. I formed the knot on a life-size paper printout of a photo of such a knot (in that case engraved on a button), pinning it first to the paper and then pinning each intersection and fold to itself. I unpinned it from the paper, lifted it over to the bib, adjusted it and centered it as best I could, and pinned it down. Periodically I repinned it, trying to minimize the number of pins used so there would be less for the sewing thread to catch on. It took a very long time. The letter T was formed directly on the bib and stitched down with somewhat less care than the knot, and then embroidered over to give it a medieval illuminated look.

The stained-glass bib was made by piecing strips and squares of terrycloth over the paper pattern, zigzagging them together, and then cutting out the bib and zigzagging the edge. After it went through the wash I had to darn one part of it that has started pulling apart. The heart on the T bib and the sailboat were both made by appliqueing terrycloth shapes with a zigzag stitch; the sailboat has additional details (lines and mast) made just with stitching.

Wishes won’t wash dishes

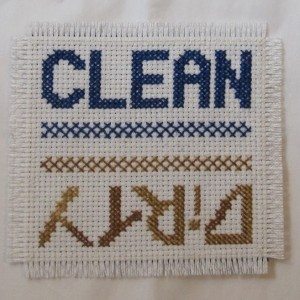
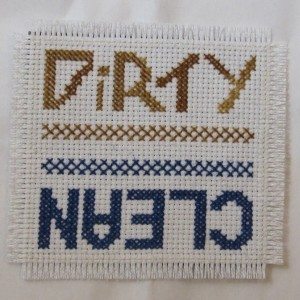
Now that I have a second person in the house, dishes get done by someone who is not me (this is a wonderful thing). Because of that, it became a Good Idea for the dishwasher to indicate whether the contents are clean or dirty. Being me, I designed such an indicator from scratch. It’s a cross-stitch square to be applied to a piece of self-adhesive magnet sheet.

magnet clean side up magnet dirty side up

This one isn’t actually ours, it’s one I made for a friend, which is why it looks pristine. The pattern is available as a pdf download. Colors are not included; I used unlabeled floss left over from other projects, and neither of them appears to be DMC (according to my color card).

If you want to make one that looks like the one above, you’ll need a crisp dark blue floss and one that variegates between tan and sand color. Don’t worry about matching up the colors in the variegated side; sudden changes, stitches that are half one color and half another, and pools of one or the other extreme color add to the “dirty” vibe. I used 2 strands on 14 count Aida; you might decide the fuller look of 3 strands would be better.

After stitching the middle, I used a single strand of white floss to secure the edging inside the fringe (which had yet to be cut) with a neat whipstitch. I secured each end of each strand in the colored floss of the interior, came out one square away from the image, and went back down two squares outward of that. Repeat in the next square over, so the back of the work shows gently slanted stitches. At the corners, five stitches share an inner corner.

For extra security (our magnet is showing most of its wear in the fringe region), I backstitched across the middle of the whipstitches all the way around and out to the edge of the whipstitch (i.e., the 2nd and 4th whipstitches sharing an inner corner actually share two inner corners, because a second stitch goes from their outer end to the corner of the backstitch line). This thread was also secured in the colored stitching.

To make it easier to remove the magnet from the dishwasher without pulling the fringe out, I wanted to bevel the magnet with my utility knife. However, I realized it was far too thin for that, so I beveled it by rubbing the outer edges on sandpaper. After wiping off the dust, I peeled off the paper backing and pressed it onto the back of the stitching.

Finally, for extra extra security, I taped off the fabric outside the white stitching with masking tape and brushed a thin layer of Mod Podge on the interior. After that dried, I peeled off the tape, trimmed the fabric to 3 rows outside the white stitching, and pulled out the crosswise threads of the fabric outside the white stitching to make fringe.