Adding to the mystery

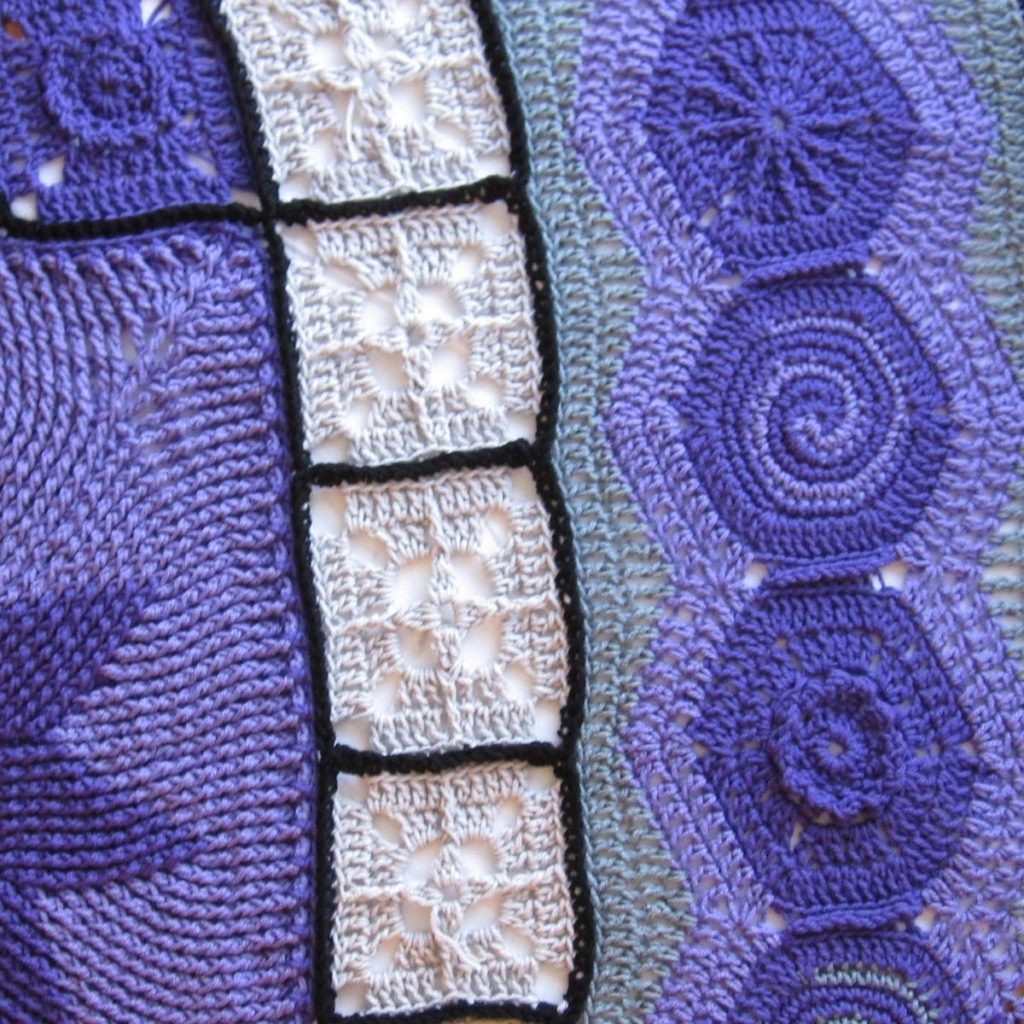
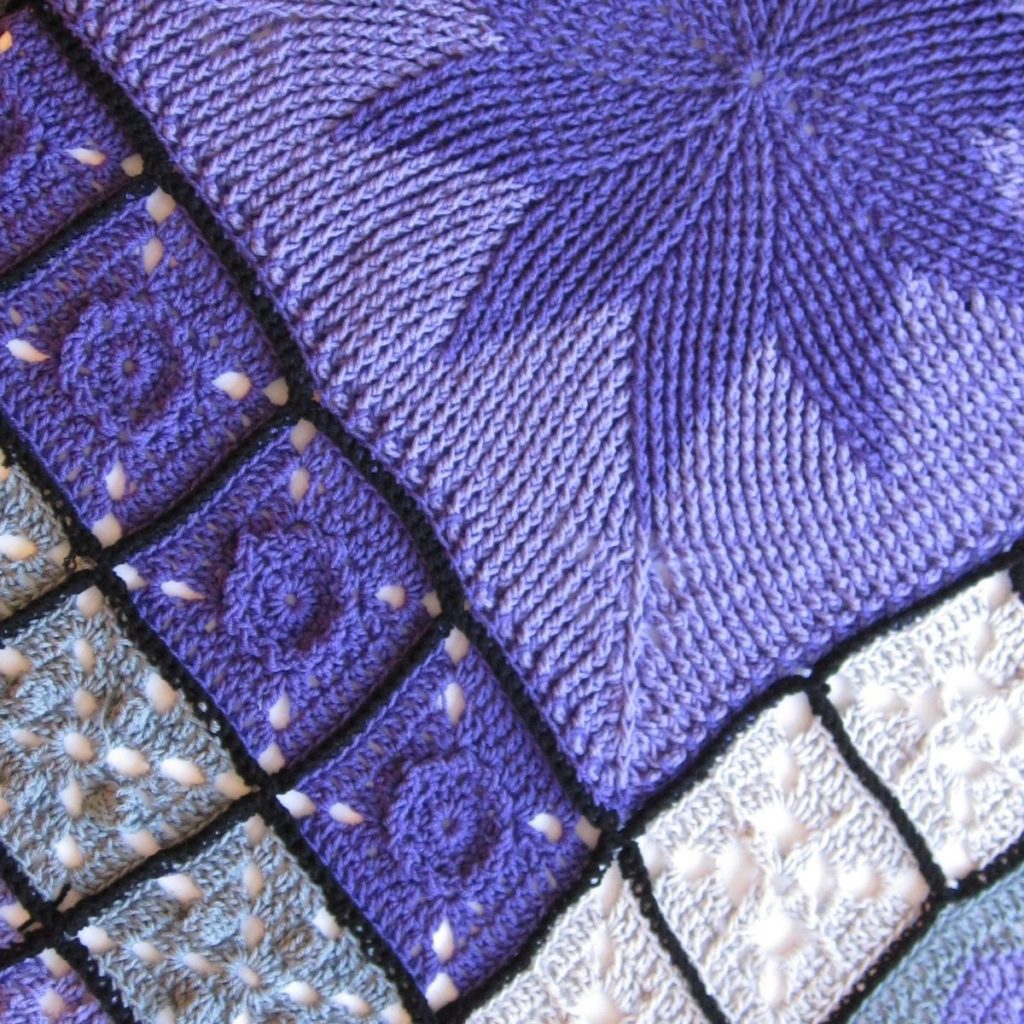
We’ve reached the next installment of the mystery afghan series. After the joining was done I checked the size. Big enough for our queen size bed? The answer was almost but not quite, and I had the solution on deck: a Greek Key patterned throw from Red Heart. I originally thought I’d do this in black and dark purple, but realized that would detract from the stained glass effect of the black joins. Since I had the most dark purple and dark gray leftover (albeit not quite enough gray, as it turned out), I did it in those colors and joined it with black.

Greek key pattern panels for the sides of an afghan

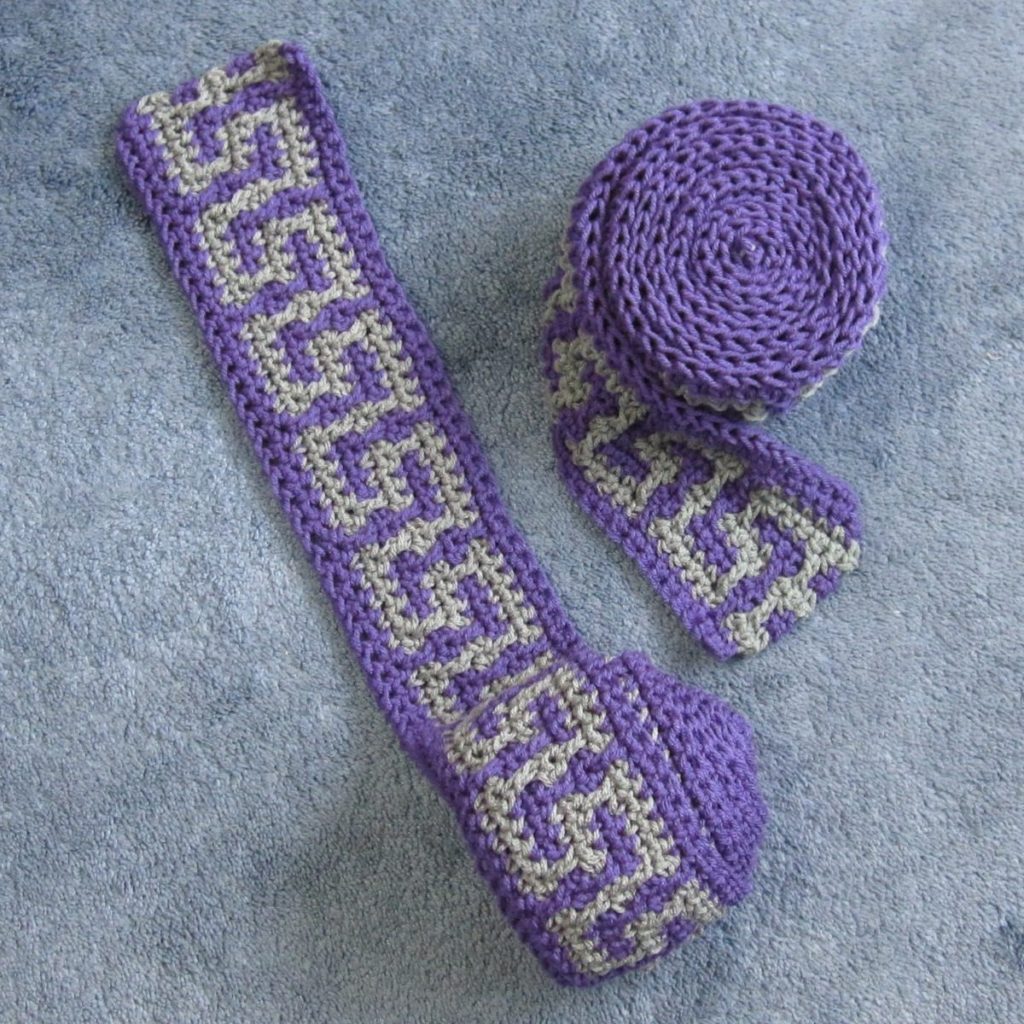
Instead of a long foundation chain followed by a row of single crochet, I made 213 foundation single crochets to start. Otherwise I followed the pattern, save fixing one typo: In row 9, just before “repeat from * across” it says to dc 3 rows down and skip the next sc. In between those two instructions it should have you chain 2 (in place of the sc you’re skipping).

The pattern calls for you to chain 2 whenever you’re skipping 1 stitch. If I were starting over I would only chain 1. It’s likely the designer’s chains are tighter than mine and a single one puckered unattractively, but in my tension the two chains spread and make the key pattern serif instead of sans-serif, so to speak.

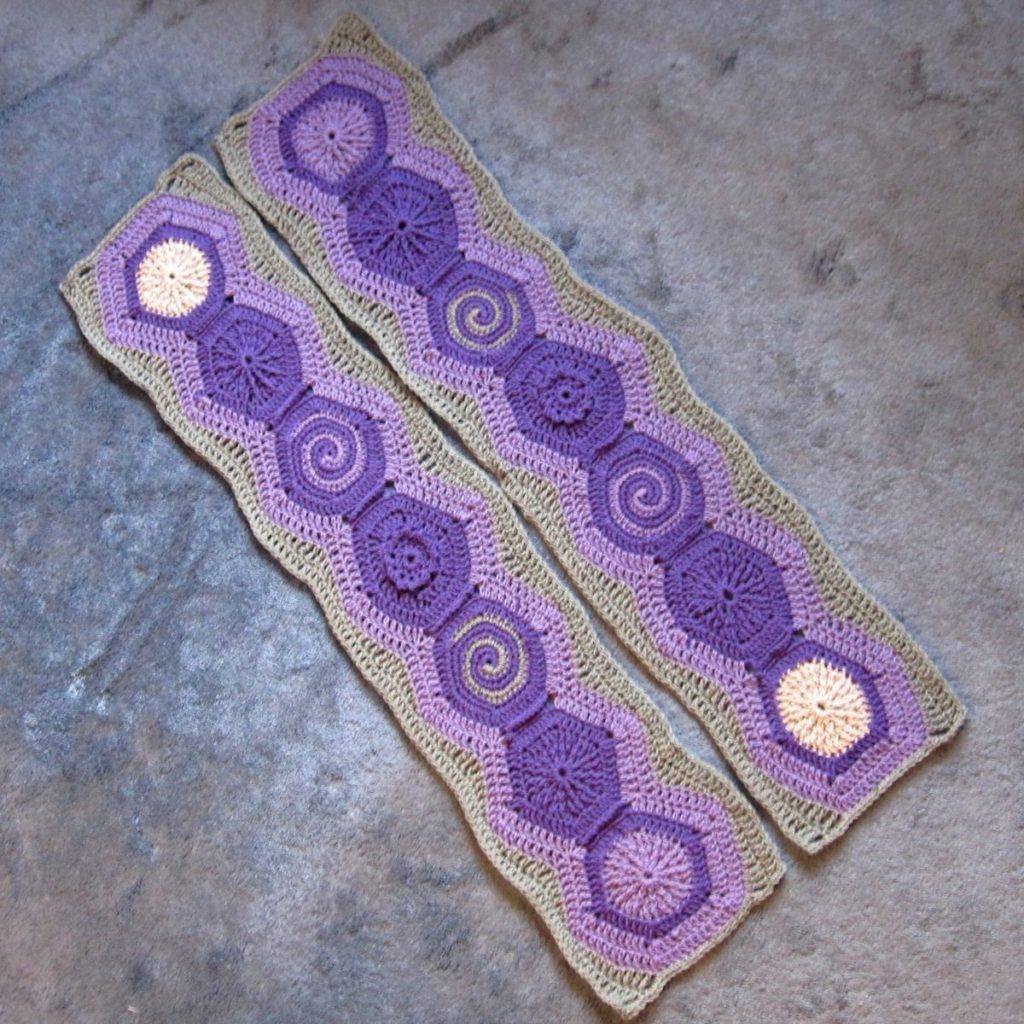
I made the second panel twice. The first time I joined all my leftover gray and still ran out with one long row left. Instead of continuing from that point with new gray yarn and a dozen tails to deal with, I decided to pull it out, and when I got back to the beginning purple I realized I’d joined that in the second row as well! Must have cut out a knot or frayed area. Anyway at that point it seemed worthwhile to start completely over. Once I got the new skein of gray I realized why I’d run out: it wasn’t enough for the panel! Barely – I ran out with maybe 10 stitches left – but man, that’s a yarn eater. I pulled back to the start of the row so the tails would be at the edge and used some of the previous leftovers to finish. Unfortunately the new skein was a vastly different dyelot than the previous, but in the not terribly bright light of the bedroom, hanging off the edge of the bed, it should be fine.

yarn left over from afghan making

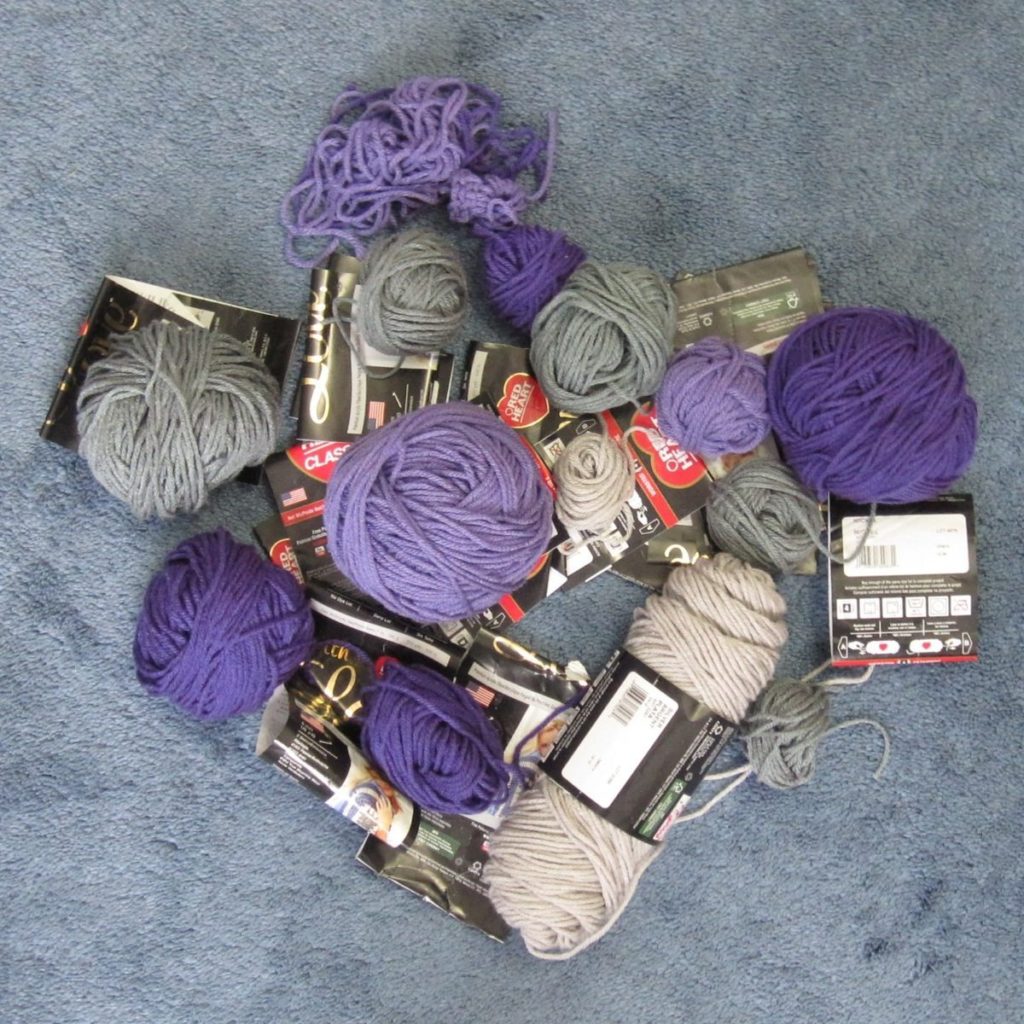
Since I’m down to just the border, here’s my leftover non-black yarn (plus all the ball bands, minus one small ball of light gray which hid in the bag). This is the remainder from 5 dark gray (Red Heart Classic Nickel), 3 light gray (RHC Silver), 5 light purple (RH With Love Lilac, double-sized skeins), and 4 dark purple (RHWL Violet, ditto). The pattern called for 3, 2, 9, and 7 single-size skeins of each color, respectively, so I used less than one additional skein of each color (not counting the extra gray for the extra panels).

In fact, if I’d omitted the extra panels and done the joins and border in two different colors, I believe I could have squeezed them out of the remaining yarn as well. That’s rather amazing because my afghan came out a third again the size predicted – the squares that said they would be 9″ came out 12″ – and I did not buy a third again the called-for yarn. My work must have much more extra air space than extra yarn.

I’ve begun the border but it is slow. I’ve now been working on this afghan fairly steadily for nearly seven months, though, so what’s another one or two?

Mystery solved, part 2

The afghan is joined! It’s not done, but I have more to show.

hexagons from clues 1-5 mysteryghan clue 6: hexagon panels

Clue 6 took the 14 hexagon motifs and joined them into two long panels. This was a pain in the tuchus and revealed previously unnoticed stitching errors. Many many yards of yarn were pulled out. I think I managed to get it all worked out, though. I decided not to use black within the panels, largely because I couldn’t determine how to fit it in well.

Clue 8 was assembly and border. Here I did use black, to be the leading of a stained glass window. The joining was mostly “make a strip of grannies and add it to this edge.” I wanted to be clever with the joining and use fewer lengths of yarn, somehow going along the edge of the strip and pulling yarn out to do the granny-to-granny joins midstream, but upon further reflection I didn’t think I could do that without yarn tension mania, so I sucked it up and joined the grannies into strips with separate lengths of yarn. My join was single crochet in the back loops only (I intended to use the method of the flat slip stitch join, but spaced out and did it the usual way, which for sc is okay since it doesn’t roll to the front like sl st), and when I came to a crosswise seam end I slip stitched into it to avoid gaps in the black lines.

I’m not going to attempt a full-afghan photo until it’s actually done, so here are some detail shots of the joins to tide you over.

joined mystery afghan, detail joined mystery afghan, detail

There are still shaggy ends because I’m not going to do the final clipping until the blanket is completed and washed. I will trim a bit, though, and/or weave the longest of the ends in a bit more so they don’t tangle in the wash.

With the border it will be long enough for the bed, but not quite wide enough (if it only needed to overhang one side instead of both, it would be enough). The next post (January?) will show you how I’m addressing that.

Shining (ribbon) stars

Our Christmas tree has no topper. We’d love to get a high-end crystal star for it, but that’s yet in the future. Meanwhile I’ve been improvising – one year we had wide ribbon tied in bows, one year I made an origami star out of construction paper (because it was the only appropriately-colored paper I had that was large enough). This year I decided to crochet a star out of ribbon, and got the chance to this weekend. The result is shown below, blurrily, on the tree, after my loving husband arranged the lights behind it for best effect.

crochet ribbon star on tree

I thought at first that I would chain stitch ribbon around wire, bend it into shape, and connect the ends; nesting two or three of different sizes would fill out the star. That might have worked if my wire had been a bit heavier, but as it was it was too flimsy, and it was also difficult to smooth and flatten the wire without crimping and creasing the ribbon.

Then I went looking for patterns and found one by Kimura Kraft that I liked the look of. Unfortunately it didn’t work in ribbon; the inner part was somehow too large for the outside.

crochet ribbon star

Fortunately I had purchased three “kegs” of ribbon, so after two strikes I could still try for a hit, modifying that pattern. For the star shown I used a J hook (6mm), a 40ft roll of 3/16 inch wide ribbon (12.2m|~5mm), and a generous 2ft (60cm) of 28-gauge jewelry wire. I had a decent bit of ribbon left, but only about half the difference to the next available size down, 32ft (9.75m).

Here are my changes to Markus’s pattern. Unfamiliar abbreviations below (and the rest of them too) are explained on the Crochet Reference page.
Round 1: Replace the starting ring and chains with “ch-4, work into ch next to sl kn.” Make sure to put your sl kn onto the hk loosely – ribbon is inelastic.
Round 2: Ch 3 to start instead of 2; work only 1 dc where it says to work 2 (so don’t make that first dc, in particular).
Round 3: This one’s different enough that it’s simpler to give the instructions in full. Note that “in picot” means to treat the “sl st in 3rd ch from hk” parts of rnd 2 as chain rings, working into the center:
No ch this rnd. Work the following stitches around the wire as well as the rnd-2 sts, leaving a wire tail of several inches: *sc 2 around next ch-2; [sc 2, ch 1, dc, ch 1, sc 2] in picot; sc 2 around next ch-2; sk dc* around. Sl st into 1st sc of rnd to join (40 sc, 10 ch, 5 dc). FO ribbon.
Twist ends of wire together and use to attach star to tree or other hanging/display place. Shape by hand.