Spring cleaning

Up here in northern New England, spring doesn’t really make its appearance until late April. That means I am not inspired to do spring cleaning until then, but hey, at least it happens eventually (← lying).

This year spring cleaning involved crochet. One of the earliest crochet patterns I downloaded was CRAFT magazine’s reversible Swiffer sock, by Linda Permann. I love the maneuverability of the Swiffer and its ability to get under furniture, but every time I throw out one of the covers I feel like I’m telling the Earth “today, I hate you a little.”

That’s overly dramatic, but I was happy to find a replacement. It cuts the maneuverability down a bit because of its thickness, but works surprisingly well for dusting.
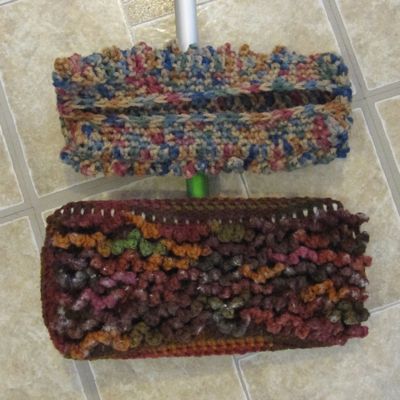

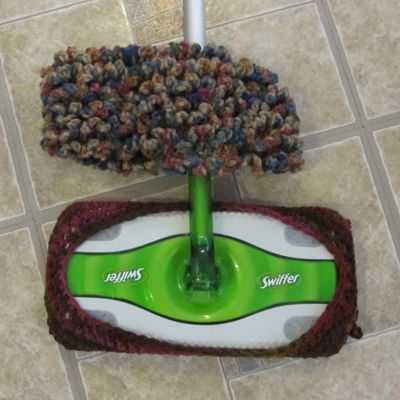
Say hello to my kitchen floor.

The darker one is my first effort. It fits, but is very snug. The Ravelry page for this pattern tells me newer Swiffers are larger than older one, though I think the problem is more likely the fact that I crochet tightly. You can see I’ve already used it; I’m pleased to report it works very well. Both yarns are Red Heart Scratchy Super Saver Special, and I’m pretty sure the bottom color is Cherry Cola. The skein bands are long gone and I have no memory of the top color name. Incidentally, I have no idea why acrylic yarns of the same brand and line vary so much in texture. I have Red Heart Super Saver that’s quite nice to the touch, and other acrylics like Red Heart’s TLC Essentials line also run the gamut.

The pattern is easy, although slip stitching the end of a chain in splitty yarn is obnoxious. It didn’t take much brain, so I was able to do it while on the phone or listening to talk radio.

For my second sock, I switched from an H to an I hook. I haven’t tried it on the Swiffer yet, but it can’t help but fit better.
Finally, while trying to get a picture of the Swiffer in situ (i.e., hanging on the landing of my basement stairs), I knocked over my broom for the last time. I have two brooms now, as I realized my older one had been used outside so much it was no longer very good for indoor use. While the old one has a braided yarn loop for a hanger, the new one had nothing, and its built-in hole wouldn’t go on my hook (at least not easily). Yet a third color of Super Saver came out of the bag.
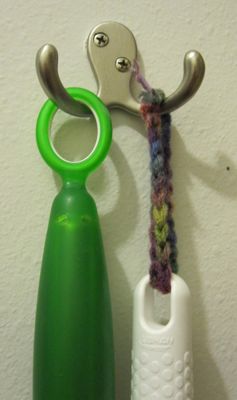
Instructions: ch 25. Pass ch through hole in broom handle and sl st in first ch to join. Sc around, including in sl st, and sl st in first sc; cut yarn, pull end through sl st, and tie ends of yarn together in a square knot. Trim.

Clearly, you don’t need to chain 25 stitches to get an adequately long loop. It looks like 15 would be ample.
Fabric Files

I am here to confess to everyone that I have a problem with remnants. Sure, I do small quilting projects and make fabric coasters and other items that use only remnant-sized amounts of fabric, but I have far more in my stash than I will use up any time soon, and I look through the remnants every time I’m in a fabric store. My sewing room has a chincy four-drawer dresser in it, with a pressboard body and plastic drawer runners, and formerly I simply stacked folded fabric in the drawers. A while ago when I got it all out to look through and put it back, to take advantage of the space I had some vertically-positioned fabric in between two stacks. Later, when looking for fabric, I thought “this is much easier to look through. I should store it all this way.”

And so, next time I went to look through all of it, I did!

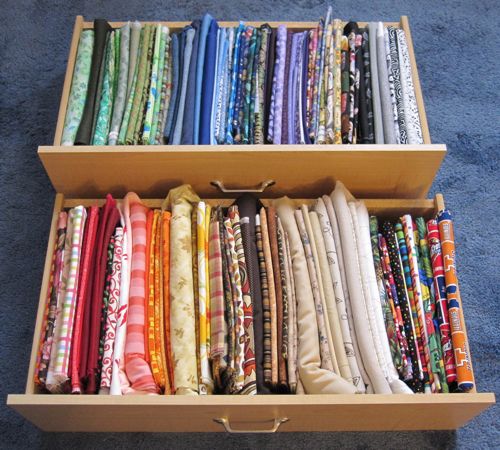
fabric stored like file folders in drawers

It is so much easier to find things, and to know what I have available. Now I just need a way to store spools of thread so I can see the colors, and yet not have them in the light. Suggestions?

Reve Appleseed

I am involved in the Upper Valley Sew-Op, a project of the Upper Valley Food Co-Op in White River Junction, VT. The logo of the Co-Op is a red apple with one leaf.

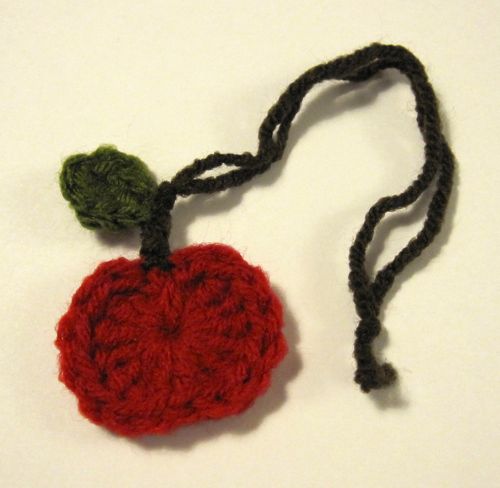
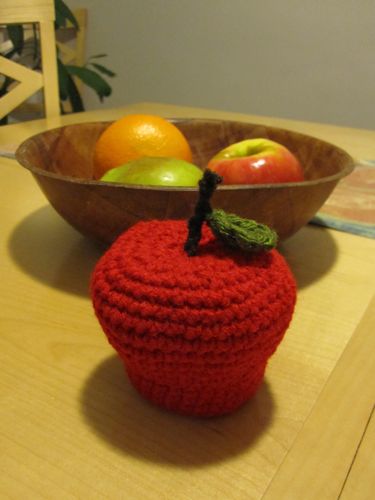
One night at the drop-in open hours, I started making one of the Lion Brand apple patterns (registration required to see the pattern). I got bored and started at the other end of my skein of red yarn to design a small flat apple pattern, finishing the large apple later. I had recently made a dozen or so of PlanetJune’s Love Hearts, the smallest of which is done as one round on a magic circle, shaping coming entirely from stitch height. I followed that model; the pattern is below. All pictures link to larger versions, and if any of them look odd it’s probably because I tweaked them to try to make the stitches clearer.

amigurumi apple paperweight crocheted small apple ornament

Small Apple Ornament  
Abbreviations explained here.

Materials:
Small amounts of red, green, and brown worsted weight yarn
Size G/6 (4.0mm) hook
Yarn needle

Apple:

  • With red, make a magic circle, pull a yarn loop through, and ch 1.
  • Into circle: dc, 6 tr, 2 dc, 6 tr, dc.
  • Ch 1 and sl st into circle.
  • Pull circle tightly closed, sew yarn ends into apple to hide, and trim.

You may find that you need to scrunch the stitches together as you go along to make room for all of them, but hold on to both strands of the magic circle when you do so it doesn’t tighten up.

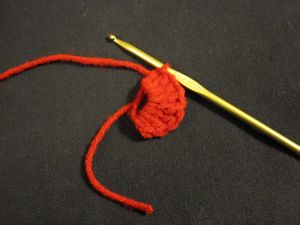
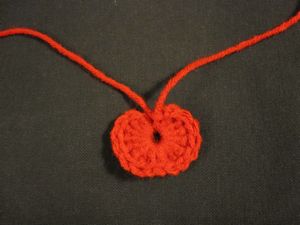
Pictures: apple halfway finished (one of the 2 dc done), complete and mostly tightened.

halfway finished crochet apple ornament finished crochet apple ornament

Leaf:

  • With green, make a slipknot, leaving about a 4″ tail.
  • Ch 4. Starting with second ch from hook, one st per ch, work sl st, sc, sl st.
  • Ch 1. Proceeding on the opposite side of the ch, sl st, sc, sl st again.
  • Sl st in first st to join; cut about a 3″ tail and pull through.
  • Sew slipknot end of yarn through leaf to emerge at about the same point as the other end of the yarn.

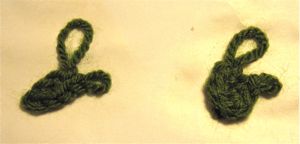
Picture: ready to make first slip stitch on second side of chain and final joining slip stitch. The larger loop is the second one (closer to the hook end) and the smaller is the final loop of the previous stitch.

steps to crochet apple leaf

Stem and finishing:

  • For an ornament, cut about 15″ of brown yarn.
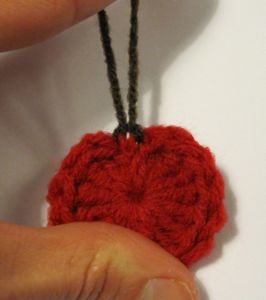
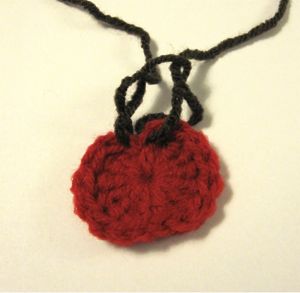
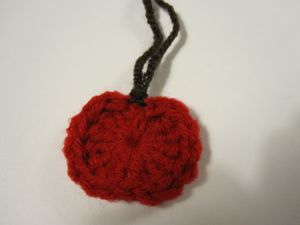
  • Feed each end through a red loop near the top center of the apple, front to back, keeping the two yarn ends even length. Bring the ends toward you over the brown loop and then feed them front to back through the loop. Pull snug. You may also make a lark’s head knot (properly it will be a reverse lark’s head), but it will not look as much like a proper apple stem, as you will see two split brown marks at the bottom.
  • Knot the brown yarns together about a half inch from the apple, and again a good ornament-hanging distance away from the first knot (I just use an overhand knot, treating the two strands as one).
  • Tie the leaf to the stem by feeding one of the leaf’s yarn ends between the brown yarn strands, between the apple and the first knot. Tie the leaf yarn ends together (I use a square or granny knot) and sew them back through the leaf to hide. Tug the ends of the leaf to make them pointier.
  • Trim the ends of the green yarn, and cut the brown yarn about a half inch above the second knot.

Pictures: What the lark’s head looks like, my attempt to show the knot I actually use, and that knot tightened down.

lark's head knot better knot for stem tightened knot for stem