Sewing machine thread tension was never anything I worried about until about the last two years, when suddenly it seemed to become a huge deal. Machines were skipping stitches, thread was breaking, everything seemed haywire.
As implied by the name, tension is tautness of the thread. On most machines there are two or three metal or plastic disks that you run the top thread between when threading the machine. When the presser foot is up they are loose, and when the presser foot is down they are compressed, by an amount determined by the user. There is also a tension setting for the bobbin thread, but setting it requires a screwdriver and is intended to be done only by sewing machine mechanics. Unless something is wrong with the machine, you’ll be able to adjust the stitching as needed using the top thread tension.
Proper tension means the stitch lines look the same on the top and the bottom, with no looseness, looping, skipped stitches, pull-through, or fabric puckering. To set the tension, start with it at its middle value. Load top and bobbin threads of two different colors into your machine and sew a straight stitch at your usual stitch length on a double-layered fabric of a third color. Choose the fabric to be representative of your usual sewing – I set my tension using calico or muslin. If the stitches look taut, the fabric puckers, the thread breaks, or the bobbin thread pulls through the fabric, decrease the tension. If the stitches look loose or the top thread pulls through the fabric, increase the tension (the top thread pulling through is not much of a problem in most situations, though, as long as it’s not creating actual loops on the back).
Here is an image of my sewing machine’s various settings. It is worth noting that 0 tension really is no tension! You can see that the bobbin thread hasn’t even stayed put in that one. I’m not getting puckering, but the stitch seems to be shorter on higher tension.
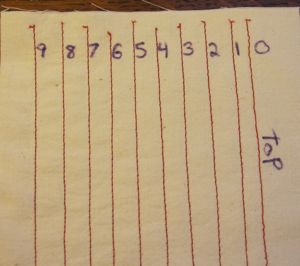
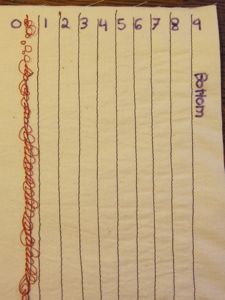
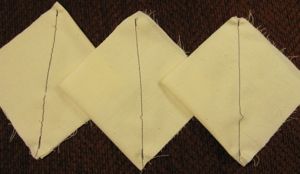
More information is obtained if you stitch on the bias instead of with the grain of the fabric. In that case you can also pull the corners of the fabric until the thread breaks; good tension should lead to each thread breaking and in roughly the same place. If only one thread breaks then it is too tight relative to the other. My tension sits at 4, which works well and is the setting my sewing machine mechanic told me is right for my machine. According to this test, though, that’s still too high! Before the breakage test you can see 9 (actually, I think it was 8 and I wrote the wrong number) is too high – the fabric wants to cup.
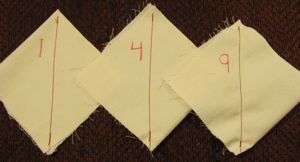
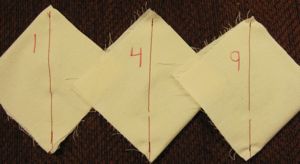
Then I gave them each a yank; the 1 broke only on the back and the other two only on the front.
Incidentally, I found a page on sewing machine tension that said to adjust your tension only when the presser foot is down, which was echoed by a couple of commenters who said otherwise you will completely wreck up your machine. I have never heard of this in my life, and I have worked in a costume shop and an alteration shop, and discussed tension with a sewing machine mechanic. I did find it mentioned casually in one of my sewing books, but not in my sewing machine manual or this New Mexico State University guide to sewing machine maintenance.
Now, for 90% of projects, you don’t need to touch the tension (mine runs 0 to 9 and I leave it at 4). There are some exceptions.
You may want to decrease the tension if
- You’re working on delicate fabric that puckers easily.
- You’re making a zigzag stitch and the fabric is scrunching.
- You’re using a twin needle to sew and are getting skipped stitches.
I do not know any circumstances under which higher tension is desirable, except perhaps to intentionally scrunch the fabric up.